Delete a relationship
You can delete a relationship or join between tables through the ThoughtSpot application.
You must have either the Can administer ThoughtSpot or the Can manage data privilege to delete a relationship. If you are not an administrator, you also need edit permissions on the table, view, or Worksheet.
Delete a relationship
To delete a relationship from the web interface:
-
Select Data on the top navigation bar.
-
Find the origin table, Worksheet or view of the join you want to delete through browsing, Search, or selecting the appropriate Tag(s).
-
Select the name of the data source from which you want to remove the relationship.
-
Select Joins. You will see the list showing existing joins. If you want to delete an external join from a Worksheet, you must select Joins within this worksheet and choose Joins from this worksheet.
-
Select the Delete icon to the right of the join name.
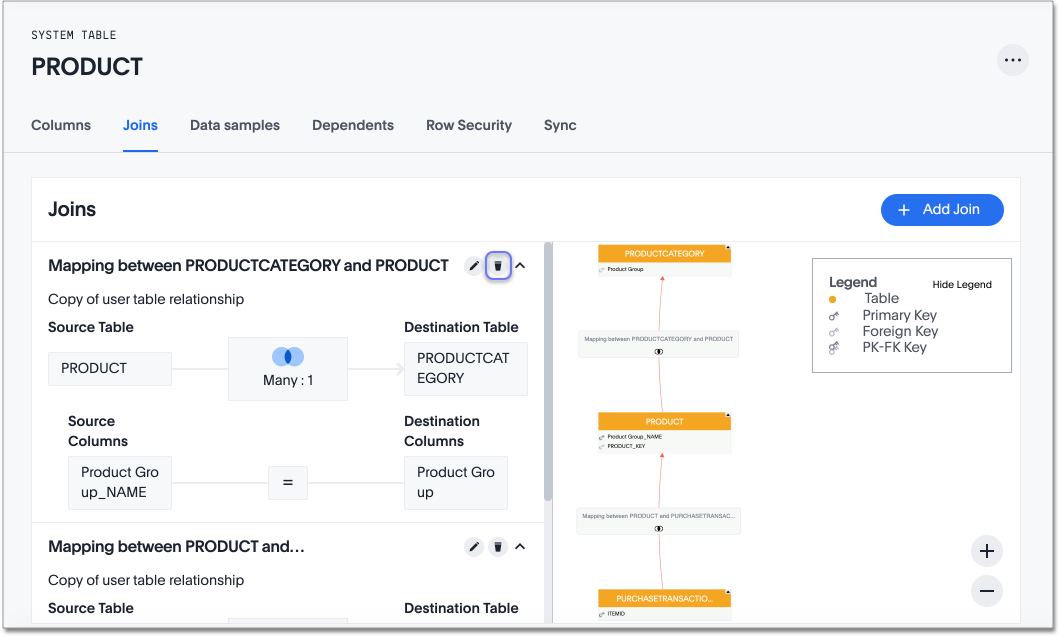
The Confirm delete window appears.
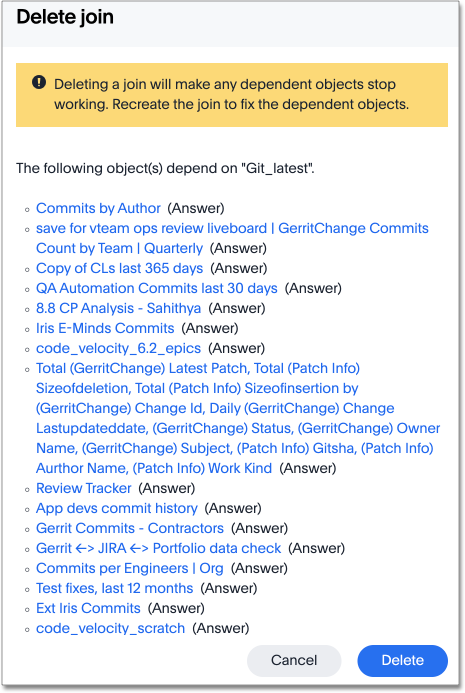
If the join has dependents, a different window appears, warning you that deleting this join makes the dependent objects stop working until you recreate the join later. However, ThoughtSpot does not delete the dependent objects. You can use this functionality to reverse the join cardinality or otherwise edit a join without deleting its dependents.
-
Select Delete.
Delete or edit a relationship that has dependents
If a relationship has dependents, and you need to delete the relationship, edit or reverse the join cardinality, or edit the join keys or condition, the process is slightly different. After you delete a relationship with dependents, the dependents still exist, but stop working until you create the relationship again and fix the first-level dependents, either by selecting Edit worksheet > Fix worksheet for Worksheets, or selecting Save for Answers or Liveboards.
Only delete a relationship with dependents if you plan to edit the relationship and add it in again, or if you can also delete the dependents.
For example, you can use this functionality to reverse the join cardinality.
Reverse join cardinality
You can use the delete functionality to reverse or change the join cardinality for a join that has dependents. To reverse the join cardinality, follow these steps:
-
Select the Delete icon to the right of the join name.
-
A warning appears, telling you that deleting the join will make dependent objects stop working. Make a note of these objects.
-
-
Select Delete.
-
At this point, the dependents still exist, but are unusable.
-
Create the join again, with the opposite cardinality, and any other changes you must make.
-
Navigate to any first-level dependents for the join. For example, you may have a join between two tables. You created a Worksheet based on these two tables and the join. You created several Answers based on the Worksheet. Only the Worksheet is a first-level dependent. The Answers are not first-level dependents.
-
If the first-level dependents are Worksheets, select Edit worksheet for each Worksheet, click Fix worksheet in the upper-right corner, and then Save the Worksheets. If the first-level dependents are Answers or Liveboards, select Save for each object. Now all dependents are usable.
If a join does not have dependents, you can change the join cardinality by editing the join. This allows you to change a many-to-one join to one-to-one. To reverse the join cardinality, you must delete the join and create it again with the opposite cardinality.
Related information


