Managing email and onboarding settings
Manage email and onboarding settings for your organization from the Admin Console.
You can manage certain advanced settings for your organization from the Admin Console. This includes customizing welcome emails, scheduled emails, and the workflow that allows users to sign up for ThoughtSpot from the login page.
| If your organization uses multi-tenancy with Orgs, you must be a cluster administrator to manage these settings, not an Org administrator. You manage these settings for the whole cluster. You cannot set them separately for each Org. |
-
Navigate to the Admin Console by selecting the Admin settings from your profile.
-
Select Onboarding.
If your organization uses multi-tenancy with Orgs, ensure that you are in the Primary Org, in the All orgs section of the Admin Console. You manage email and onboarding settings for the whole cluster. You cannot set them separately for each Org.
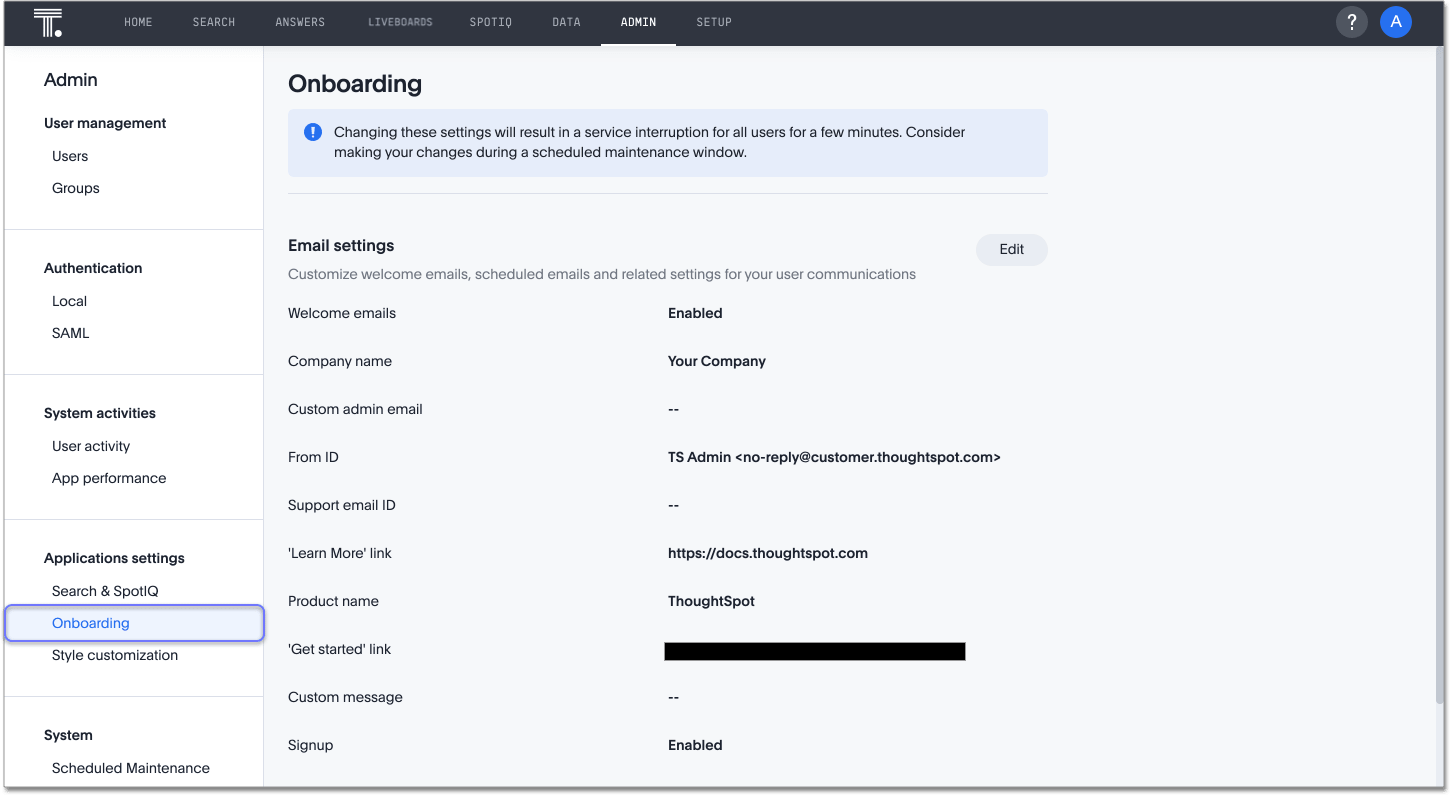
Changing these settings results in a service interruption for all users for approximately 2 minutes. To minimize disruption, consider making your changes during a scheduled maintenance window.
Email settings
To customize or otherwise manage the ThoughtSpot welcome email for your users, follow these steps.
|
If you want your ThoughtSpot instance to send email notifications with a custom domain name and a specific sender ID, contact ThoughtSpot support. To send email notifications from a specific email account with your domain, update the Custom admin email and From ID fields in the page, and contact ThoughtSpot support to enable these settings for your application instance. |
-
Select the Edit button in the Email Settings section.
-
Select the Welcome emails toggle to enable or disable welcome emails. ThoughtSpot sends these emails to new users.
-
Optionally fill out the following parameters. If you do not fill them out, ThoughtSpot uses the system defaults.
Parameter Definition Company name
Your company name. The default is "Your Company"; for example, "Your Company has invited you to ThoughtSpot."
Custom admin email
The email address for your company’s ThoughtSpot administrator. Change this setting, and contact ThoughtSpot support to enable it.
From ID
Email address that should send the welcome email. The default is TS Admin <[email protected]>. Change this setting, and contact ThoughtSpot support to enable it.
Support email ID
The email address for your company’s Support contact. This email address appears only in welcome emails, for new users in your company’s ThoughtSpot environment.
'Learn More' link
A link for users to learn more about ThoughtSpot, or your company’s implementation of ThoughtSpot. The default is https://docs.thoughtspot.com, the documentation for ThoughtSpot’s software product.
Product name
The name of the product the welcome email is for. The default is ThoughtSpot.
'Get started' link
A link to allow users to get started using the product. The default is a link to the cluster you added the user to.
Custom message
A custom message for the email.
-
Select Save changes. Alternatively, you can Reset to default.
Signup settings
The "Sign up" button on ThoughtSpot’s login page is customizable. You can use it to redirect users to a company-wide app directory or to an internal app request workflow, for example.
To configure the workflow that allows users to sign up for ThoughtSpot from the login page for the cluster, follow these steps:
-
Select the Edit button in the Email Settings section.
-
Select the Signup toggle to enable or disable the workflow for users to sign up for ThoughtSpot from the cluster login page.
-
Enter the text the signup button should display, in the text box next to Signup button text.
-
Enter the URL the signup button should link to, in the text box next to Signup button link.
-
Select Save changes. Alternatively, you can Reset to default.
Related information


