Create, edit, or delete a group in a multi-tenant environment
Before adding users, create the groups to which they belong. Each group includes a set of privileges for its users.
Create a group
To create a group and add privileges for the group, follow these steps:
-
Ensure that you are in the correct Org. Navigate to the specific Org the groups you must manage are in. Use the Org Switcher to the left of the help menu in the top navigation bar.
-
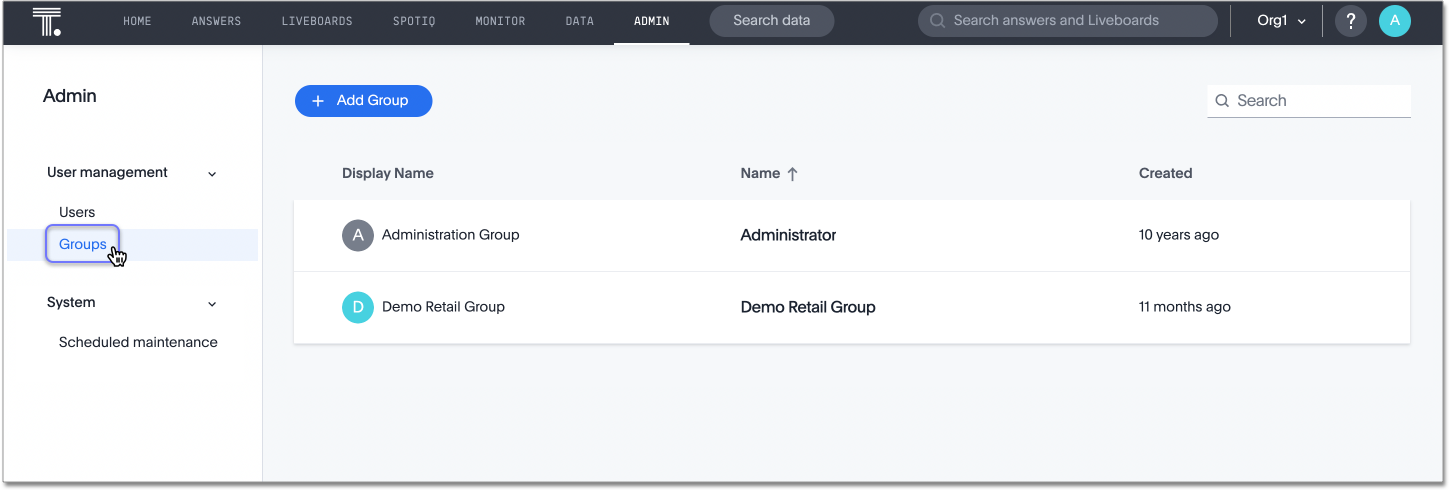
Navigate to the Admin Console by selecting the Admin tab from the top navigation bar.
-
Select Groups from the left navigation bar that appears. If you do not see Groups, you may be in the All orgs section of the Admin Console. Instead, select Primary org from the left navigation bar. Then, select Groups.
-
Select the + Add Group button on the upper-left side of the screen.
-
In the Add a new group modal, enter the details for the new group:
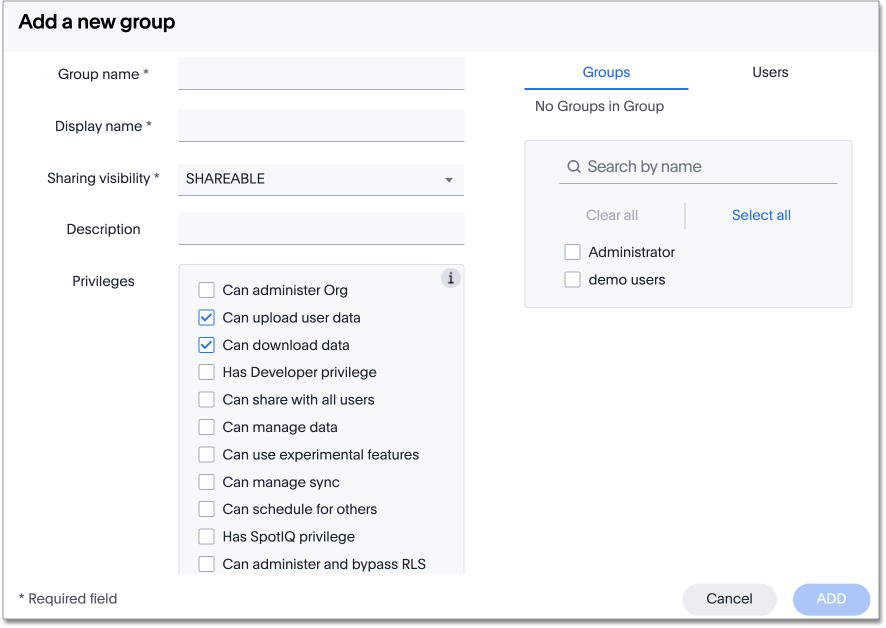
- Group name
-
Enter a unique name for the group.
- Display name
-
Name of the group as it appears in ThoughtSpot.
- Sharing visibility
-
Indicate whether objects can be shared with this group. When set to SHAREABLE, this group is an option in the Share dialog for objects within the Org.
- Description
-
Optionally, enter a description.
- Privileges
-
Check the privileges you want to grant to the group. If you add the privilege Can administer Org to a group, all users in that group can see all the data in the Org. Administrators can always see all data sources in the Org, and row-level security does not apply to them. To give a group cluster administrator privileges, the group must be in the Primary Org. Any group with the Can administer Org privilege in the Primary Org is automatically a cluster administrator.
-
You can also add groups (these would be the subgroups of the group you are creating) and users.
-
Select Add to create the group.
Edit a group
After adding a group, you can edit its settings to add or revoke privileges. The new settings apply to all group members.
To edit an existing group, follow these steps:
-
Ensure that you are in the correct Org. Navigate to the specific Org the groups you must manage are in. Use the Org Switcher to the left of the help menu in the top navigation bar.
-
Navigate to the Admin Console by selecting the Admin tab from the top navigation bar.
-
Select Groups from the left navigation bar that appears. If you do not see Groups, you may be in the All orgs section of the Admin Console. Instead, select Primary org from the left navigation bar. Then, select Groups.
-
Find the group you want to edit in the list, and select its name.
If you don’t immediately see the name of the group, try searching for it.
-
You can change the Group name, Display name, Sharing visibility, Description, and the selected Privileges.
-
Make your changes, and select Update.
Groups
When editing a group, keep in mind that only subgroups or possible subgroups appear in the list of groups. The No Groups in Group only indicates there are no children in this group’s hierarchy. Do not underestimate the importance of the parent(s) of the group, because each group inherits the privileges of each of its parent groups.
Follow these steps to change subgroups of the group:
-
Select the Groups tab.
-
Select the groups you want to add in the list by clicking the box next to the group name.
-
You can also use the search bar above the list of groups to find groups by name.
-
Deselect the groups you want to remove from the list by clearing the box next to the group name.
-
Select Update to save changes.
Users
Follow these steps to change the users of the group:
-
Select the Users tab.
-
Select the users you want to add in the list by clicking the box next to the username.
-
You can also use the search bar above the list of users to find users by name.
-
Deselect the users you want to remove from the list by clearing the box next to the username.
-
Select Update to save changes.
Deleting groups
To delete existing groups, follow these steps:
-
Ensure that you are in the correct Org. Navigate to the specific Org the groups you must manage are in. Use the Org Switcher to the left of the help menu in the top navigation bar.
-
Navigate to the Admin Console by selecting on the Admin tab from the top navigation bar.
-
Select Groups from the left navigation bar that appears. If you do not see Groups, you may be in the All orgs section of the Admin Console. Instead, select Primary org from the left navigation bar. Then, select Groups.
-
Select the groups you plan to delete by clicking the box next to the group name.
If you don’t immediately see the name of the group, try searching for it.
-
Select Delete in the upper-left corner.
List group members
When browsing through users or subgroups, you can often see only a limited list. To check for other users, search for the name of a specific user or subgroup.
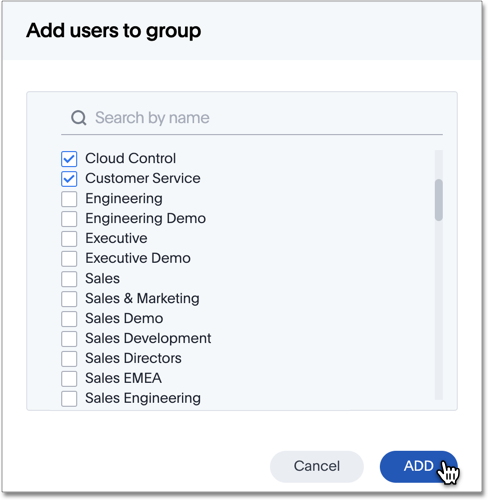
Add multiple users to a group
To add multiple users to a group, you must be on the Users interface. Follow these steps:
-
Ensure that you are in the correct Org. Navigate to the specific Org the users you must manage are in. Use the Org Switcher to the left of the help menu in the top navigation bar.
-
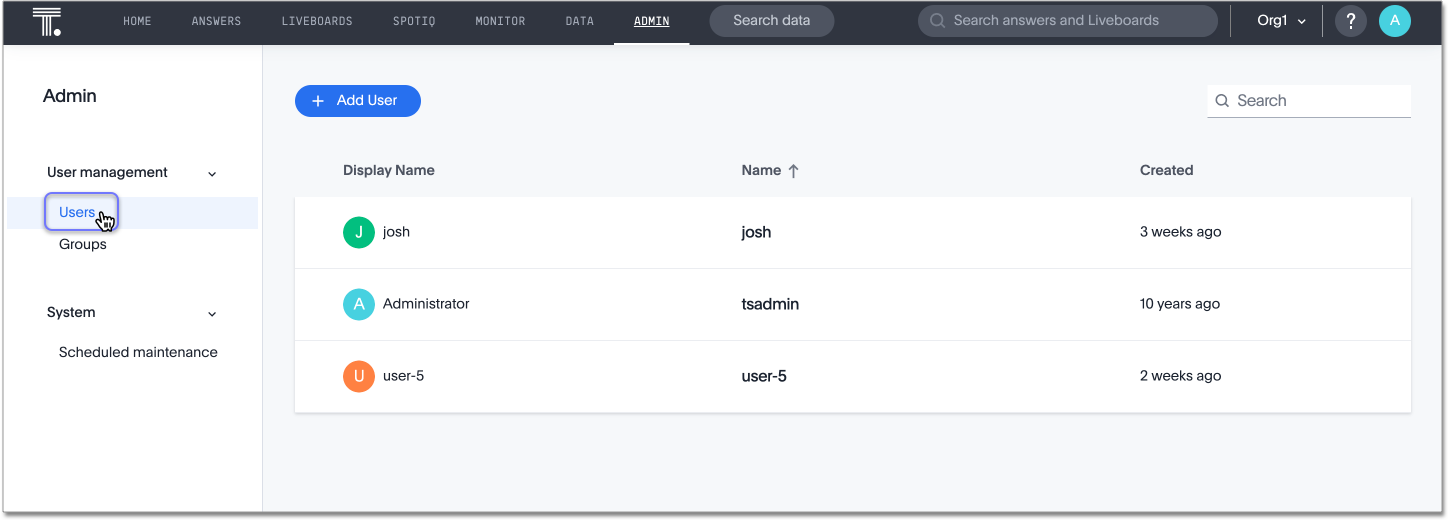
Navigate to the Admin Console by selecting on the Admin tab from the top navigation bar.
-
Select Users from the side navigation bar that appears.
-
Select the names of users you plan to add to groups by clicking the box next to the username.
If you don’t immediately see the username, try searching for it.
-
Select the Add users to groups button above the list of users.
-
In the Add users to groups interface, select the groups by clicking the box next to the group name.
-
Select Add.