Best practices for Snowflake connections
This article contains helpful pointers on data modeling when using Snowflake.
After connecting to Snowflake through ThoughtSpot, you may notice that some things don’t work as you expect. This article lists best practices for improving the user experience by making small changes to the Snowflake schema in Snowflake, to optimize it for ThoughtSpot.
Keep default collation settings
Collation settings in Snowflake compare strings based on their UTF-8 character representations. For the best query performance, ThoughtSpot recommends using the default setting of en-cs (case-sensitive).
For more information, see Collation Support in the Snowflake documentation.
Change JSON to a relational schema in Snowflake
ThoughtSpot works with relational data, where data must be in the form of a table, with rows and columns. Relational data is commonly stored as comma separated values, in CSV format, or in tables in a database.
The Snowflake warehouse uses more flexible requirements for storing data, such as the VARIANT data type to store JSON. However, the user experience when searching directly on JSON data in ThoughtSpot is not as good as searching over relational data.
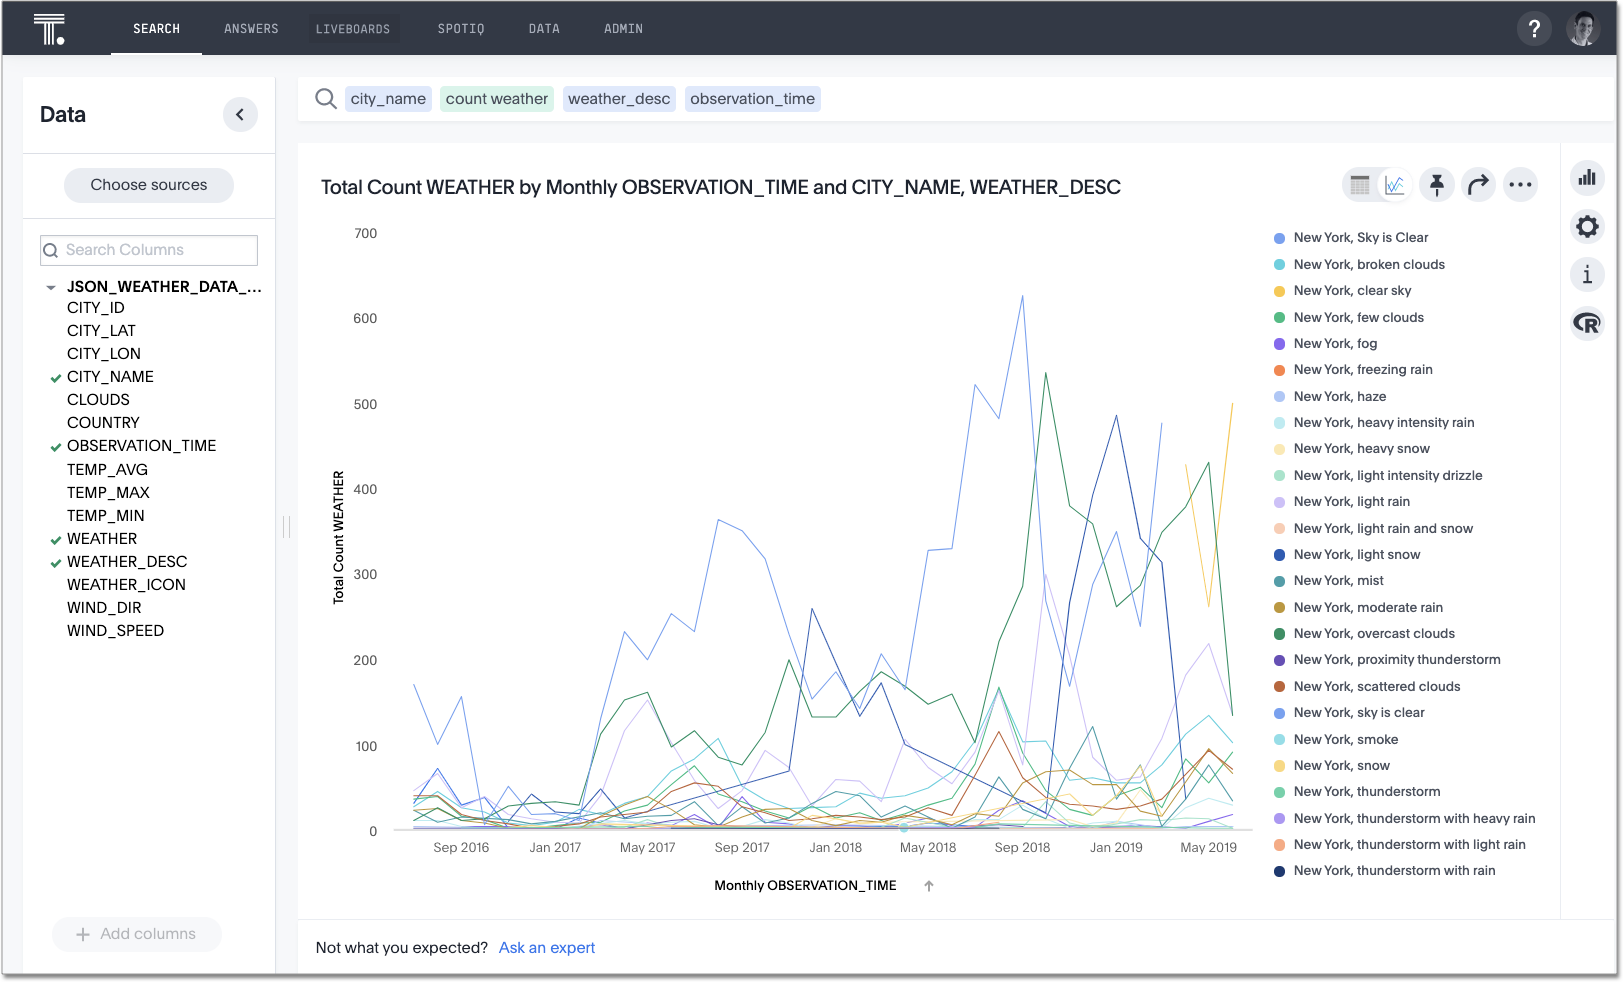
For example, if you connect to the Snowflake Free Trail sample WEATHER dataset, and search it in ThoughtSpot, the DAILY_14_TOTAL table features JSON data.

To make this data searchable in ThoughtSpot, you must first create a view in Snowflake, which effectively makes the JSON data into relational (table) data. You can then search this data in ThoughtSpot, and generate chart and table results from your searches. This process is called "schema on read".
Allow ThoughtSpot to connect only to a specific Snowflake database
You can choose to access all your Snowflake databases, or only one database. If you only want to access one Snowflake database, you can specify the database in the Database text box in Specify connection details during setup. To connect to all Snowflake databases, leave the Database field empty.
Create a view in Snowflake
To create a view from a Snowflake table that contains JSON, follow these steps:
-
Sign in to your Snowflake instance.
-
If necessary, change your role so you can issue
CREATE VIEWDDL statement in the target schema. See CREATE VIEW in Snowflake.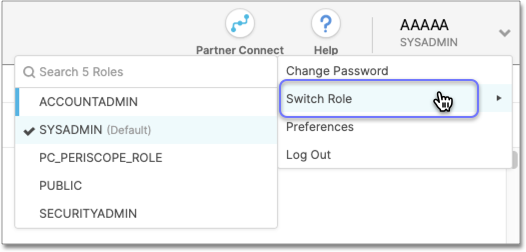
-
Select Worksheets.
-
Issue the
CREATE VIEWstatement.See CREATE VIEW Syntax.
The following example uses the sample
WEATHERdata from the Snowflake Free Trial sample data:CREATE json_weather_data_view as SELECT v:time::timestamp as observation_time, v:city.id::int as city_id, v:city.name::string as city_name, v:city.country::string as country, v:city.coord.lat::float as city_lat, v:city.coord.lon::float as city_lon, v:clouds.all::int as clouds, (v:main.temp::float)-273.15 as temp_avg, (v:main.temp_min::float)-273.15 as temp_min, (v:main.temp_max::float)-273.15 as temp_max, v:weather[0].main::string as weather, v:weather[0].description::string as weather_desc, v:weather[0].icon::string as weather_icon, v:wind.deg::float as wind_dir, v:wind.speed::float as wind_speed FROM json_weather_data WHERE city_id = 5128638; -
Query the new view in Snowflake.
The following example demonstrates how you can query the view
json_weather_data_viewcreated in the previous step:SELECT * FROM json_weather_data_view WHERE date_trunc('month',observation_time) = '2018-01-01' LIMIT 20; -
Add a connection to Snowflake in ThoughtSpot, specifically to the view you created.
See Connect to Snowflake.
When you subsequently search in ThoughtSpot against the Snowflake view, you can easily create charts and graphs, as expected.
Add joins between tables
To search more than one table at the same time in ThoughtSpot, you must define joins between these tables by specifying the columns that contain matching data across two tables. These columns represent the 'primary key' and 'foreign key' of the join.
In Snowflake, you can query the schema to get a list of its existing foreign key constraints with referenced constraints.
To determine which foreign keys already exist in your Snowflake schema, issue the following SELECT … AS statement:
SELECT
  fk_tco.table_schema as foreign_schema,
  fk_tco.table_name as foreign_table,
  fk_tco.constraint_name as foreign_constraint,
  '>-' as rel,
  pk_tco.table_schema as referenced_schema,
  pk_tco.table_name as referenced_table,
  pk_tco.constraint_name as referenced_constraint
FROM
  information_schema.referential_constraints rco
JOIN
  information_schema.table_constraints fk_tco
  on fk_tco.constraint_name = rco.constraint_name
  and fk_tco.constraint_schema = rco.constraint_schema
JOIN
  information_schema.table_constraints pk_tco
  on pk_tco.constraint_name = rco.unique_constraint_name
  and pk_tco.constraint_schema = rco.unique_constraint_schema
ORDER BY
  fk_tco.table_schema,
  fk_tco.table_name;
The system returns the results of this query as a table that represents all foreign keys in the database, ordered by schema name and by name of the foreign table. The table has the following columns:
- foreign_schema
-
The name of the foreign schema
- foreign_table
-
The name of the foreign table
- foreign_constraint
-
The name of the foreign key constraint
- rel
-
The relationship symbol that indicates the direction of the join
- referenced_schema
-
The name of the referenced schema
To search multi-table Snowflake data in ThoughtSpot, you must explicitly create joins.
There are two options for accomplishing this:
-
ThoughtSpot recommends that you add the necessary foreign key constraints by creating a join in Snowflake. We demonstrate how you can do in Create joins in Snowflake.
For in-depth information from Snowflake, see CREATE or ALTER TABLE … CONSTRAINT.
-
Alternatively, if you don’t have the necessary permissions, you can create these relationships in ThoughtSpot.
Create joins in Snowflake
To add a foreign key constraint in Snowflake, you must issue the following ALTER TABLE statement:
ALTER TABLE <table_name> ADD { outoflineUniquePK | outoflineFK }- outoflineUniquePK
-
The primary key in the relationship, with the following definition:
outoflineUniquePK ::= [ CONSTRAINT <constraint_name> ] { UNIQUE | PRIMARY KEY } ( <col_name> [ , <col_name> , ... ] ) [ [ NOT ] ENFORCED ] [ [ NOT ] DEFERRABLE ] [ INITIALLY { DEFERRED | IMMEDIATE } ] [ ENABLE | DISABLE ] [ VALIDATE | NOVALIDATE ] [ RELY | NORELY ] - outoflineFK
-
The foreign key in the relationship, with the following definition:
     outoflineFK :=
    [ CONSTRAINT <constraint_name> ]
    FOREIGN KEY ( <col_name> [ , <col_name> , ... ] )
    REFERENCES <ref_table_name> [ ( <ref_col_name> [ , <ref_col_name> , ... ] ) ]
    [ MATCH { FULL | SIMPLE | PARTIAL } ]
    [ ON [ UPDATE { CASCADE | SET NULL | SET DEFAULT | RESTRICT | NO ACTION } ]
         [ DELETE { CASCADE | SET NULL | SET DEFAULT | RESTRICT | NO ACTION } ] ]
    [ [ NOT ] ENFORCED ]
    [ [ NOT ] DEFERRABLE ]
    [ INITIALLY { DEFERRED | IMMEDIATE } ]
    [ ENABLE | DISABLE ]
    [ VALIDATE | NOVALIDATE ]
    [ RELY | NORELY ]
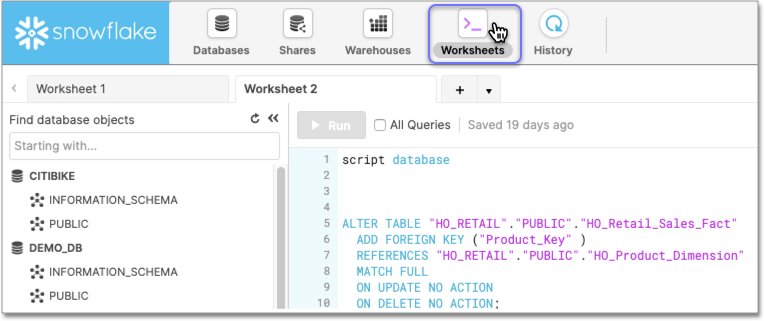
Example: adding a foreign key in Snowflake
For example, you can add a foreign key to Retail Sales schema in Snowflake by running the following ALTER TABLE statement:
ALTER TABLE "HO_RETAIL"."PUBLIC"."HO_Retail_Sales_Fact"
  ADD FOREIGN KEY ("Date_Key" )
  REFERENCES "HO_RETAIL"."PUBLIC"."HO_Date_Dimension"
  MATCH FULL
  ON UPDATE NO ACTION
  ON DELETE NO ACTION;
Connect to Snowflake
Follow the general steps in Add a Snowflake connection.
In the following screen, the Account name is the first part of the URL that you use to access Snowflake.
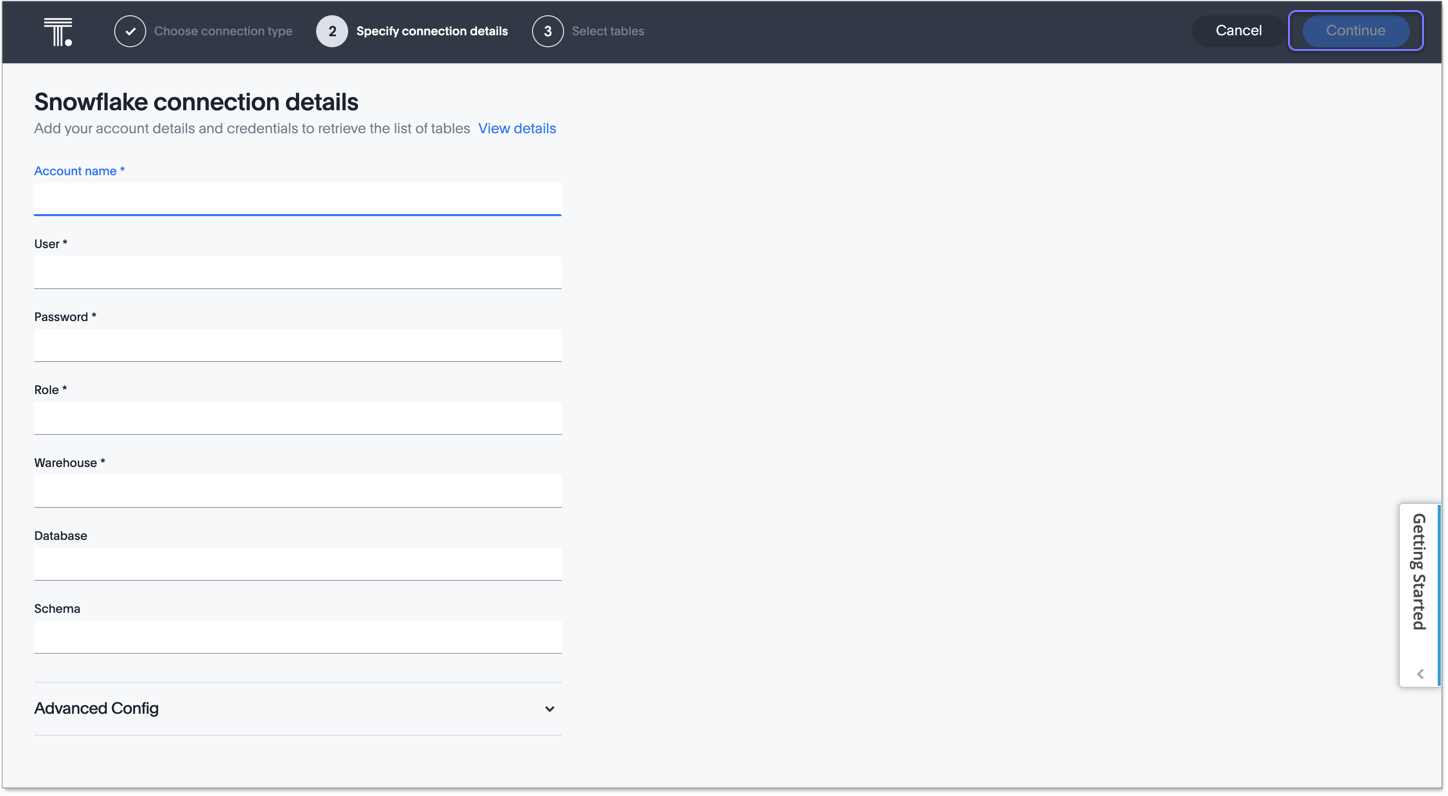
If you cannot find your Full account name in Snowflake, see the following examples for determining your account based on the account name, cloud platform, and region. Assume that the account name is xy12345.
| Cloud platform | Region | Full account name |
|---|---|---|
AWS |
US East (N. Virginia) |
xy12345.us-east-1 |
US East (Ohio) |
xy12345.us-east-2.aws |
|
US West (Oregon) |
xy12345 |
|
Canada (Central) |
xy12345.ca-central-1.aw |
|
EU (Ireland) |
xy12345.eu-west-1 |
|
EU (Frankfurt) |
xy12345.eu-central-1 |
|
Asia Pacific (Singapore) |
xy12345.ap-southeast-1 |
|
Asia Pacific (Sydney) |
xy12345.ap-southeast-2 |
|
GCP - Preview |
us-central1 (Iowa) |
xy12345.us-central1.gcp |
Azure |
East US 2 |
xy12345.east-us-2.azure |
US Gov Virginia |
xy12345.us-gov-virginia.azure |
|
Canada Central |
xy12345.canada-central.azure |
|
West Europe |
xy12345.west-europe.azure |
|
Australia East |
xy12345.australia-east.azure |
|
Southeast Asia |
xy12345.southeast-asia.azure |


