Add a Databricks connection
Configuring OAuth
If you need to use OAuth with Databricks, you must configure OAuth in Microsoft Azure. For details, see OAuth for a Databricks connection or Configure OAuth with AAD for a Databricks connection.
| Databricks-managed passwords will reach end of life on July 10, 2024. You will no longer be able to use Databricks-managed passwords to authenticate to Databricks, known as basic authentication, after July 10, 2024. You can sign in using OAuth or Service Account. |
Adding a Databricks connection
To connect to Databricks, follow these steps:
-
Navigate to Data workspace > Connections.
-
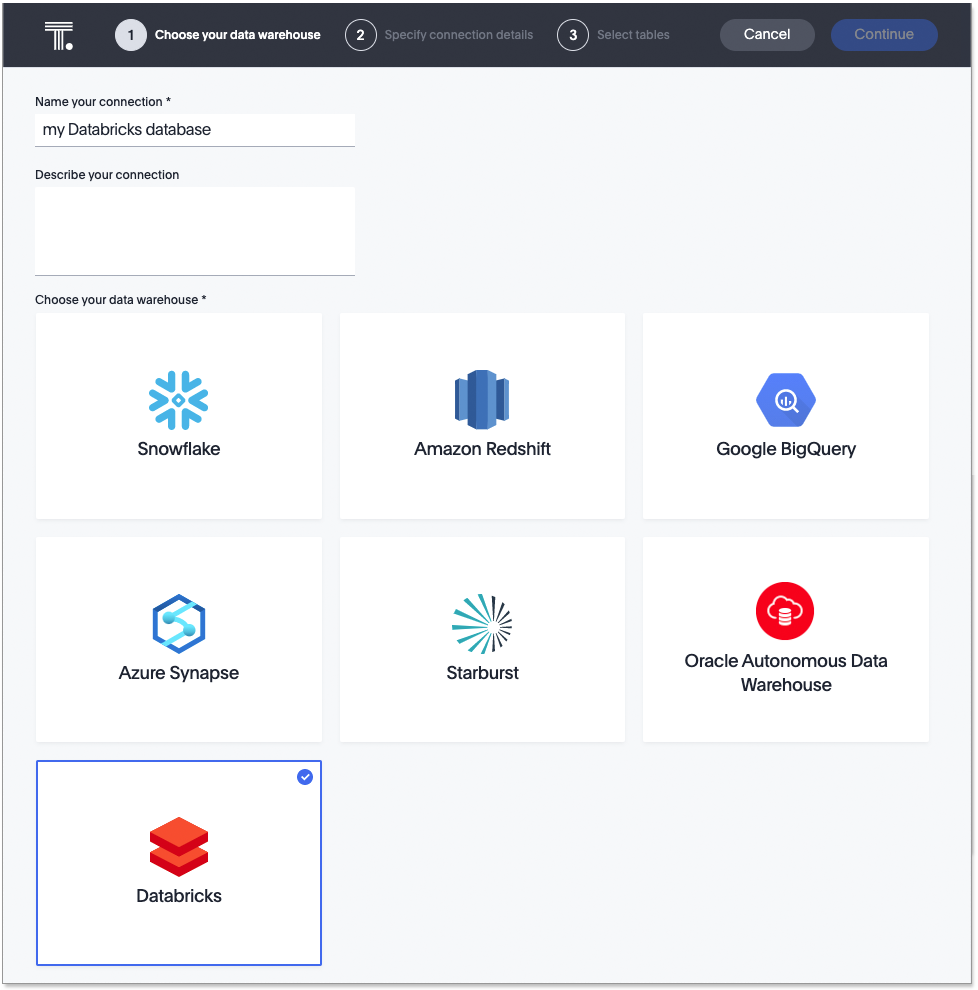
Click + Create connection, and select the Databricks tile. Then click Next.
-
Create a name for your connection, a description (optional), and enter the connection details for your Databricks data source. Then click Next.
-
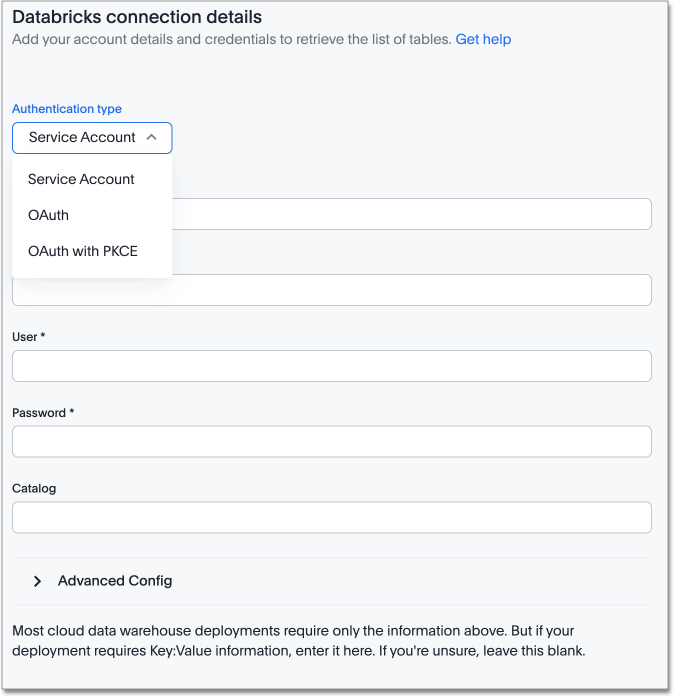
Enter the connection details for your Databricks data source using Personal Access Token, Service Account, OAuth, or OAuth with PKCE.
For Personal Access token, do the following:
-
Enter Host, HTTP Path, Personal Access Token, and Catalog (optional).
For OAuth authentication, do the following:
-
Enter Host, HTTP Path, OAuth Client ID, OAuth Client Secret, Scope, Auth URL, Access token URL, and Catalog (optional).
For OAuth authentication with Service Principal, do the following:
-
Enter Host, HTTP Path, Service Principal UUID, and Service Principal OAuth Secret.
For OAuth authentication with PKCE, do the following:
-
Enter Host, HTTP Path, OAuth Client ID, OAuth Client Secret (optional), Scope, Auth URL, Access token URL, and Catalog (optional).
For Service Account authentication, do the following:
-
Follow steps on Databricks to create a personal access token.
-
Enter the following fields:
-
For username, enter "token".
-
For password, enter your personal access token.
Refer to the Databricks connection reference for more information on each of the specific attributes you must enter for your connection.
-
-
(Optional) Provide additional key-value pairs that you need to set up your connection to Databricks or customize additional JDBC parameters supported by Databricks, by doing the following:
-
Select the Advanced Config menu to reveal the Key and Value fields. Refer to the installation and configuration guide that comes with the Databricks JDBC driver for information on Databricks’s supported keys and values.
-
Enter your key and value information.
-
To add more keys and values, select the plus sign (+), and enter them.
Any key-value pairs that you enter must be defined in your Databricks data source. Key-value pairs are case-sensitive. -
For OAuth with Service Principal connections, enter the following key-value pair:
-
Key: catalog
-
Value: databricks catalog_name
-
-
-
-
Select tables and the columns from each table, and then click Validate and save.
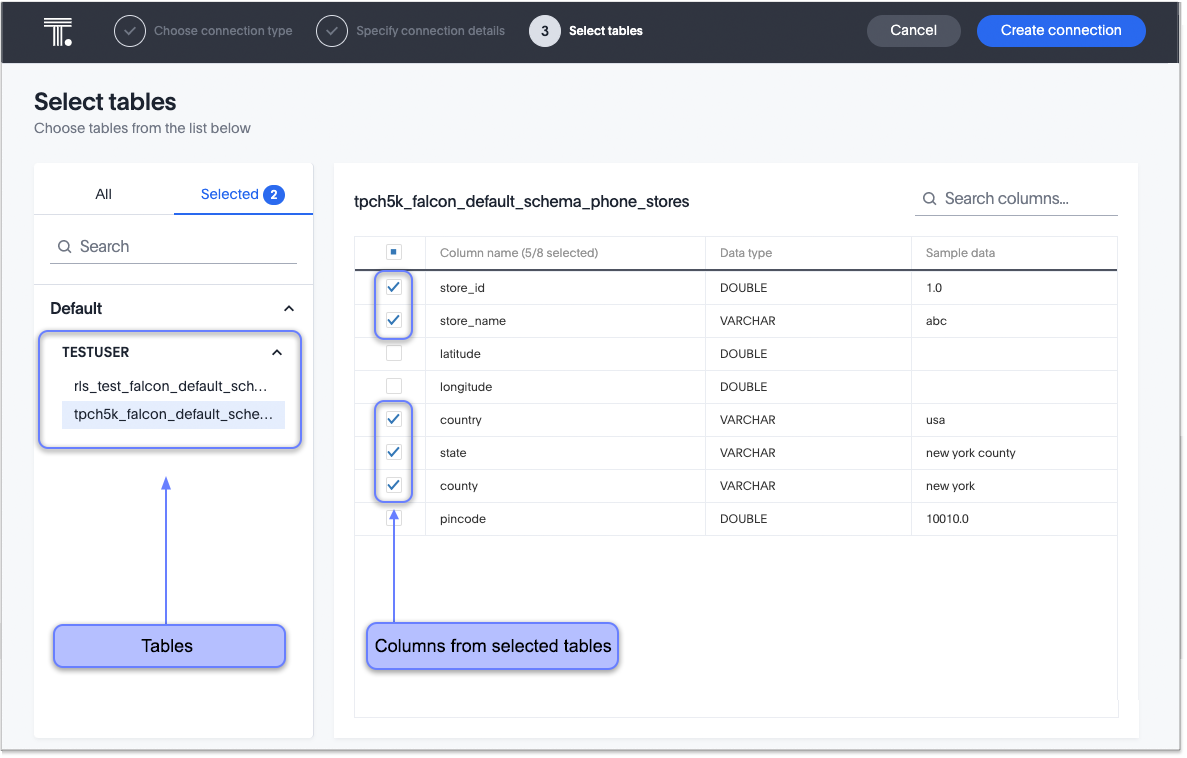
A message appears indicating the number of tables and columns that will be added to your connection.
After you add the connection, you can search your Databricks database.
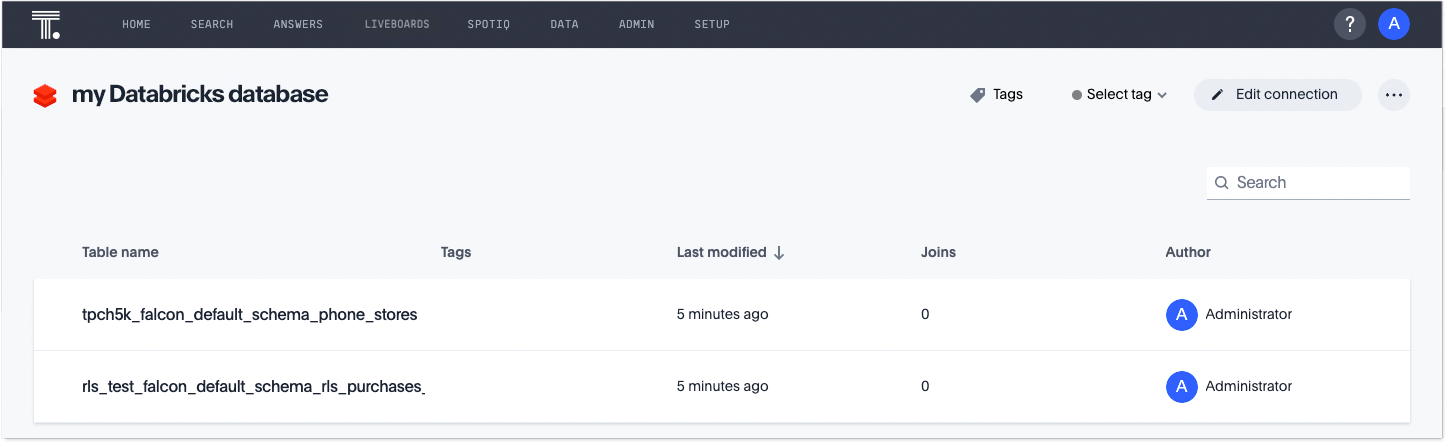
Your new connection appears on the Data workspace > Connections page. Select the name of your connection to view the tables and columns in your connection.
The connection you just created is a link to the external data source. If there are any joins in the selected tables of the external data source, those are imported into ThoughtSpot. We also import column and table descriptions, if they exist.
You can now perform a live query on the selected tables and columns of your connection. Because the selected tables and columns in your connection are linked, it may take a while to initially render the search results. This is because ThoughtSpot does not cache linked data. With linked data, ThoughtSpot queries the external database directly, which is slower than querying data that is stored in ThoughtSpot’s database.
You can modify a Databricks connection in the following ways:
You can also Delete a Databricks connection.
See the Connection reference for details of connection parameters.
Share a connection
Users with can manage data or admin privileges can share connections with other users or groups that have can manage data privileges. Once granted access to a connection, users can add, remove, and modify tables in that connection.
To share a connection with another user, follow these steps:
-
Navigate to Data workspace > Connections.
-
Select the checkbox next to the name of the connection you want to share, and click Share.
-
In the Share connection dialog, enter the ID of the user or group you want to share the connection with. You can use the search bar to find the user or group.
-
Select Done.
Note that to remove share access from a connection, you must navigate to the Share connection dialog and select Remove access to the left of the user group or name.
Creating additional configurations for your Databricks connection
When you create your Databricks connection, you enter a default configuration. You can create additional configurations for your Databricks connection. With additional configurations you can do the following:
-
Configure a separate Databricks warehouse for specific ThoughtSpot users or groups, eliminating the need to duplicate Liveboards and configure multiple Databricks connections. This can help you with cost tracking and chargeback.
-
Use a different configuration, including Databricks warehouse, for your search indexing so that you can control and balance the computing load.
-
Test a set of Liveboards against different environments (dev, qa, prod), and configure different Databricks warehouses for multi-tenancy / multi-Org deployments.
Create an additional configuration for your Databricks connection
To create an additional configuration for your Databricks connection, do the following:
-
Navigate to Data workspace > Connections.
-
In the list of connections, find the connection where you want to add a configuration.
-
At the far right of your connection, click the More menu
 , and select Create configuration.
 -
In the Add configuration details window, specify the following:
-
Authentication type
-
User
-
Password
-
Role
-
Warehouse
-
(Optional) Advanced Config
-
-
Click Continue.
Depending on the authentication type, you may have to sign in to your Databricks account.
-
(Optional) If the Databricks sign-in screen appears, sign in to Databricks. Then, when a message appears asking you to allow your connection access to your Databricks account, click Allow.
The connection is validated by ThoughtSpot and then the Describe your configuration window appears.
-
Create a name and (optional) description of your configuration, and click Continue.
-
In the Select policy type window, select from the following options:
- No Policy
-
Choose this if you want to save the configuration, but not apply the policy to your connection yet.
- Users and groups
-
Choose this if you want to specify users and groups who can use the connection.
- Processes
-
Choose this if you want to use this configuration for search indexing. Make sure Sage indexing is checked.
-
Click Continue.
Your additional configuration is complete and appears below your connection’s name on the Connections page.
| Configurations that are greyed out, are currently disabled. |
You can edit additional configurations after you create them, including disabling and deleting them. For details, see Edit additional connections of your Databricks connection.


