Configure multiple connections on Windows
You can add multiple ODBC data sources.
Use this procedure if you want to add an additional data source after creating installing ODBC on Windows. The main reason for needing to set up multiple ThoughtSpot ODBC data sources is that you have a production cluster and a test or development cluster.
-
Locate and open the ODBC Data Source Administrator (64-bit) application.
-
Select the System DSN tab.
-
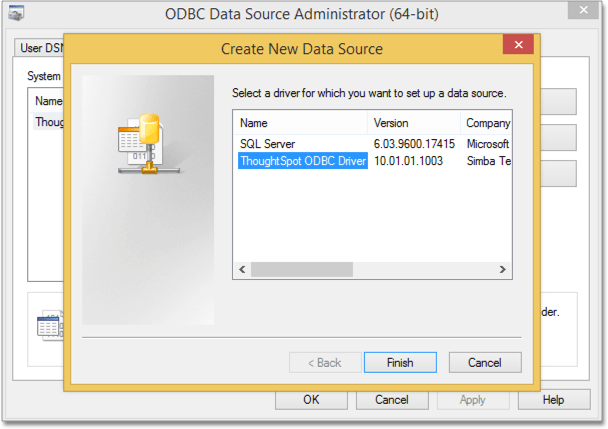
Select Add.
The system lists the available drivers.
-
Choose the ThoughtSpot ODBC Driver and select Finish.
The system displays the Client Configuration Dialog.
-
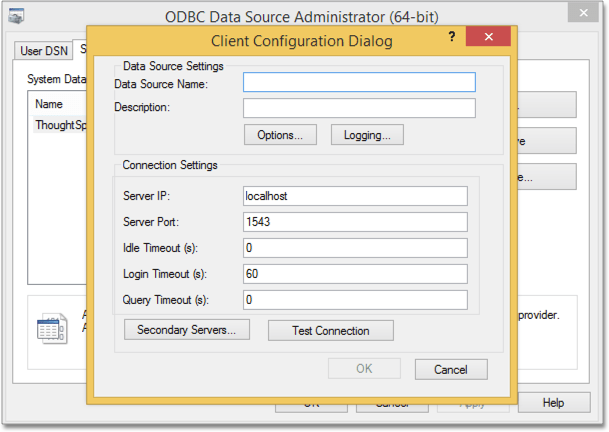
Enter your data source configuration.
Configuration Property Value Data Source Name
The name you want to call the data source.
Description
A description of the data source.
Server IP
A list of the IP addresses for each node, separated by commas.
Server Port
12345Idle Timeout
Time in seconds after which an idle ODBC connection times out.
Login Timeout
Time in seconds after which a login request times out.
Query Timeout
Time in seconds after which a query times out.
-
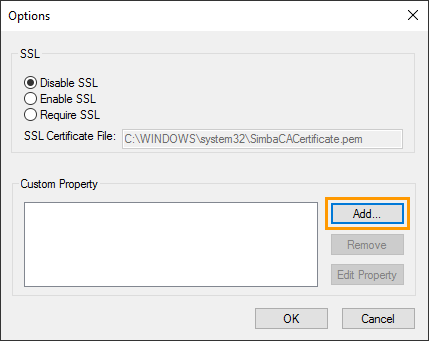
Configure custom properties by selecting Options.
The system displays the Options dialog.
-
Add these properties using the Add to enter an option and select OK after to save an option.
Option Value DATABASE
The default database to connect to.
SCHEMA
The default schema to connect to. Use
falcon_default_schemaif you aren’t sure.CONNECTIONTIMEOUT
Optional. Seconds before an idle connection times out.
The key must be defined exactly as it appear here, using all capital letters. You can find other supported properties in ODBC and JDBC configuration properties.
-
When you are done, select OK to save your new configuration.
-
Select Test Connection to test your database connection. If your connection is successful, a Success pop-up appears
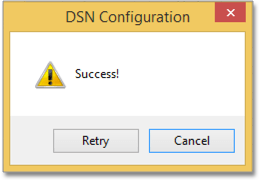
If your test connection fails, enable ODBC logging to troubleshoot.
-
Select Cancel to close the DSN Configuration dialog.
-
Select OK to close the Client Configuration Dialog the dialog.
-
Select OK to close the ODBC Data Source Administrator (64-bit) application
Related information


