Add a Snowflake connection
Prerequisites
Before you add a Snowflake connection, ensure the default role of the account being used, or the role you provide in the connection, has been granted usage on the database and the schema, and select on the tables that will be added to the connection.
Example:
-
Grant usage on warehouse
<warehousename>to role<rolename> -
Grant usage on database
<databasename>to role<rolename> -
Grant usage on schema
<databasename>.<schemaname>to role<rolename> -
Grant select on all tables in schema
<databasename>.<schemaname>to role<rolename>
Connecting to Snowflake
To connect to Snowflake:
-
Select Data in the top navigation bar.
-
Open the Connections tab in the left navigation bar, and select the Snowflake tile. Alternatively, select + Create new in the left navigation bar, select Connection, and select the Snowflake tile.
-
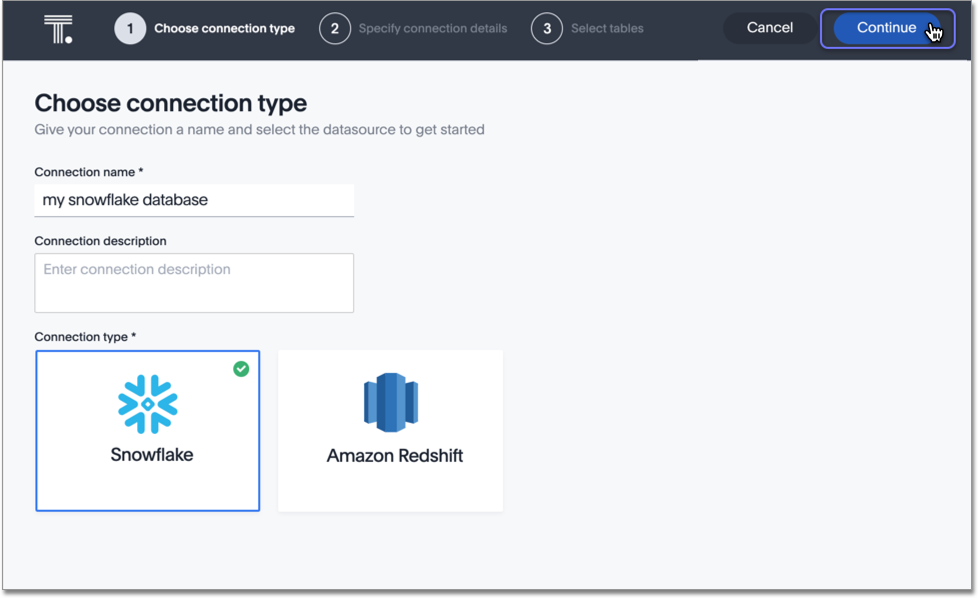
Create a name for your connection and a description (optional), then select Continue.
-
Enter the connection details for your Snowflake data source using either OAuth, OAuth with PKCE, Microsoft Azure AD OAuth, Service Account, or Key Pair authentication:
The Use OAuth option uses Snowflake OAuth authentication.
Before selecting Use OAuth or OAuth with PKCE authentication, you must configure OAuth in Snowflake. For details, see Configure OAuth for a Snowflake connection.
Before selecting Use External OAuth authentication, you must configure either Azure AD or Okta external OAuth. For details, see Configure Azure AD external OAuth for a Snowflake connection or see Configure Okta external OAuth for a Snowflake connection.
-
For OAuth authentication, do the following:
-
Select OAuth.
-
Enter Account name or your Snowflake URL, OAuth Client ID, OAuth Client Secret, Database (optional), Role (optional), and Warehouse (optional).
-
If you wish to provide the optional additional key-value pairs for your Snowflake connection, complete the procedure in step 5, and then select Continue. If not, select Continue.
-
When the Snowflake login screen appears, enter your Snowflake User Name and Password and select Log In, or use the Single-Sign-On option.
-
In the next Snowflake screen, allow ThoughtSpot to access your Snowflake account by selecting Allow, and then go to step 7 to select tables for your connection.
Using security passthrough may have implications for your row-level security. See About row-level security (RLS) for more information.
-
-
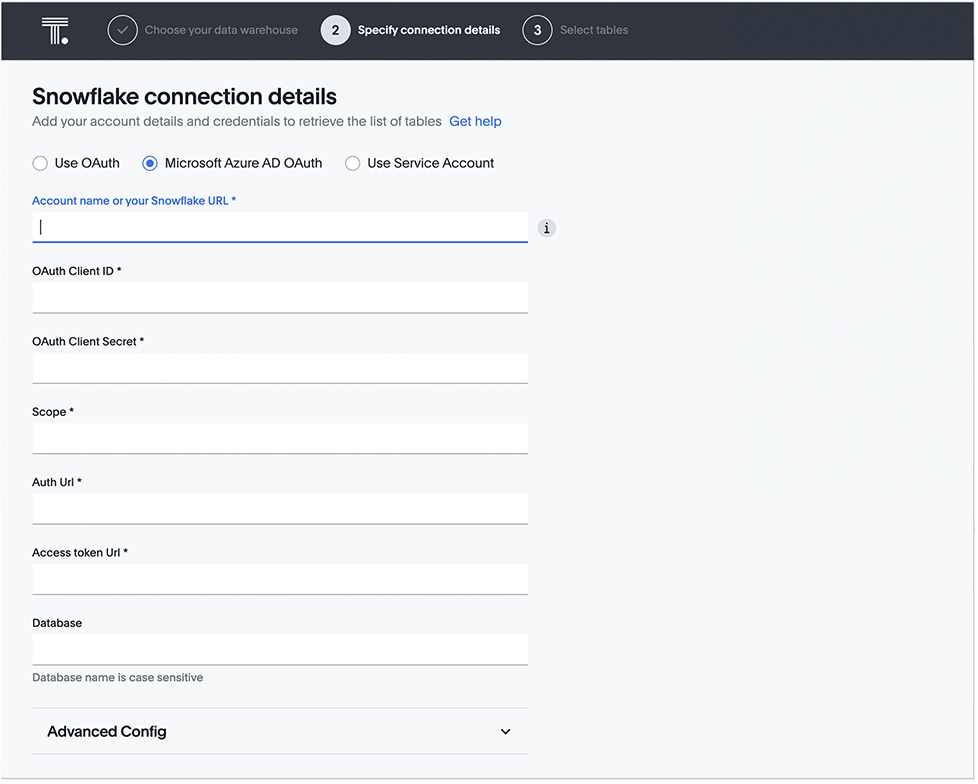
For Microsoft Azure AD or Okta OAuth authentication, do the following:
-
Select External OAuth.
-
Enter Account name or Snowflake URL, OAuth Client ID, OAuth Client Secret, Scope, Auth URL, Access token URL, and (optional) Database.
-
If you wish to provide the optional additional key-value pairs for your Snowflake connection, complete the procedure in step 5, and then select Continue. If not, select Continue.
-
To enable Snowflake secondary roles, enter the following key-value pair:
-
Key: enableSecondaryRoles
-
Value: true
-
-
When the Microsoft sign-in screen appears, sign in to your account using the email and password of your Microsoft account associated with Azure.
-
On the Stay-signed-in screen, select Yes.
-
-
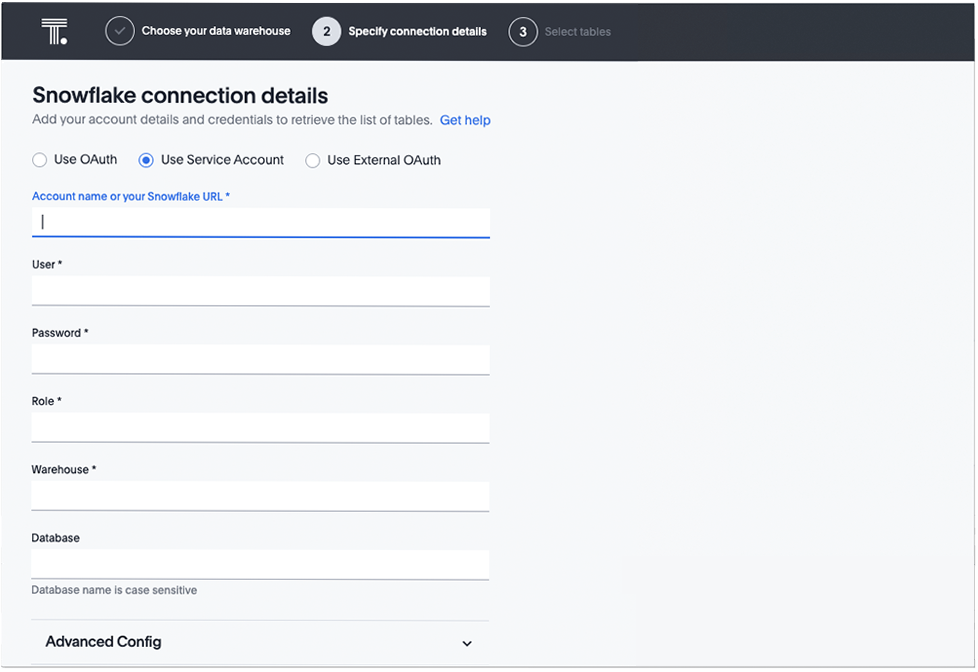
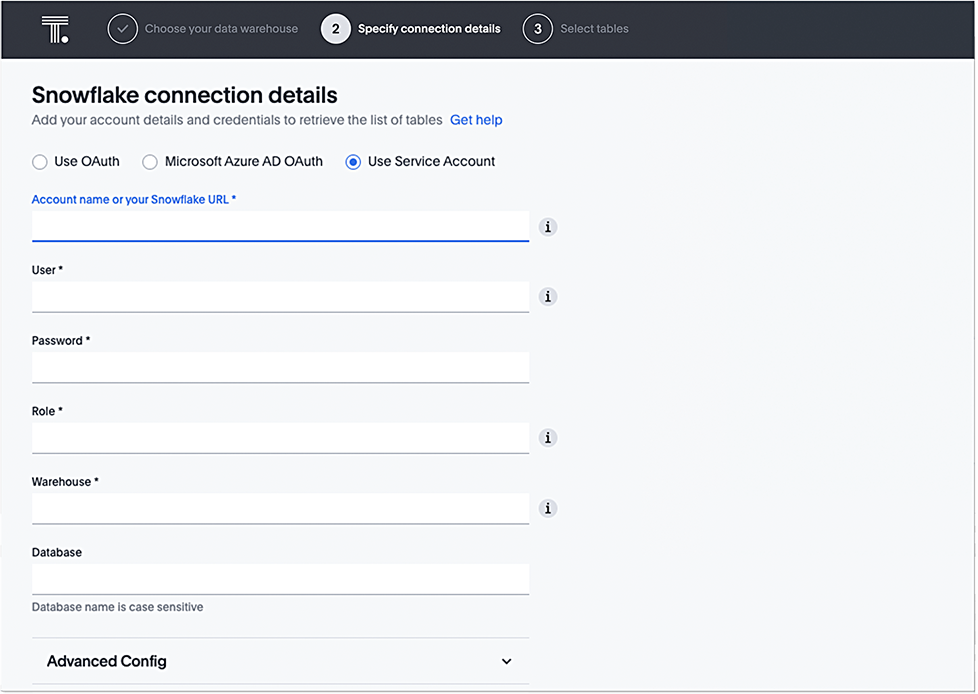
For Service Account authentication, do the following:
-
Select Service Account.
-
Enter Account name, User, Password, Role, Warehouse, and (optional) Database.
-
-
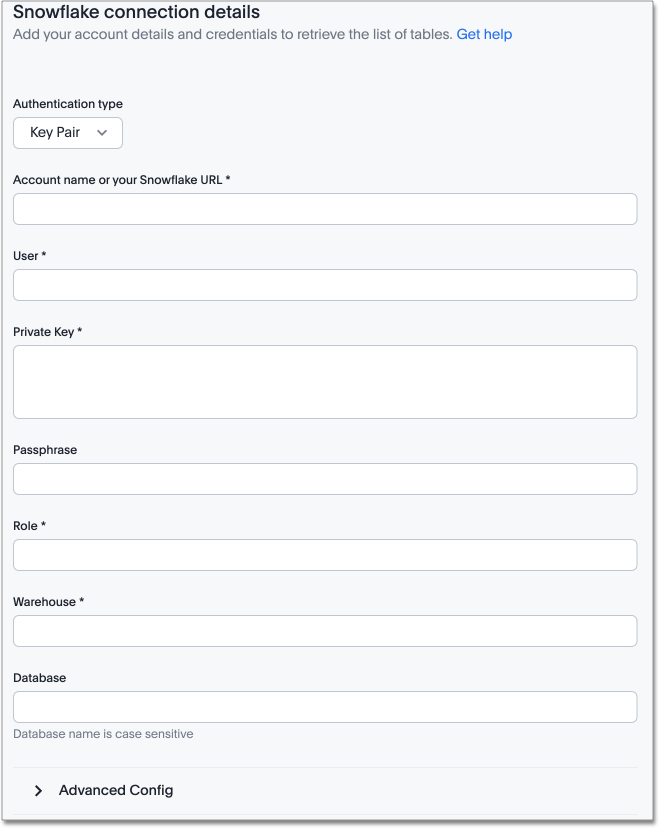
For Key Pair authentication, do the following:
-
Select Key Pair.
-
Enter Account name or Snowflake URL, User, Private Key, (optional) Passphrase, Role, Warehouse and (optional) Database.
-
Refer to the Snowflake connection reference for more information on each of the specific attributes you must enter for your connection.
-
-
(Optional) Configure proxy for your Snowflake connection by doing the following:
-
Select the Advanced Config menu to reveal the Key and Value fields.
-
For Key, enter useProxy, and for Value, enter true.
-
Select the plus sign ( + ) to add additional Key and Value fields.
-
For Key, enter proxyHost, and for Value, enter the URL of your proxy server.
-
Select the plus sign ( + ) to add additional Key and Value fields.
-
For Key, enter proxyPort, and for Value, enter your proxy port number.
Snowflake Shared proxy limitationSnowflake uses proxy settings from the first connection, and reuses the proxy configuration across all connections.
When setting up a proxy with Snowflake ensure that:
-
There are no other connections which use a different proxy or are without a proxy.
-
Ensure each new connection has the same proxy details. If there was an unsuccessful attempt to fetch metadata without proxy, adding a proxy later might not work because the Snowflake driver might assume no proxy.
-
-
-
(Optional) Provide additional key-value pairs that you need to set up your connection to Snowflake or customize additional JDBC parameters supported by Snowflake, by doing the following:
-
Select the Advanced Config menu to reveal the Key and Value fields.
-
Enter your key and value information. For example, if you want to access multiple Snowflake databases in a single connection, but do not want the connection to access all your Snowflake databases, you can specify that here. For each specific database you would like to access, set
databaseas the key, and the database name as the value. Refer to the Snowflake JDBC documentation. -
To add more keys and values, select the plus sign (+), and enter them.
Any key-value pairs that you enter must be defined in your Snowflake data source. Key-value pairs are case-sensitive. -
-
Select Continue.
-
Select tables (on the left) and the columns from each table (on the right), and then select Create connection.
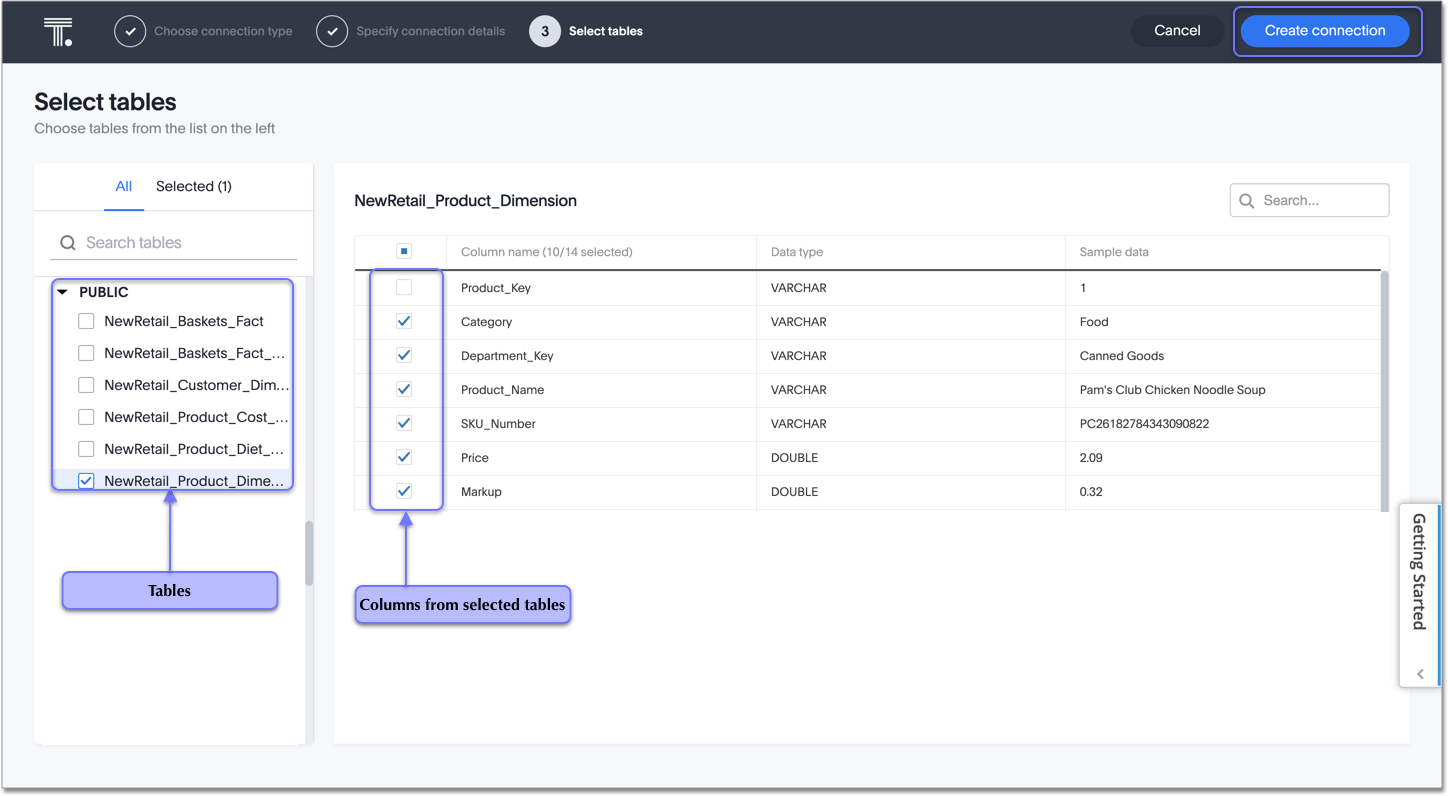
The Create connection message appears, telling you the number of tables and columns that will be added to your connection.
-
Select Create.
After you add the connection, you can search your Snowflake database using the Search field.
Your new connection appears on the Data > Connections page. Select the name of your connection to view the tables and columns in your connection.
The connection you just created is a link to the external data source. If there are any joins in the selected tables of the external data source, those are imported into ThoughtSpot.
You can now perform a live query on the selected tables and columns of your connection. Because the selected tables and columns in your connection are linked, it may take a while to initially render the search results. This is because ThoughtSpot does not cache linked data. With linked data, ThoughtSpot queries the external database directly, which is slower than querying data that is stored in ThoughtSpot’s database.
You can modify a Snowflake connection in the following ways:
You can also Delete a Snowflake connection.
See the Connection reference for details of connection parameters.
We also recommend that you review Best practices for Snowflake connections. == Sharing a connection
Users with can manage data or admin privileges can share connections with other users or groups that have can manage data privileges. Once granted access to a connection, users can add, remove, and modify tables in that connection.
To share a connection with another user, follow these steps:
-
Navigate to the Data tab and select Connections.
-
Select the checkbox next to the name of the connection you want to share, and click Share.
-
In the Share connection dialog, enter the ID of the user or group you want to share the connection with. You can use the search bar to find the user or group.
-
Select Done.
Note that to remove share access from a connection, you must navigate to the Share connection dialog and select Remove access to the left of the user group or name.
Creating additional configurations for your Snowflake connection
When you create your Snowflake connection, you enter a default configuration. You can create additional configurations for your Snowflake connection. With additional configurations you can do the following:
-
Configure a separate Snowflake warehouse for specific ThoughtSpot users or groups, eliminating the need to duplicate Liveboards and configure multiple Snowflake connections. This can help you with cost tracking and chargeback.
-
Use a different configuration, including Snowflake warehouse, for your search indexing so that you can control and balance the computing load.
-
Test a set of Liveboards against different environments (dev, qa, prod), and configure different Snowflake warehouses for multi-tenancy / multi-Org deployments.
Create an additional configuration for your Snowflake connection
To create an additional configuration for your Snowflake connection, do the following:
-
Select Data in the top navigation bar.
-
Open the Connections tab in the left navigation bar.
-
In the list of connections, find the connection where you want to add a configuration.
-
At the far right of your connection, click the More menu
 , and select Create configuration.
 -
In the Add configuration details window, specify the following:
-
Authentication type
-
User
-
Password
-
Role
-
Warehouse
-
(Optional) Advanced Config
-
-
Click Continue.
Depending on the authentication type, you may have to sign into your Snowflake account.
-
(Optional) If the Snowflake sign-in screen appears, sign in to Snowflake. Then, when a message appears asking you to allow your connection access to your Snowflake account, click Allow.
The connection is validated by ThoughtSpot and then the Describe your configuration window appears.
-
Create a name and (optional) description of your configuration, and click Continue.
-
In the Select policy type window, select from the following options:
- No Policy
-
Choose this if you want to save the configuration, but not apply the policy to your connection yet.
- Users and groups
-
Choose this if you want to specify users and groups who can use the connection.
- Processes
-
Choose this if you want to use this configuration for search indexing. Make sure Sage indexing is checked.
-
Click Continue.
Your additional configuration is complete and appears below your connection’s name on the Connections page.
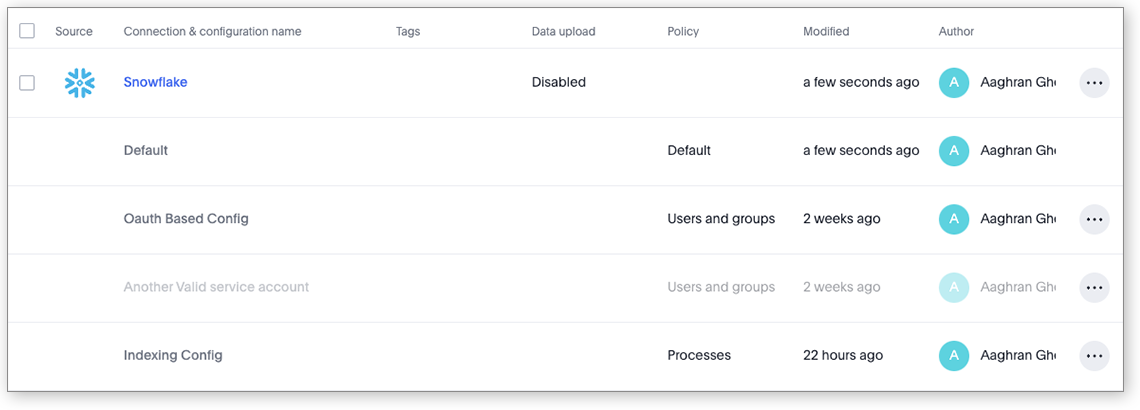
| Configurations that are greyed out, are currently disabled. |
You can edit additional configurations after you create them, including disabling and deleting them. For details, see Edit additional connections of your Snowflake connection.
Related information


