Add a Starburst connection
Follow these steps to connect to Starburst databases:
-
Click Data in the top navigation bar.
-
Click the Connections tab in the left navigation bar, and select the Others tile. Alternatively, select + Create new in the left navigation bar, select Connection, and select the Starburst tile.
-
Create a name for your connection and a description (optional), then select the Starburst connection type, and click Continue.
-
In the Choose your data warehouse interface, specify the fields:
- Name your connection
-
For example, MyStarburstDatabase
- Describe your connections
-
The optional description of the database
- Choose your data warehouse
-
Select the Starburst tile

-
Select Connect.
-
. Enter the connection details for your Starburst data source using either OAuth, OAuth with PKCE, or Service Account authentication.
Before selecting Use OAuth authentication, you must configure OAuth in Starburst. For details, see Configure Okta OAuth for a Starburst connection.
Refer to the Starburst connection reference for more information on each of the specific attributes you must enter for your connection.
-
(Optional) Configure proxy for your Starburst connection by doing the following:
-
Select the Advanced Config menu to reveal the Key and Value fields.
-
For Key, enter httpProxy, and for Value, enter <proxyHost>:<proxyPort>.
Example: 40.142.32.22:5050
- Additional configuration
-
You can also click to open the Advanced Config section, and enter additional parameters as Key and Value pairs. To add more keys and values, click the plus sign (+), and add them. Refer to the cloud data warehouse’s JDBC driver reference documentation for information on the supported keys and values.
-
The key-value pairs must be already defined in your data source.
-
Key-value pairs are case-sensitive.
-
-
-
Click Continue.
-
Select the tables and columns for your new connection.
-
Select tables (on the left)
-
Select columns from each table (on the right)
-
When you select multiple tables that share data, ThoughtSpot recognizes existing joins within the new connection. You can also add joins at a later time.
-
For very wide tables, select only the columns that you need for calculations, filters, and joins.
-
-
-
Click Create connection.
After ThoughtSpot creates the new connection, it displays a message about the number of tables and columns in that connection.
-
Click Create.
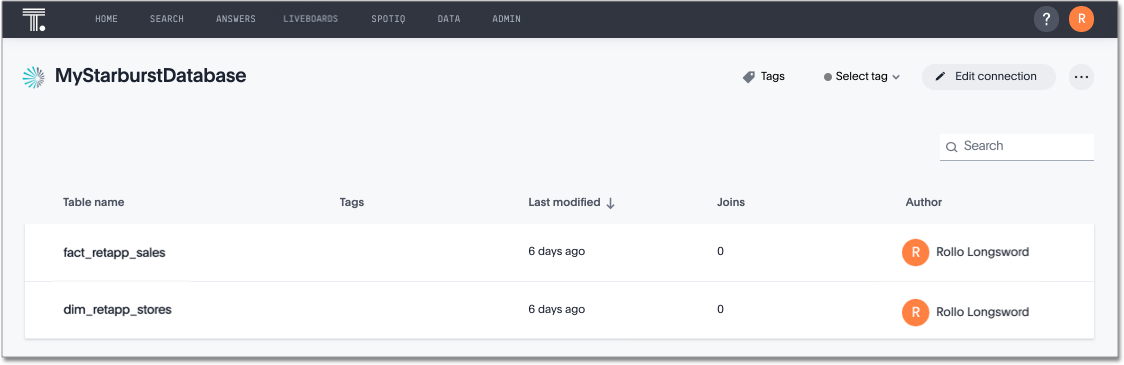
Your new connection appears on the Data > Connections page.
The connection you just created is a link to an external data source. If the external data source contains joins, ThoughtSpot recognizes them.
After you add the connection, you can search your database.
Click the name of your connection to view the tables and columns in your connection.
You can now perform a live query on the tables and columns of your connection. Because the selected tables and columns in your connection are outside ThoughtSpot (they are linked, not imported), it may take a little longer to render the initial search results. This is because ThoughtSpot does not cache linked data.
Related information


