Configure OAuth for a Starburst connection
To configure OAuth for Starburst, you create an app in the Identity Provider and use the app’s credentials to register it in Starburst as an external token provider. Once these steps are completed, Starburst will allow connections coming in with the JWT issued by the IdP.
| For OAuth, we recommend checking the Starburst documentation to confirm any IDP support and their details. This article documents only the most frequently set-up IDP. |
Azure AD OAuth
For details on how to configure Microsoft Azure AD OAuth for Starburst, see Starburst’s Azure Active Directory documentation.
| You can use any OAuth flow provided that you can get the information required for the security integration. The following steps provide a guide for getting the information required to create the security integration for Snowflake. |
| Be sure to consult your organization’s security policies for configuring an authorization server to make sure you meet all requirements. |
Part 1: Configuring the IdP with Okta
The following steps detail the configuration of IdP with Okta as an example. You can set up any other OpenID Connect (OIDC)-based IdP providers following a similar process. For details, refer to the respective documentation for those.
To configure the IdP with Okta, do the following:
-
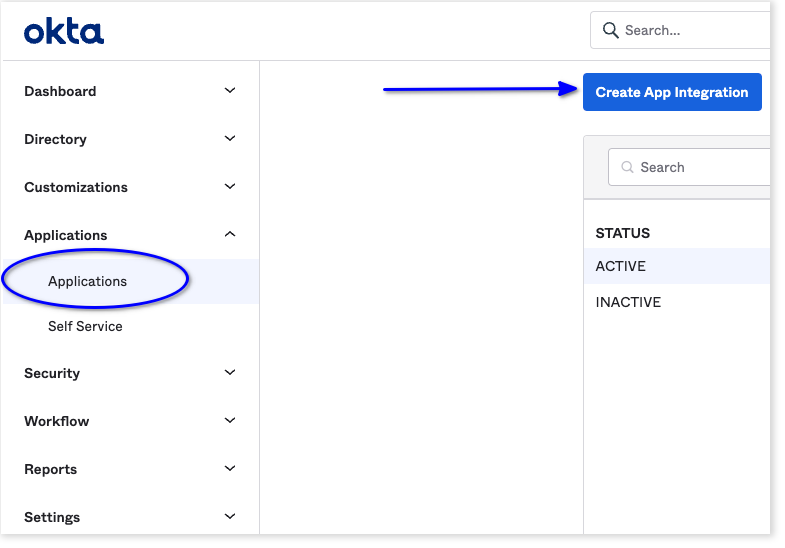
Sign in to the Okta console with a user having administrator privileges. Navigate to the Applications page in the console and select Create App Integration.
-
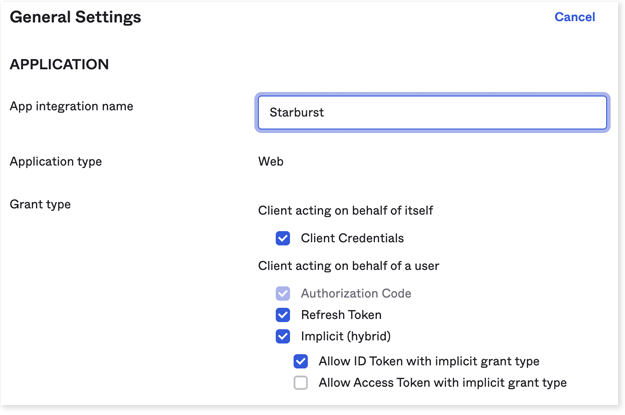
For sign-in method, choose OIDC - OpenID Connect.
-
For application type, choose Web Application
-
Select Next.
-
Under Grant type, make sure Authorization Code and Refresh Token are selected.
-
For Sign-in redirect URIs, add the ThoughtSpot redirect URI for the application.
It should follow this format:
https://<your-thoughtspot-instance-host>/callosum/v1/connection/generateTokens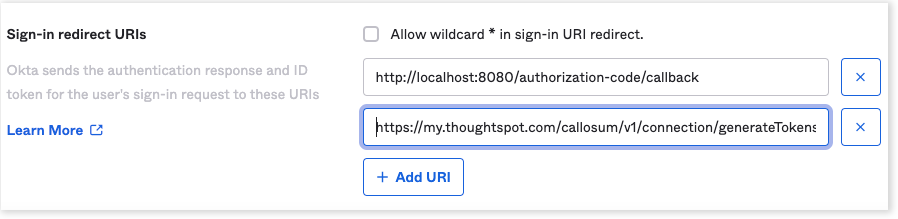
-
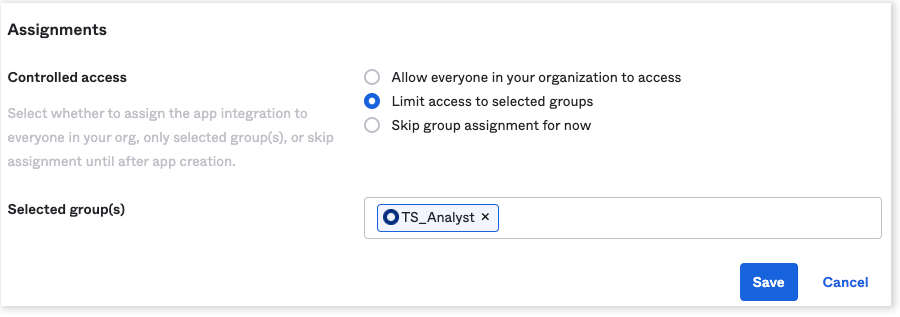
Assign the application to everyone in the organization or to specific groups. This step may vary for other IdPs.
-
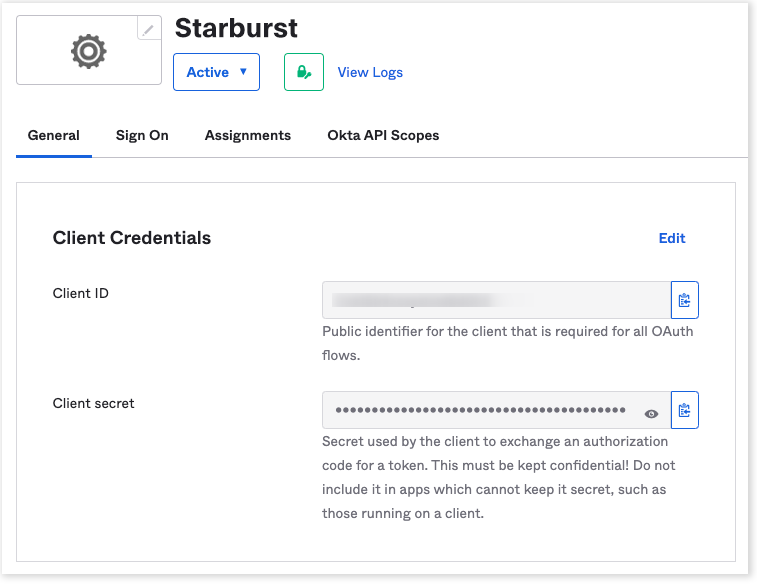
Collect the client credentials from the application home page and make a note of them. These will be required later for adding the external token provider in Starburst.
-
Go to , and make a note of the value for Audience. This is required in a later step for configuring the OpenID well-known URI for the authorization server.

For Okta, it should follow this format:
https://<organization>.okta..com/oauth2/<unique_id>/.well-known/oauth-authorization-server -
Open the URL in a browser and make a note of the values for the following parameters:
-
Issuer
-
Authorization endpoint
-
JWKS URI
-
Token endpoint
-
Part 2: Adding external token provider in Starburst
To add an external token provider in Starburst, do the following:
-
From the installation folder, open
<install_dir>/etc/config.propertiesand add the following properties:http-server.authentication.type=PASSWORD,JWT http-server.authentication.jwt.key-file=<value of jwks_uri from open id config> http-server.authentication.jwt.required-issuer=<value of issuer from open id config> http-server.authentication.jwt.required-audience=<value of audience frmo open id config> http-server.authentication.jwt.principal-field=<value of the claim containing the user name>These details should be obtained from the well known open id configuration URL obtained from Okta authorization server (for example, https://example.okta.com/oauth2/abc1234xyz/.well-known/oauth-authorization-server).
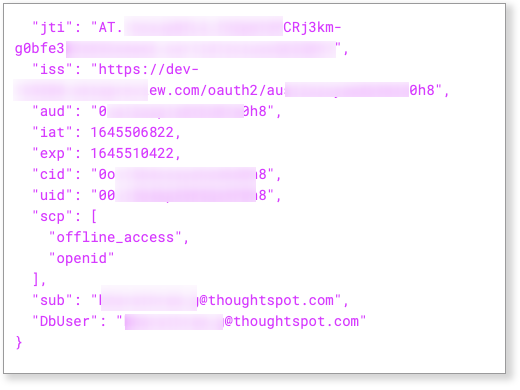
The value for the principal-field configuration should be the claim name in the JWT that contains the username matching the username created in Starburst. This can be found from the token payload. In the following example, the username is in the claim “sub.”
Related information
JWT authentication in Starburst documentation


