Configure NAS for backup storage
Learn how to use network attached storage (NAS) to support backup/restore and data loading.
ThoughtSpot Training
For best results in configuring NAS backups, we recommend that you take the following ThoughtSpot U course: NAS Mount.
See other training resources at ThoughtSpot U.
About NAS mount
ThoughtSpot enables you to mount a NAS file system for storing or accessing large files. The file system mounts at the same location on each node in the cluster automatically. When any node restarts, the file system mounts again automatically, if it can be found.
When supplying a directory for writing or reading a backup, you can specify a new mount point within /export as the directory to use.
Likewise, you can stage data there for loading.
It is best to have 2 separate NAS volumes, individually dedicated to data loads and backups.
Backups are written by the Linux user admin.
If that user does not have permission to write to the NAS file system, you can write the backups to a disk (for example /export/sdc1, /export/sdd1, /export/sde1, or /export/sdf1) and then set up a cron job that executes as root user and copies the backup to the NAS device every night, then deletes it from the directory.
Do not send the periodic backups or stage files on /export/sdb1 since it is a name node.
It is used internally by Hadoop Distributed File System (HDFS) and if this drive fills up, it can cause serious problems.
Do not allow backups or data files to accumulate on ThoughtSpot.
If disk space becomes limited, the system will not function normally.
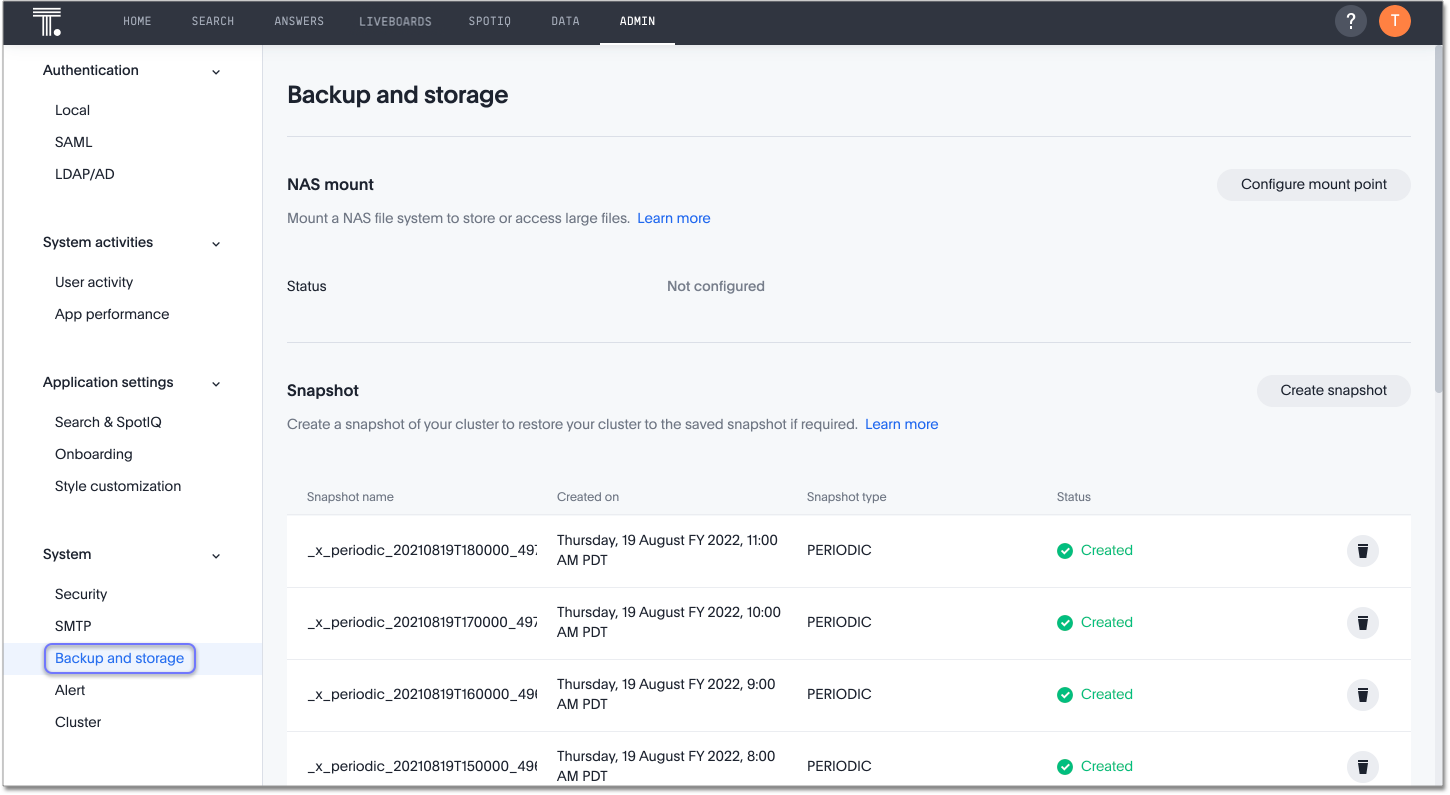
Mount NAS using the Admin Console
To mount a NAS file system using the Admin Console, navigate to the Admin Console by clicking on the Admin tab from the top navigation bar. Select Backup and storage from the side navigation bar that appears.
-
Select Configure mount point.
-
Specify the parameters in the dialog box that appears:
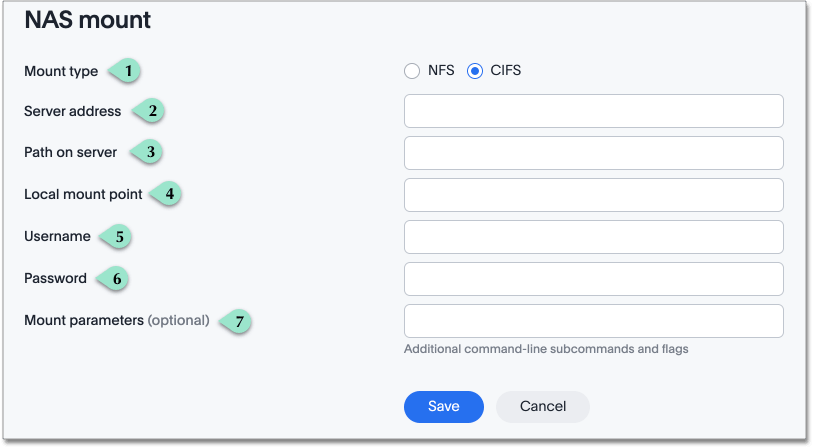
1. Choose the mount type: either
NFS(Network File System) orCIFS(Common Internet File System).2. Specify the server address, in the form
storageservername.file.yourdomain.net.3. Specify the server path.
4. Specify the local mount point. This should be within the
/exportdirectory.5. If you choose the
CIFSmount type, you must specify a username and password.6. If you choose the
CIFSmount type, you must specify a username and password.7. Optionally specify additional command-line subcommands and flags. Refer to the tscli reference for NAS commands.
-
Click OK.
You can unmount NAS from the Admin Console, or by running tscli nas unmount --dir <directory>.


