Configure internal authentication
Many organizations don’t use LDAP or active directory for user authentication. In other scenarios, some users are not in LDAP and are created only in ThoughtSpot. In such cases, you can choose to authenticate users against ThoughtSpot internal authentication.
Many organizations don’t use LDAP or active directory for user authentication. In other scenarios, some users are not in LDAP and are created only in ThoughtSpot. In such cases, you can choose to authenticate users against ThoughtSpot internal authentication.
| Before the user logs into ThoughtSpot, the user must exist in ThoughtSpot. This is independent of the authentication mechanism. |
Enable internal authentication with the Admin Console
Local authentication is enabled by default in your ThoughtSpot environment. This means that any local user you create can log in to ThoughtSpot with the specific ThoughtSpot credentials you set up for them when creating the user.
If you disable local authentication, no local user can log in to ThoughtSpot.
You can enable or disable local authentication from the Admin Console.
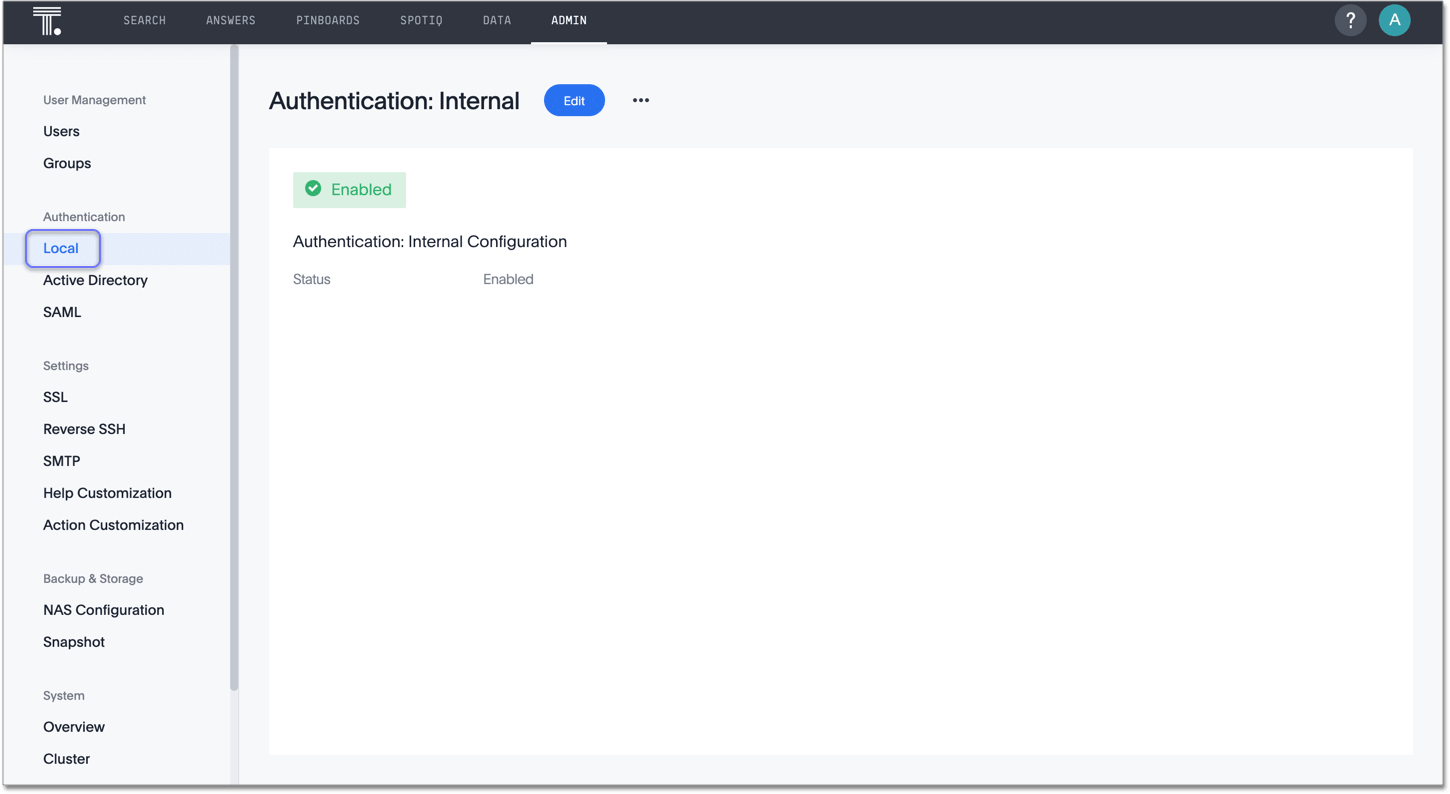
Navigate to the Admin Console by clicking on the Admin tab from the top navigation bar. Select Local from the side navigation bar that appears.
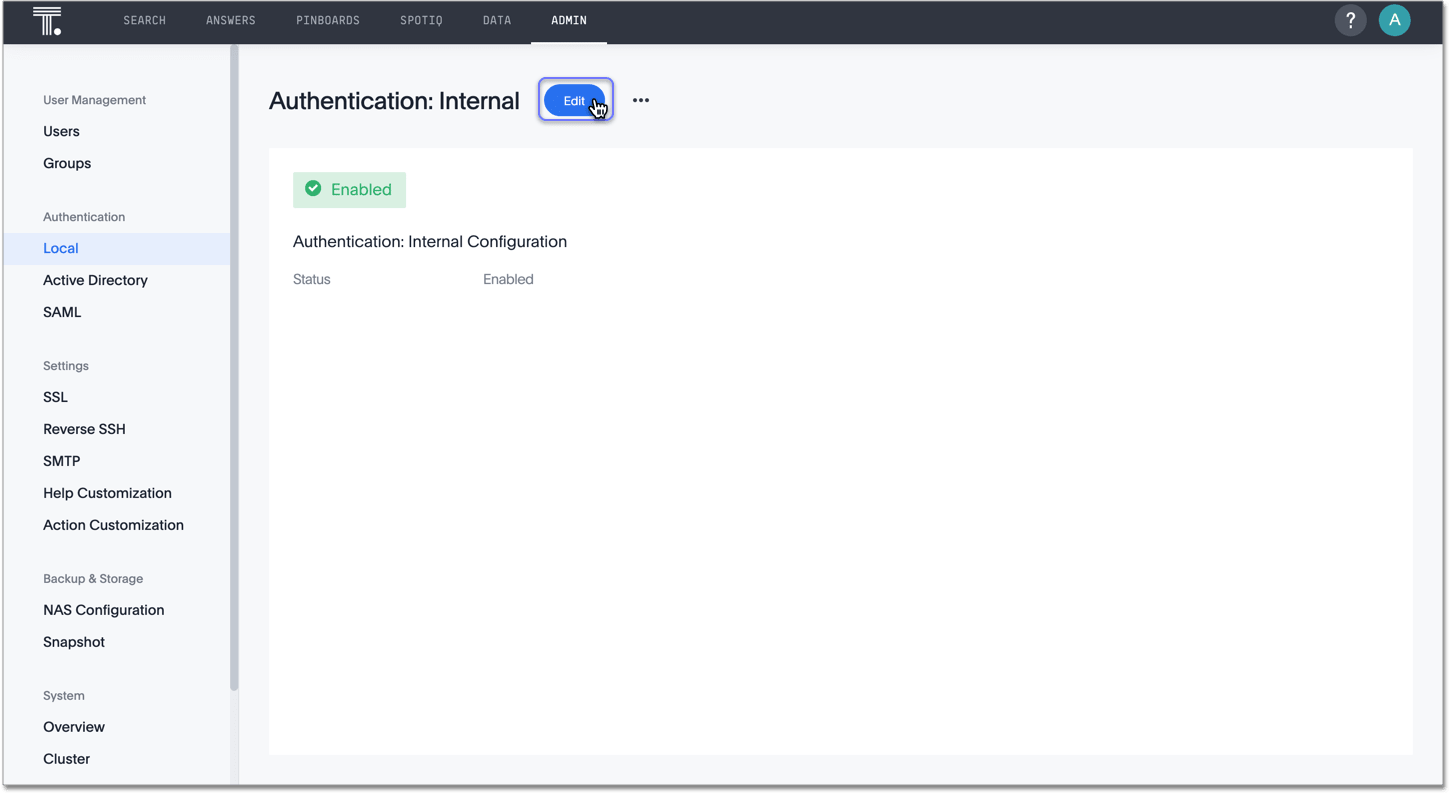
Click the Edit button in the top middle of the screen.
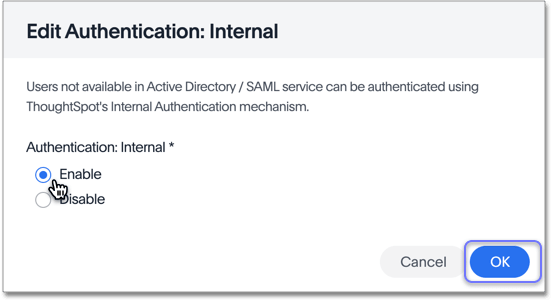
Select Enable or Disable, and click OK.
Note that you cannot disable local authentication until you configure Active Directory or SAML authentication.
If you have been using ThoughtSpot with users you created manually, and you now want to transition to LDAP, contact ThoughtSpot Support. They can assist you in migrating existing users to their LDAP equivalents.


