Create Models
You use the Model editor to create Models.
With the Model editor, you can:
-
Build a data Model visually, by dragging and dropping tables and columns
-
Create joins between tables quickly
-
Use the tabbed interface to quickly switch between table and column views, as well as formulas, filters, parameters, and settings.
You can use SpotterModel to generate comprehensive, optimized Models ready to use in your analysis. SpotterModel automates table selection, join creation, and column selection, while allowing you to review and customize each step. For more information, see SpotterModel.
Creating a Model
To create a data Model:
-
Go to the Data workspace tab.
-
Select the + Create new button in the side navigation bar.
-
Select Model.
-
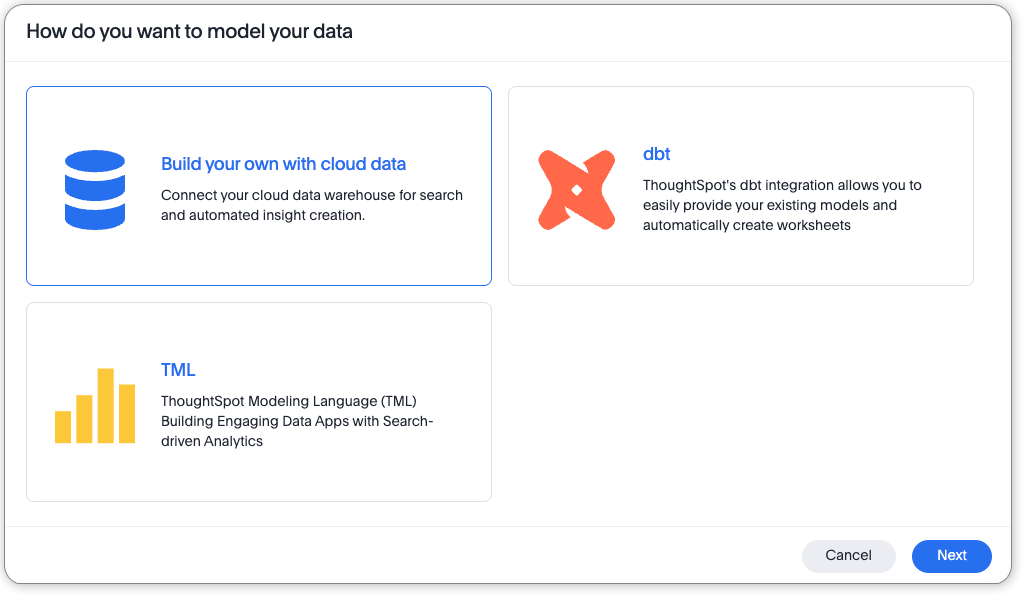
Choose how you want to model your data, using one of the following options:
-
To create your own model, select Build your own with cloud data and click Next.
-
To create a new connection, refer to About connections
-
To use an existing connection, select it from the list, and select Connect.
-
-
To build a model from tables originally created from dbt models, select dbt and click Next.
-
To create a new dbt connection, select Add dbt connection and refer to step 5 of Integrating with dbt.
-
To use an existing connection, select it from the list, and select Connect.
-
-
To import the TML for a model, select TML and click Next.
-
Upload your tml files..
The information at this link also applies to Models.
-
-
Building your Model
After creating your Model, you need to add the sources that contain the data. A source is another name for a table. You do that using the Model editor. If you chose an existing model, you can make changes to your model.

The sources you choose are typically related to one another by foreign keys.
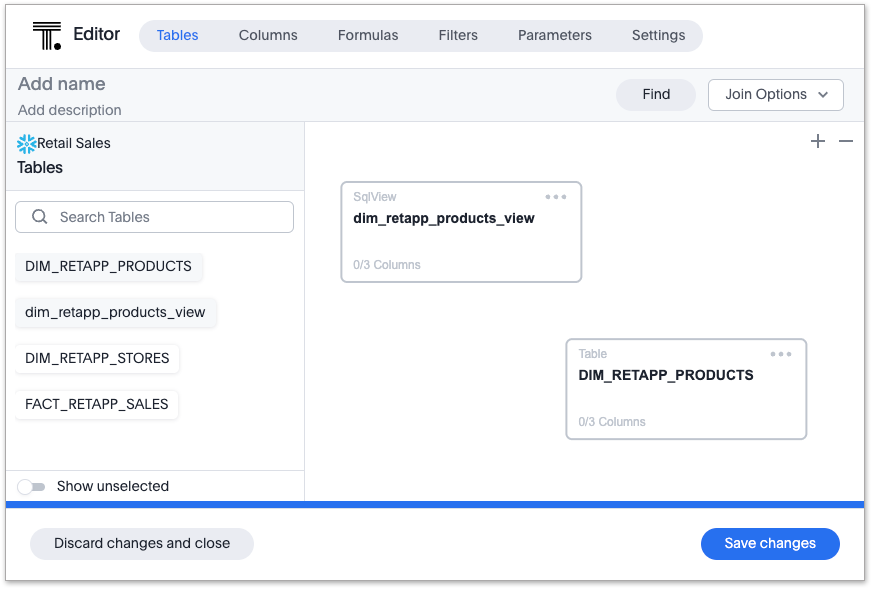
The first step to building your Model, is to add tables.
Adding tables
To add tables to your Model, do the following:
-
Drag tables from the list on the left, and drop them into the right pane.
Suggested joins
If the tables you added to your Model were joined previously, a join suggestion appears.
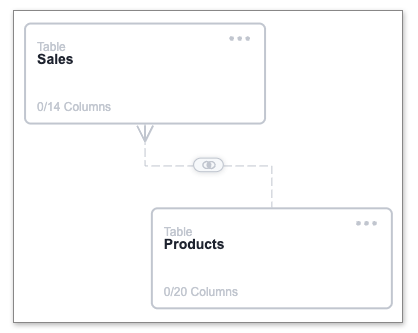
You can choose whether to keep, modify or remove the suggested join.
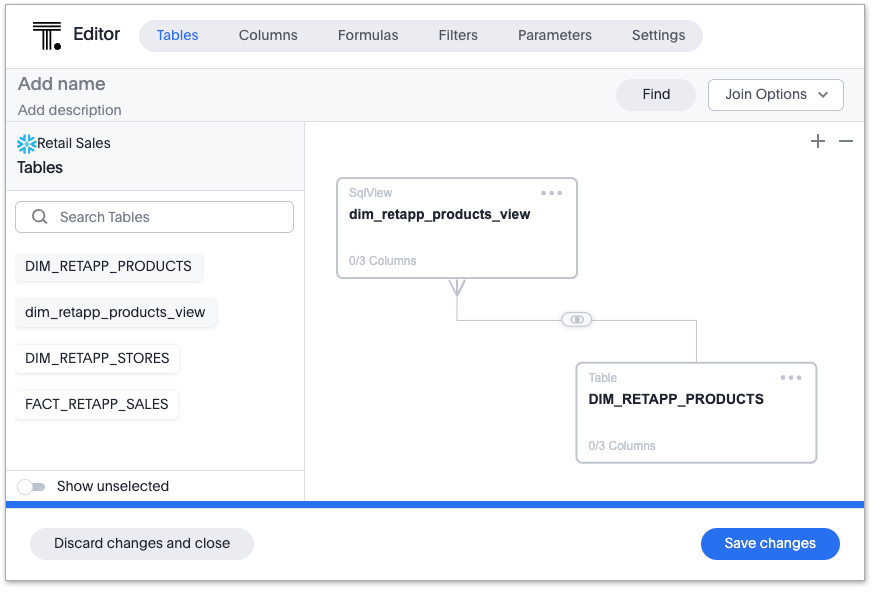
-
Click the join icon
 , then select one of the following options:
-
To keep the join, click Accept Join.
-
To modify the join, click Edit Join.
-
Make your changes and click Save. For more information, see step 2 of Adding joins.
-
-
To remove the join, click Clear Join.
-
Adding joins
-
To add a new join between tables, do one of the following:
-
Select the More menu
 in the upper right of a table, and select Add Join.
 -
Hover over the table until you see a + appear on the edge of the table, then click the + and drag to the table you want to join.
-
-
In the Create Join window for Table 2, select the table you want to join to the first table (Table 1).
-
For Column from Table 1, select the column you want to join to another column in Table 2.
-
For Column from Table 2, select the column in Table 2 which you want to join to the selected column in Table 1.
-
For Join Type, select a join type. Options include:
-
INNER
-
FULL OUTER

-
LEFT OUTER

-
RIGHT OUTER

-
-
For Cardinality, select the cardinality. Options include:
-
Many:1
-
1:Many
-
1:1
-
-
Click Save.
The join is created.
-
Add additional tables and joins, as needed.
-
(Recommended) Name your Model by clicking Add name and entering a name.
-
(Optional) Add a description of your Model by clicking Add description and entering a description.
-
When you are finished adding tables and joins to your Model, the next step is to add columns.
Global and local joins
Models support both global and local joins. It’s helpful to understand the difference.
-
Global joins are created between two tables in a connection and they are available to any Model created in that connection. If you see a join suggestion when you create a model, it means that join is a global join.
-
Local joins are created in a specific Model and they are only available in that Model.
Adding columns
To add columns to your Model, do the following:
-
Click the Columns tab.
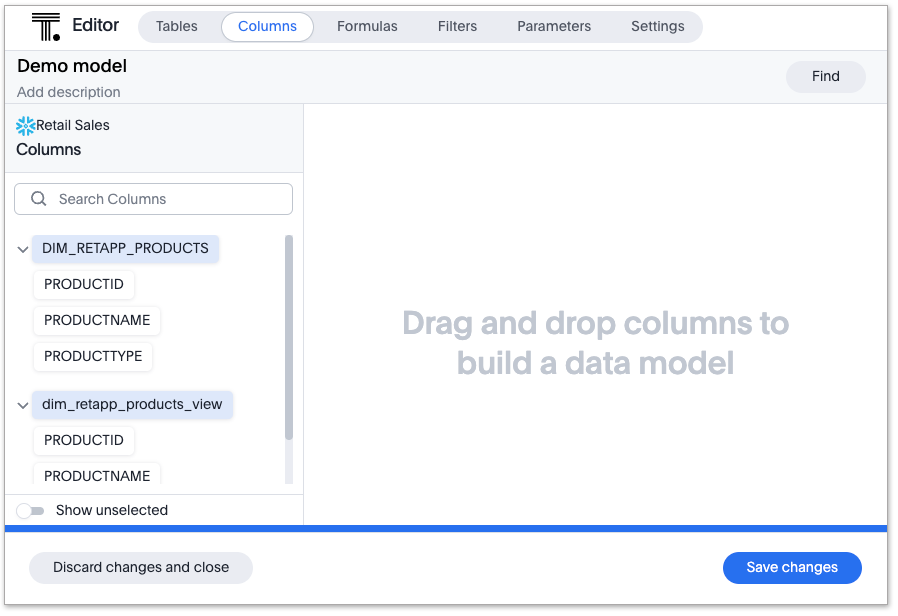
Table names are highlighted in blue, and their associated columns appear underneath them.
-
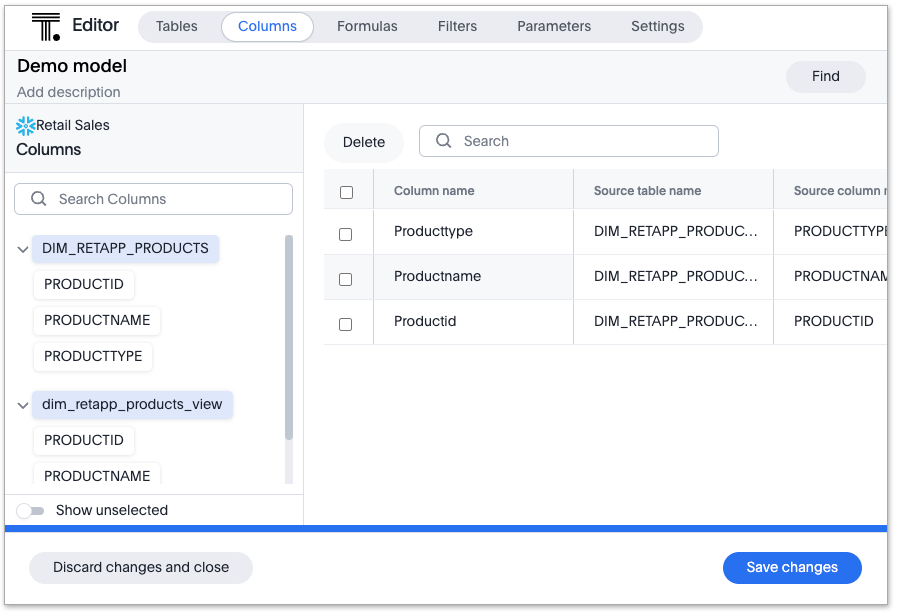
Add columns by doing either of the following:
-
To add all the columns from a table, drag the table name from the list on the left and drop it into the right pane.
-
To add an individual column from a table, drag the column name from the list on the left and drop it into the right pane.
-
-
(Optional) Edit column properties, using either of the following methods:
-
For an individual column:
-
Click the column property you want to edit, and make your changes.
-
-
For multiple columns:
-
Click the checkbox next to the columns you want to edit.
-
Click the Edit menu, and select the property you want to edit.
-
In the window that opens, select the option you want and click Update.
You can make bulk edits to column properties by exporting the model as a CSV file. You can then make bulk edits in the CSV file, and then import the file back into ThoughtSpot.
-
-
-
To save the columns in your Model, select Save changes.
You are prompted to edit the title and description of your Model.
-
Edit the title and description if needed.
-
Click Save.
Your model is saved, and you have the option to add formulas, filters, parameters, and adjust settings.
-
If you don’t want to add those now, select Exit data model.
Sorting and filtering columns
You have the option to sort any column in ascending or descending order, as well as apply a filter to a column by selecting possible values of the column.
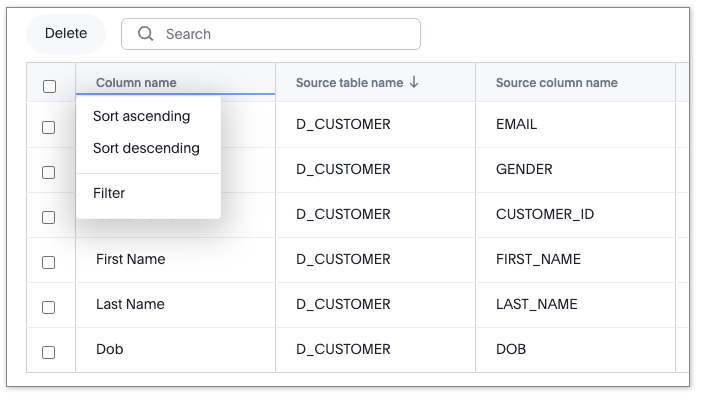
To sort a column, do the following:
-
Click a column heading
-
From the pop-up menu, select either Sort ascending or Sort descending.
To filter a column, do the following:
-
Click a column heading
-
From the pop-up menu, select Filter.
-
In the Edit filter window, select the values you want to filter by and click Apply.
A label appears above the table indicating the values used to filter the column.
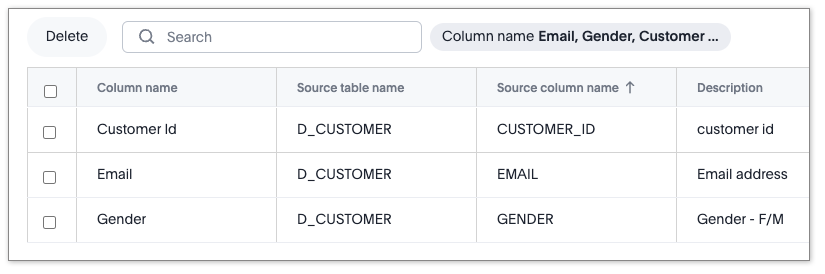
You can delete the filter by hovering over the label and clicking the (X).
In the Edit filter window, you also have the following options to use when editing or adding a filter:
-
Select all
-
Clear
-
Search
-
Show selected
Sort and filter states are not saved when you save your Model, however they do persist when you switch between tabs of the Model editor. -
Adding formulas
To add formulas to your Model, do the following:
-
Click the Formulas tab.
-
Click Add Formula.
-
Create a name for your formula.
-
Enter a formula, using the formula assistant (at right) if needed.
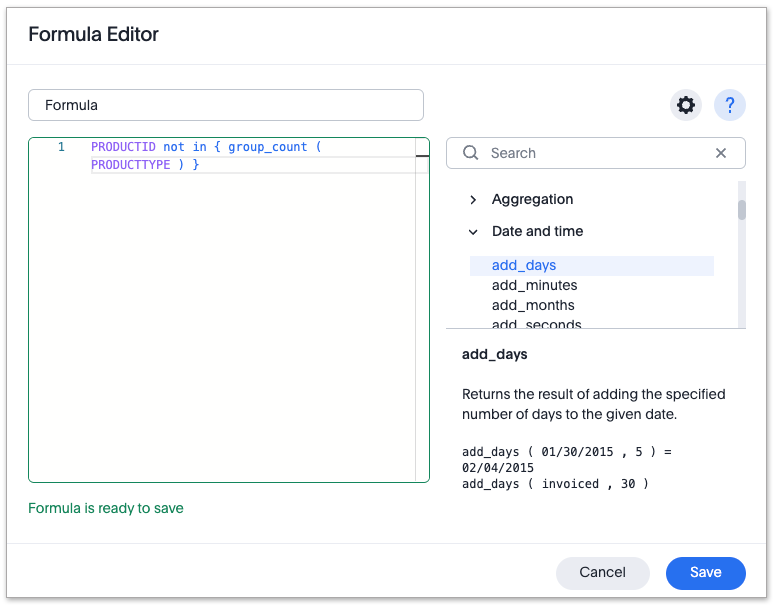
With the formula assistant, you can see a list of formula operators with examples.
If you want to change what your formula returns, select the Advanced settings button
 .
.Depending on your formula, you may be able to change:
-
Data type: Determines the type of data that the formula generates. For example, use date for an add_days formula.
-
Measure or attribute: Determines if the output of the formula is a measure or an attribute. For example, choose attribute for a formula that generates age groups, and choose measure for a formula that generates profit.
-
Aggregation: Determines the default aggregation of the formula output. For example, choose min to see minimum profit.
-
-
Click Save.
-
Click Save changes.
Adding filters
To add filters to your Model, do the following:
-
Click the Filters tab.
-
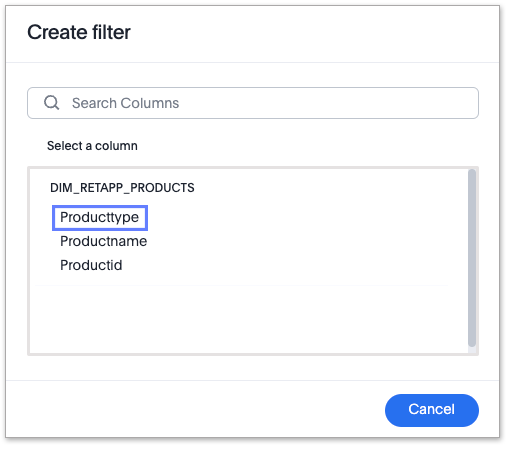
Click Add filter.
-
Choose the column you want to filter on.
-
Select the values to include in your Answer.
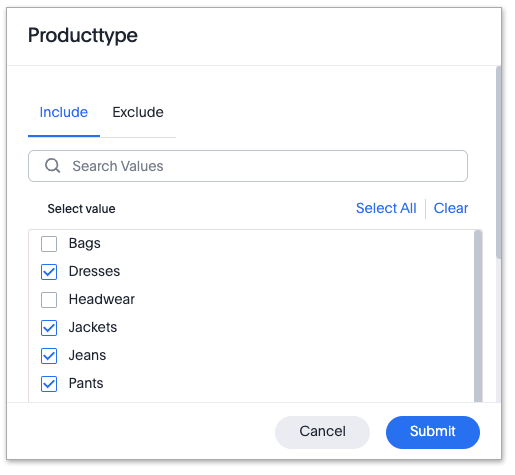
-
If you want to exclude values, select Exclude and choose values to exclude.
You can also include values in bulk, by clicking + Add values in bulk, and adding values separated by a comma (,) or a semicolon (;) or by putting them on separate lines.
-
Click Submit.
-
Click Save changes.
| ThoughtSpot recommends to not use more than 1,000 filter values in a Model. |
Progressive Model filters
Previously, any filter defined at the Model level applied to every query based on that Model. Now, you can define which table a filter applies to in the Model TML. Once defined, the filter only applies to queries that include columns from that specific table. For more information, see TML for Models.
Adding parameters
To add parameters to your Model, do the following:
-
Click the Parameters tab.
-
Click Add Parameter.

-
In the Parameter name text box, enter a name for your Parameter. This name should be unique for the object, and easy for users to understand.
-
Optionally, enter a description for the Parameter in the Add a description text box. Use this field to add additional information users might need before using this Parameter in their analysis. It is a best practice to use this field to specify the formulas this Parameter is used in, in addition to any other information you add.
-
Under Data settings, specify the data type the Parameter must be: Integer, Double, String, Boolean, or Date. For more information about data types, refer to Data types.
-
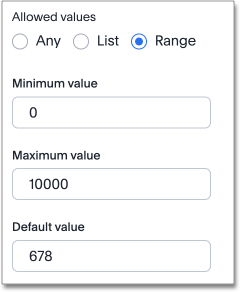
For integer, double, or date data types, specify the allowed values: Any, List, or Range. For the string data type, specify either Any or List.
Any Allows any value within the data type’s constraints.
List Allows values only in the list you create. Enter a value in the Enter value… text box, and optionally enter what the value should display as in the Display as… text box. To add more values, select + Add row. To delete values, select the x to the right of the row the value is in.
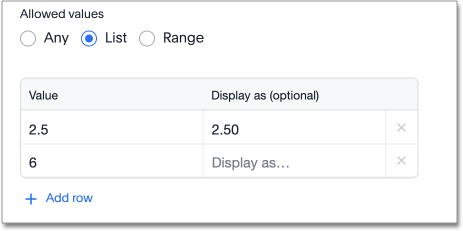
Range Allows values only within the range you specify. In the Minimum value and Maximum value text boxes, specify the values the range begins and ends with.
-
For the boolean data type, optionally set custom names for
trueandfalse; for example,0and1. -
Set the default value for your Parameter. In the default value text box, enter the value this Parameter should default to. For the boolean data type, the Default value option is a dropdown.
trueandfalseare the only options. -
Select Save.
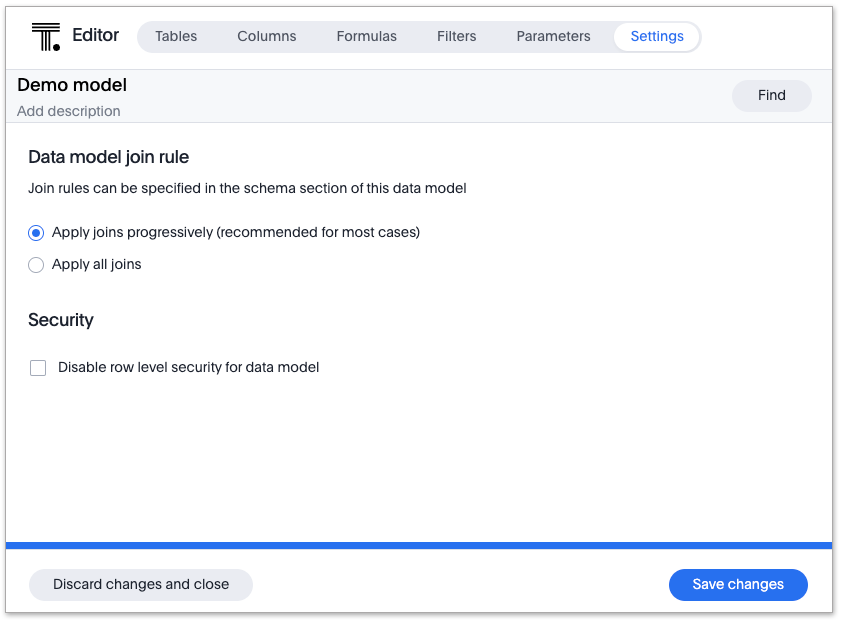
Settings
You can set properties for your model, including join rules and security.
To set properties for your Model, do the following:
-
Click the Settings tab.
-
For Data model join rule choose one of the following:
-
Apply joins progressively (recommended for most cases)
-
Apply all joins
-
-
For Security you have the option to disable row level security for your data model.
Often, a Model includes several dimension tables and a fact table. With progressive joins, if your search only includes terms from the fact table, you can see all of the rows that satisfy your search. But as you add terms from dimension tables, the total number of rows shown may be reduced, as the joins to each dimension table are applied. It works like this:
-
If you choose Apply joins progressively (recommended for most cases), joins are only applied for tables whose columns are included in the search.
-
If you choose Apply all joins, all possible joins are applied, regardless of which tables are included in the search.
When using Apply joins progressively, the number of rows in a search using the Model depends on which tables are part of the search. The Model contains the results of a defined query in the form of a table. So if a particular dimension table is left out of the search, its joins are not applied.
-
-
Click Save changes.
-
In the Describe your model window, name and describe your model (if you haven’t already), and click Save.
-
Click Exit data model.
Model TML
Additional Model properties can be defined via TML.
Reference date constraints, date bucket settings, and data panel column groups.
Editing a Model
If you created a Model, or you have edit permissions on it, you can make changes such as adding sources and columns, adding or editing formulas, changing relationships, and changing column names. You can also rename a Model or change its description.
To edit a Model:
-
Go to the Data workspace tab.
-
Select Data objects.
-
Select Models.
-
Select the name of the Model you want to edit.
-
Select the Edit model button in the upper-right of the screen.
-
Make your changes to the Model.
Edit tables
Using the More menu
in the upper right of a table, you can edit a table in the following ways:-
Add Join
-
Rename table
-
Duplicate table
-
Remove table
-
Show Join Recommendation
-
-
Select Save changes.
Making a copy of a Model
To make a copy of a Model:
-
Go to the Data workspace tab.
-
Select Data objects.
-
Select Models.
-
Select the name of the Model you want to make a copy of.
-
Open the More menu
 and select Make a copy.
The make a copy dialog appears.
-
Change the name and description, as needed, and select Save.
When you navigate back to the Model page, your new Model name appears in the list.
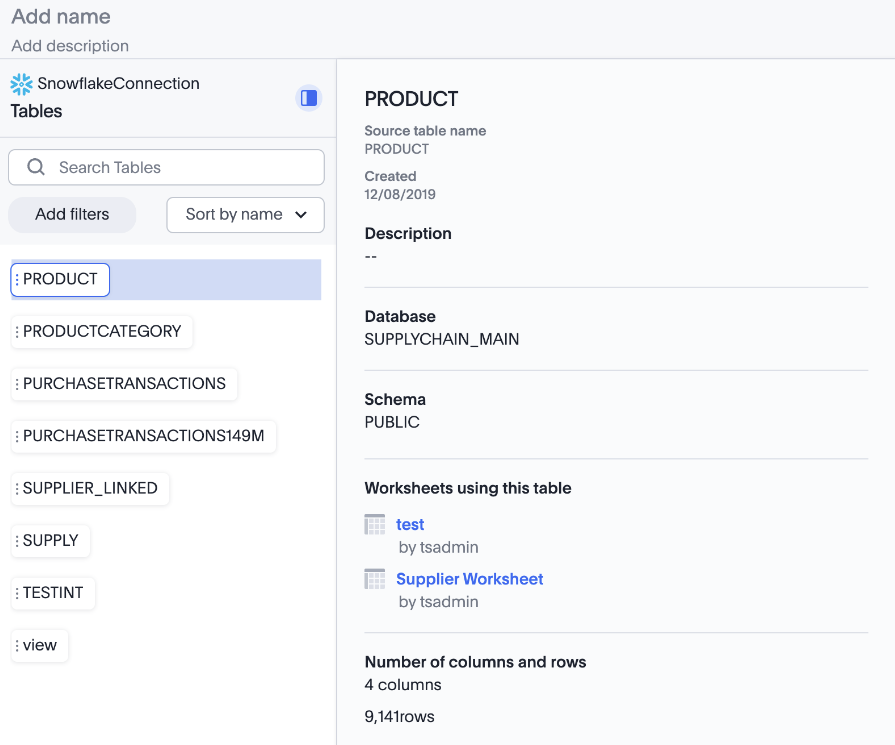
Knowledge cards
With knowledge cards, you can see more detail about tables and columns before you add them to your Model.
To view a knowledge card, do the following:
-
Click the knowledge card button
 .
. -
Click a table or column.
Role-playing dimensions
A role-playing dimension is when a single physical dimension is referenced multiple times in a fact table, with each reference linking to a logically distinct role for the dimension. ThoughtSpot supports role-playing dimensions for Models. For example, you may have a fact table joined to a dimension table more than once. This is useful for cases such as when you have a sales fact table and an employee dimension table, where the sales table may record the employee ID who created, updated, and owned a record. In this case, you would want to join these three columns to the employee dimension table on employee ID.
Now, we support table aliases for chasm trap models, and aliasing the primary fact table. Note that data security (row-level and column-level security) apply to the aliased table as well as the original table. We also now support progressive filters for table aliases.
Implementing role-playing dimensions with Models
To implement role-playing dimensions with Models, do the following in the Model editor:
-
Go to the Tables tab.
-
Select the More menu
in the upper right of the dimension table that you want to use in a different role. -
Select Duplicate Table.
-
In the Duplicate Table Name window that opens, assign an alias (since 2 tables cannot have the same name) by entering a new name (or alias) for that table.
-
Click Save.
-
Join this logical copy of the dimension table to the fact table with the join condition corresponding to the new role.
-
Go to the Columns tab.
-
Add columns from the new role-playing dimension.
It will appear as a new table (with the alias assigned in step 4) on the left panel in the Columns tab of the model. You can tell it’s a role-playing dimension because the original table name appears in parentheses () next to the new name.
| Copies/aliases of tables that are on the "many" side of a join are not supported in Models. |
Cyclic dependencies
A cyclic dependency occurs when Models and views reference each other directly or indirectly, forming a loop in the dependency graph. For instance references such as, Model M1 → View V1 → Model M2 → View V2 → back to Model M1
Even though each step may look valid in isolation, the overall graph becomes cyclic. These cycles introduce risks during cluster upgrade and must be avoided.
To resolve circular dependencies, avoid linking two Models directly to one another. Instead, move the shared logic into a View at the data warehouse level. You can then reference this View in both Models, or create a new Model that combines the View with the required base tables. This approach preserves reuse and consistency while breaking direct model-to-model dependency chains, keeping the overall dependency graph acyclic and more resilient to upgrades and query planning issues.
The following are a few ways in which cyclic dependency gets created:
- First‑level dependency (Direct cycle)
-
-
Create a Model M1 using:
-
Product table (T1)
-
Product Category table (T2)
-
-
Select all columns and save M1
-
Create a view V1 from M1
-
Select all columns and save V1
-
Add V1 back into M1
-
This creates a direct cycle: M1 → V1 → M1
- Multi‑level dependency (Indirect cycle)
-
-
Create a Model M1 using:
-
Product table (T1)
-
Product Category table (T2)
-
Select all columns
-
-
Create a view V1 from M1
-
Select columns only from Product (T1) and save V1
-
Create a second Model M2 using:
-
Purchase Transactions table (T3)
-
View V1
-
-
Create a view V2 from M2
-
Select columns from Purchase Transactions (T3) and save V2
-
Add V2 back into M1
-
This creates an indirect (multi‑level) cycle: M1 → V1 → M2 → V2 → M1