Upload custom geo maps
ThoughtSpot supports rendering of many countries and subdivisions by default. In addition, you can upload your own custom maps and visualize data on geo charts with regions that are specific to you and your organization. For example, upload a map of the United States with regions such as Southwest, Northeast, and so on.
To view the countries and subdivisions that ThoughtSpot supports by default, refer to Geo map reference.
Upload up to 50 custom map files. To increase this limit, contact ThoughtSpot support.
Prerequisites
-
To upload custom maps, you must have admin privileges.
-
Your custom map must be a
TopoJSONfile. The file can’t be more than 100 MB.TopoJSONis a JSON format that encodes geographic data structures into a shared topology. For more information on TopoJSON files and how to structure them, see TopoJSON specification. -
If you use a remote URL to upload your custom map, you must contact ThoughtSpot support and ask them to add the base URL of the custom map to your CSP override list.
-
Your
TopoJSONfile must follow the EPSG:4326 standard.
Upload your own custom maps
To upload your own custom maps, follow these steps:
-
Go to your profile and select Admin settings, and select the All Orgs tab (if there are multiple Orgs).
-
Select Chart customization.
-
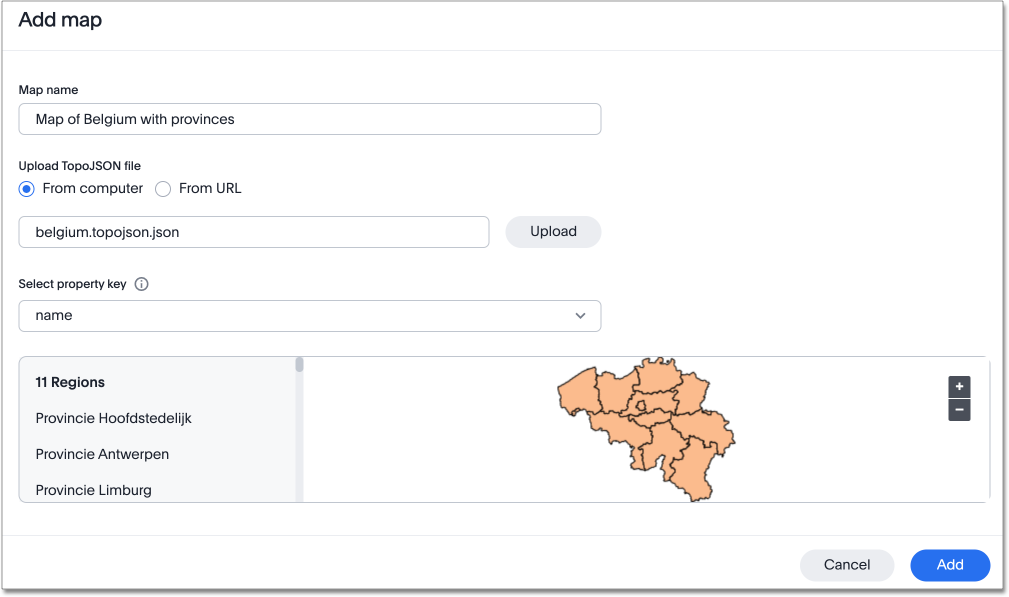
Select Add map.
-
Enter a name for the map in the Map name text box. Make sure it is a unique name so that you can find it later.
-
Under Upload TopoJSON file, select either From computer or From URL.
-
If you select From computer, select Upload. Select a file from your computer’s file picker when it appears.
-
If you select From URL, enter the URL for the file in the Remote URL text box, and select Upload.
If you use a remote URL to upload your custom map, you must contact ThoughtSpot support and ask them to add the base URL of the custom map to your CSP override list. For example, if the remote URL for your custom map is https://raw.githubusercontent.com/bmesuere/belgium-topojson/master/belgium.json, ThoughtSpot support must add https://raw.githubusercontent.com to your CSP override list.
Alternatively, if you have developer privileges, you can add the base URL yourself. Navigate to Develop in the upper navigation menu in ThoughtSpot. If you don’t see Develop, you don’t have developer privileges. Select Security Settings under Customizations. Add the base URL to CSP connect-src domains.
-
Under Select property key, use the dropdown to select the property key that defines the region names in your TopoJSON file. The property key must be unique for each value or region name in your file. If you select the correct key, a preview of the map and a list of the regions it defines appears in the preview box. If you do not select the correct key, it returns an error, and does not show a preview.
-
Select Add.
Use your custom map to visualize data
After you upload your custom map, use it to visualize your geographical data. You must designate the column(s) in your data source as Geo columns, and specify the custom map you created. In order to see the custom map when you search on an attribute, you must designate the custom map option in the Geo config property of the attribute in the Model.
To learn how to designate columns as Geo data and specify a custom map, follow these steps:
-
Find the GEO CONFIG for the column that contains the geographical data.
-
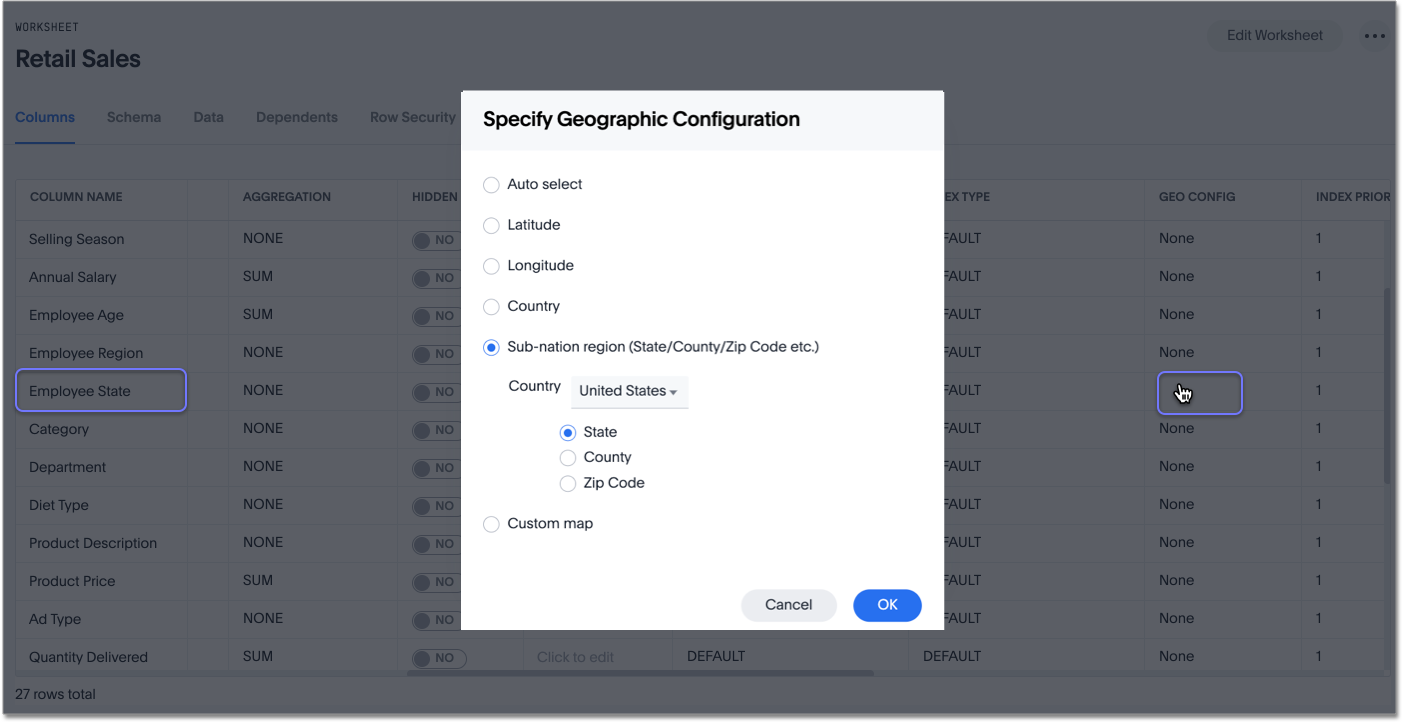
Select the GEO CONFIG for the column. The Specify Geographic Configuration dialog box appears.
-
Select the correct geographic configuration, depending on the kind of geo data the column contains. If you would like to use a custom map to visualize the data, select Custom map, and select the correct map from the dropdown that appears.
If your data includes latitude and/or longitude columns that are stored as a numeric data type (
DOUBLE), make these changes for those columns:-
Change the Type to
ATTRIBUTE. -
Change ADDITIVE to
NO/FALSE.
-
-
Save your changes.
Edit a custom map
If you must make changes to the custom map you uploaded, you can edit it from the Admin Console. To edit your custom map, follow these steps:
-
Go to your profile and select Admin settings, and select the All Orgs tab (if there are multiple Orgs).
-
Select Chart customization
-
Select Custom maps.
-
In the list of custom maps, find the name of the map you would like to edit.
-
Select Edit.
-
Edit the map name or upload a new TopoJSON file.
-
If the map has any dependents, a warning appears at the top of the Edit map dialog: Changes to the map will update n objects. View all. To view the dependents that will change if you edit the map, select View all.
-
Select Save.
When you edit a custom map, ThoughtSpot expects your data to be in sync with the new map. For example, if you remove a region in the file you upload, ThoughtSpot will not show that region in geo charts you create, even if the region is still in your data.
Delete a custom map
Delete a custom map from the Admin Console. To delete your custom map, follow these steps:
-
Go to your profile and select Admin settings, and select the All Orgs tab (if there are multiple Orgs).
-
Select Chart customization
-
Select Custom maps.
-
In the list of custom maps, find the name of the map you would like to delete.
-
Select Delete.
-
If the custom map has any dependents, a Fix dependent objects dialog appears, warning you that you can’t delete the custom map while it has dependents. To delete the map, you must first remove it from the dependent objects' geo configuration. See How to edit geographic columns.
If the custom map does not have dependents, a confirmation dialog appears. Select Delete again.
Related information