Configure Azure AD external OAuth for a Redshift connection
ThoughtSpot supports Microsoft Azure Active Directory (AD) OAuth for a Redshift connection. With Azure AD OAuth, the authorization server generates an access token from Azure AD on behalf of the ThoughtSpot user which authenticates them with Redshift and authorizes ThoughtSpot to query the database using their Redshift user account.
|
OAuth requires users to log in and authorize. The frequency of login will depend on the token expiry. ThoughtSpot supports Authorization Code grant flow in OAuth authentication. |
Prerequisites
To set up Azure AD OAuth for Redshift, you must have the following:
-
An AWS account.
-
An Amazon Redshift cluster.
-
A downloaded Amazon Redshift JDBC SDK driver-dependent library 2.1.0.4 and onwards. You must unzip the Amazon Redshift JDBC JAR zipped folder. All prior Amazon Redshift driver versions don’t support native IdP.
-
An Azure account with an active subscription. You need an admin role to set up the application on Azure AD.
Set up your Azure application
To set up your Azure application, you must create both an OAuth application and a Redshift Client application. The OAuth application is used to authenticate the user and provide a login token. The Redshift Client application is used to retrieve user and group information.
Step 1: Create OAuth application
To create a Redshift OAuth application, do the following:
-
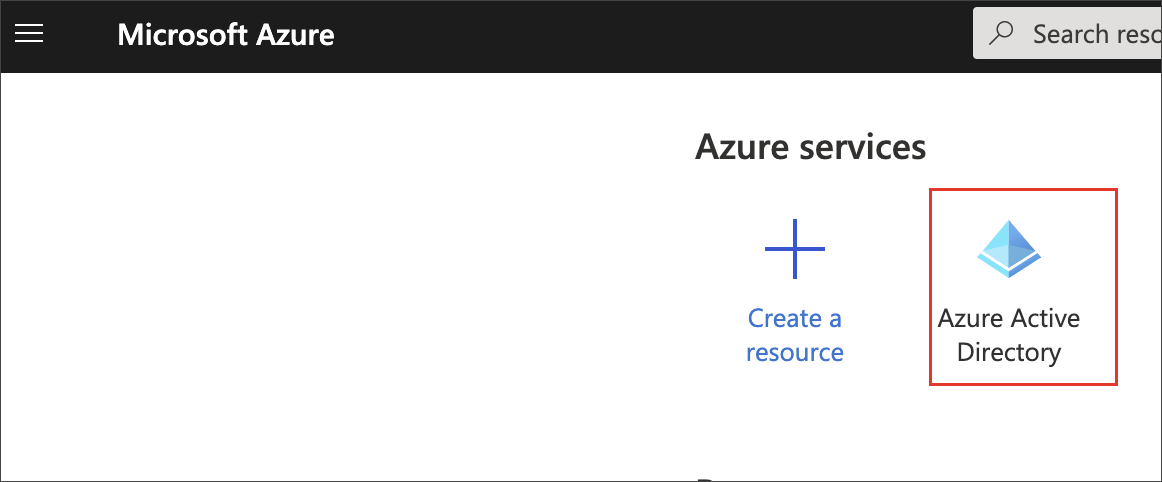
Sign in to the Microsoft Azure portal.
-
Navigate to Azure Active Directory.
-
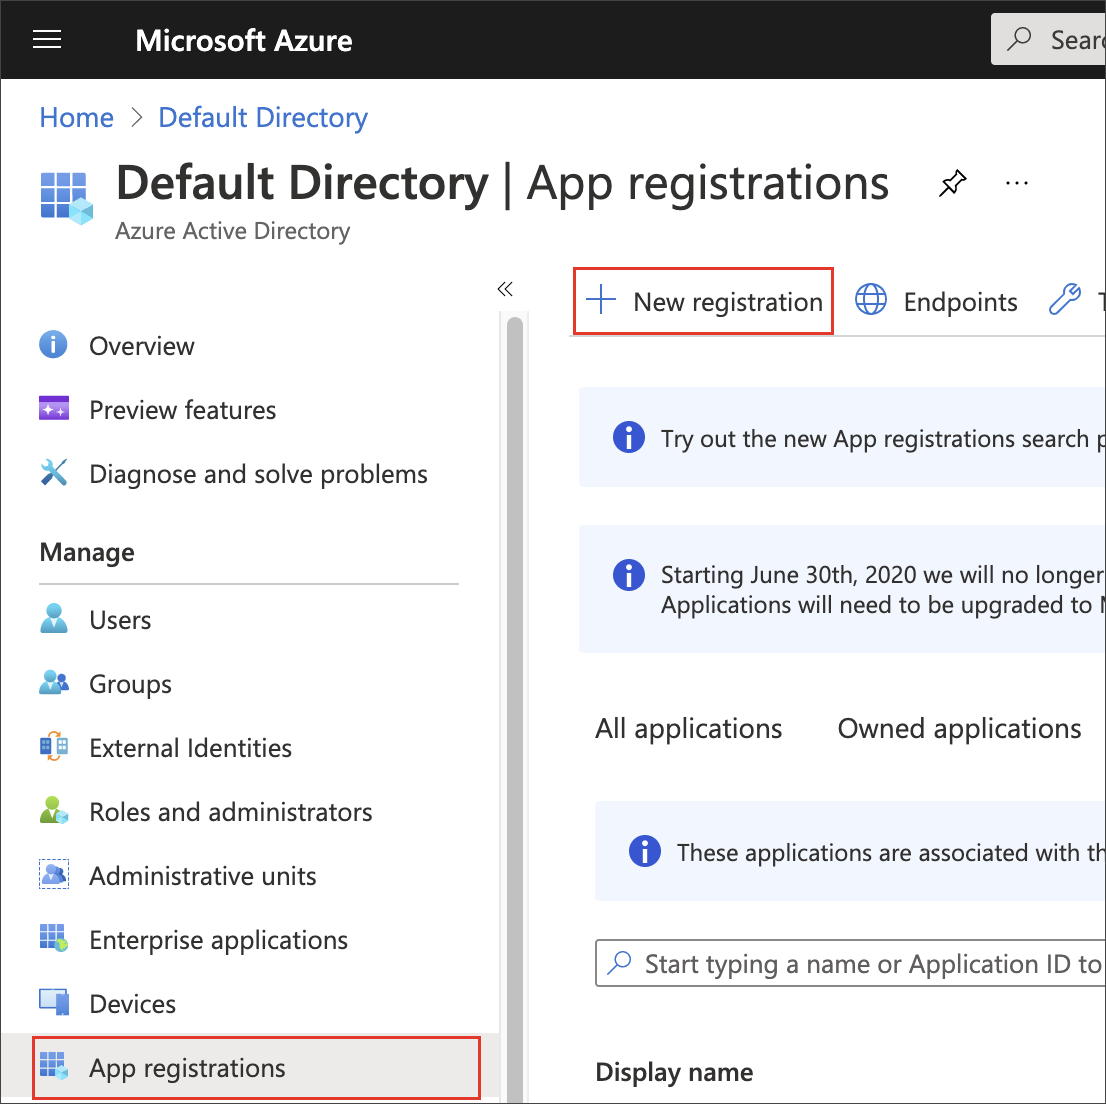
From the Manage section, select App registration, then New registration.
-
For Name, enter a name for your application.
Example:
Redshift OAuth User Resource -
For Redirect URI, choose Public client/native(mobile and desktop) and enter the redirect URL
https://<your-thoughtspot-instance-host>/callosum/v1/connection/generateTokens. Keep the default settings for the remaining fields. -
Select Register.
-
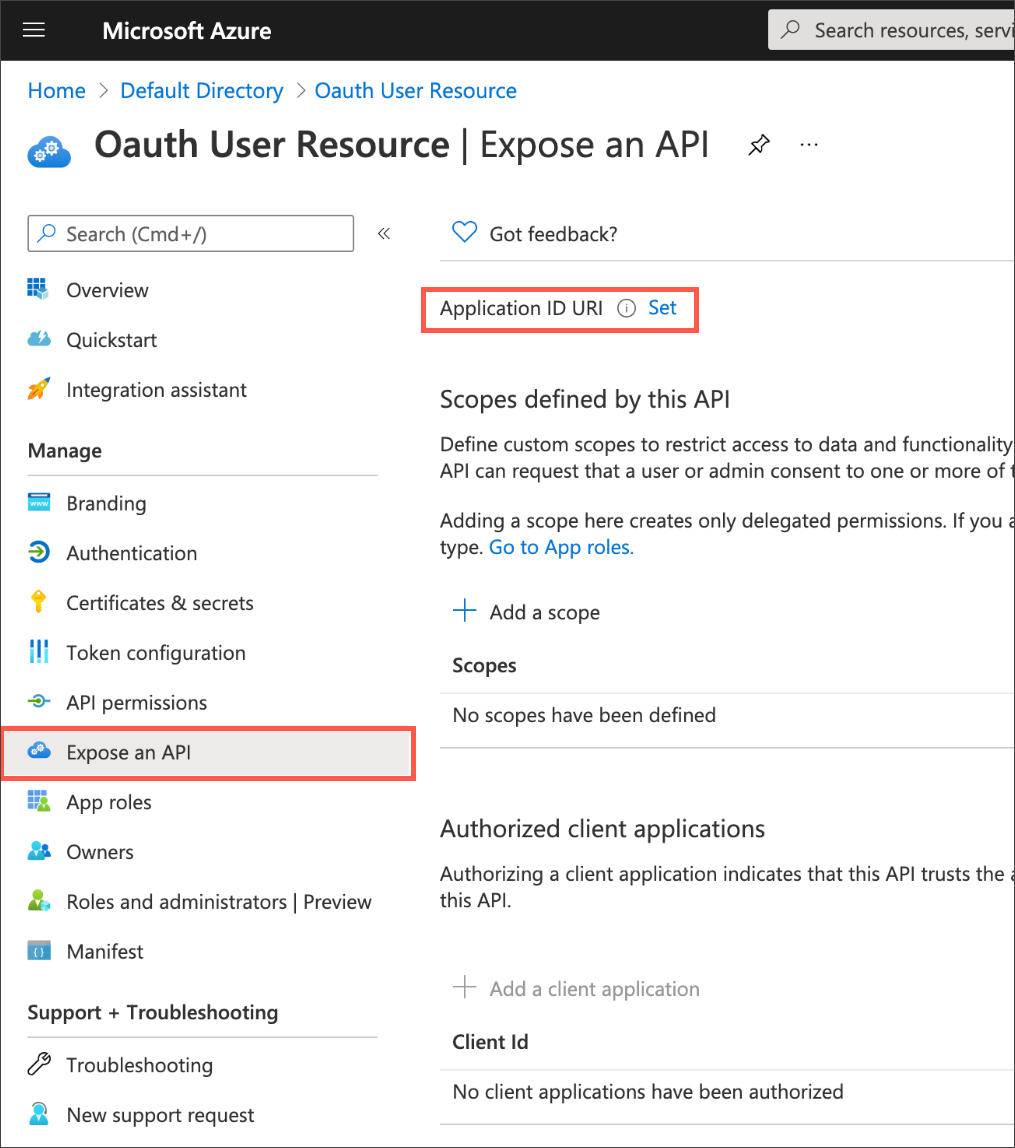
After the application is created, select Expose an API from the left navigation pane. If this is your first setup, Set appears to the right of the Application ID URI.
-
Next to Application ID URI, select Set and change its value from
api://<alphanumeric value>tohttps://<alphanumeric value>and select Save.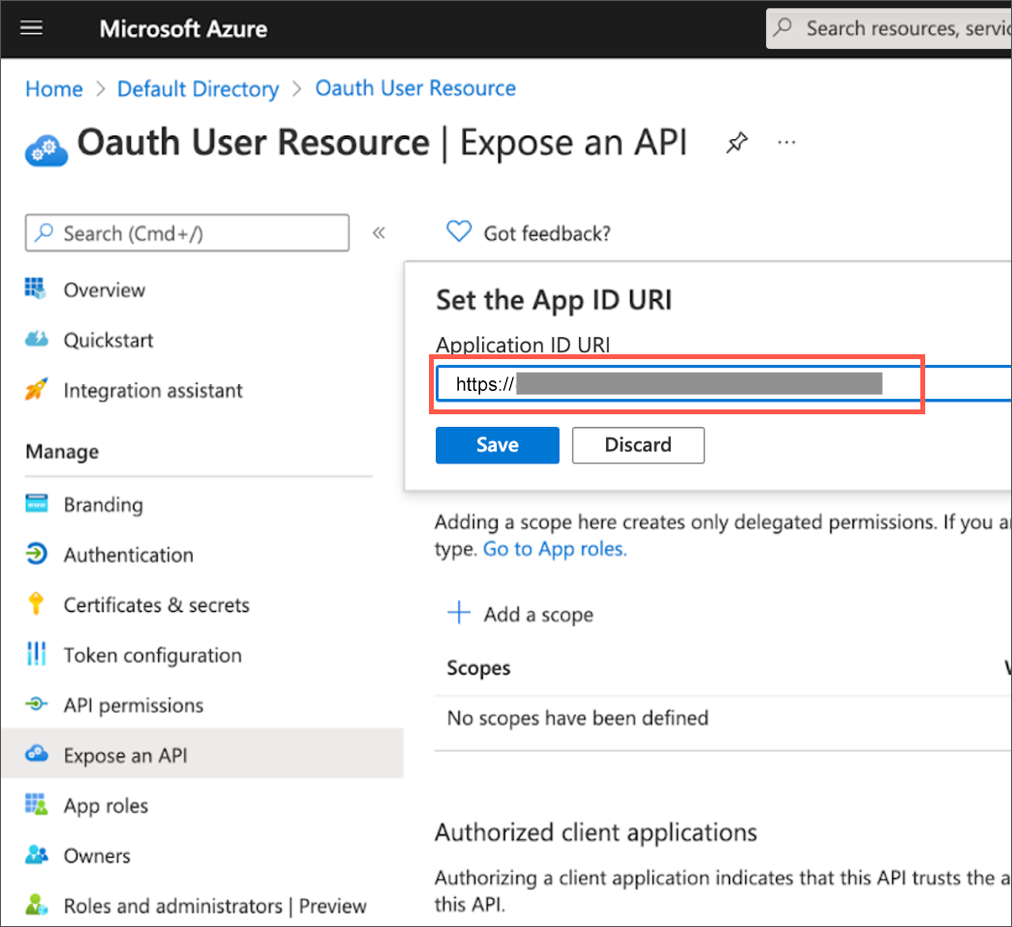
The Application ID URI must be unique within your organization’s directory, such as https://your.company.com/4d2a8c2b-a5f4-4b86-93ca-ack45667. -
Select Add a scope.
-
For Scope name, enter a name (for example,
session:role-any). -
Select who can consent.
-
For Admin consent display name, enter a display name (for example,
Any). -
For Admin consent description, enter a description of the scope.
-
Select Add scope.
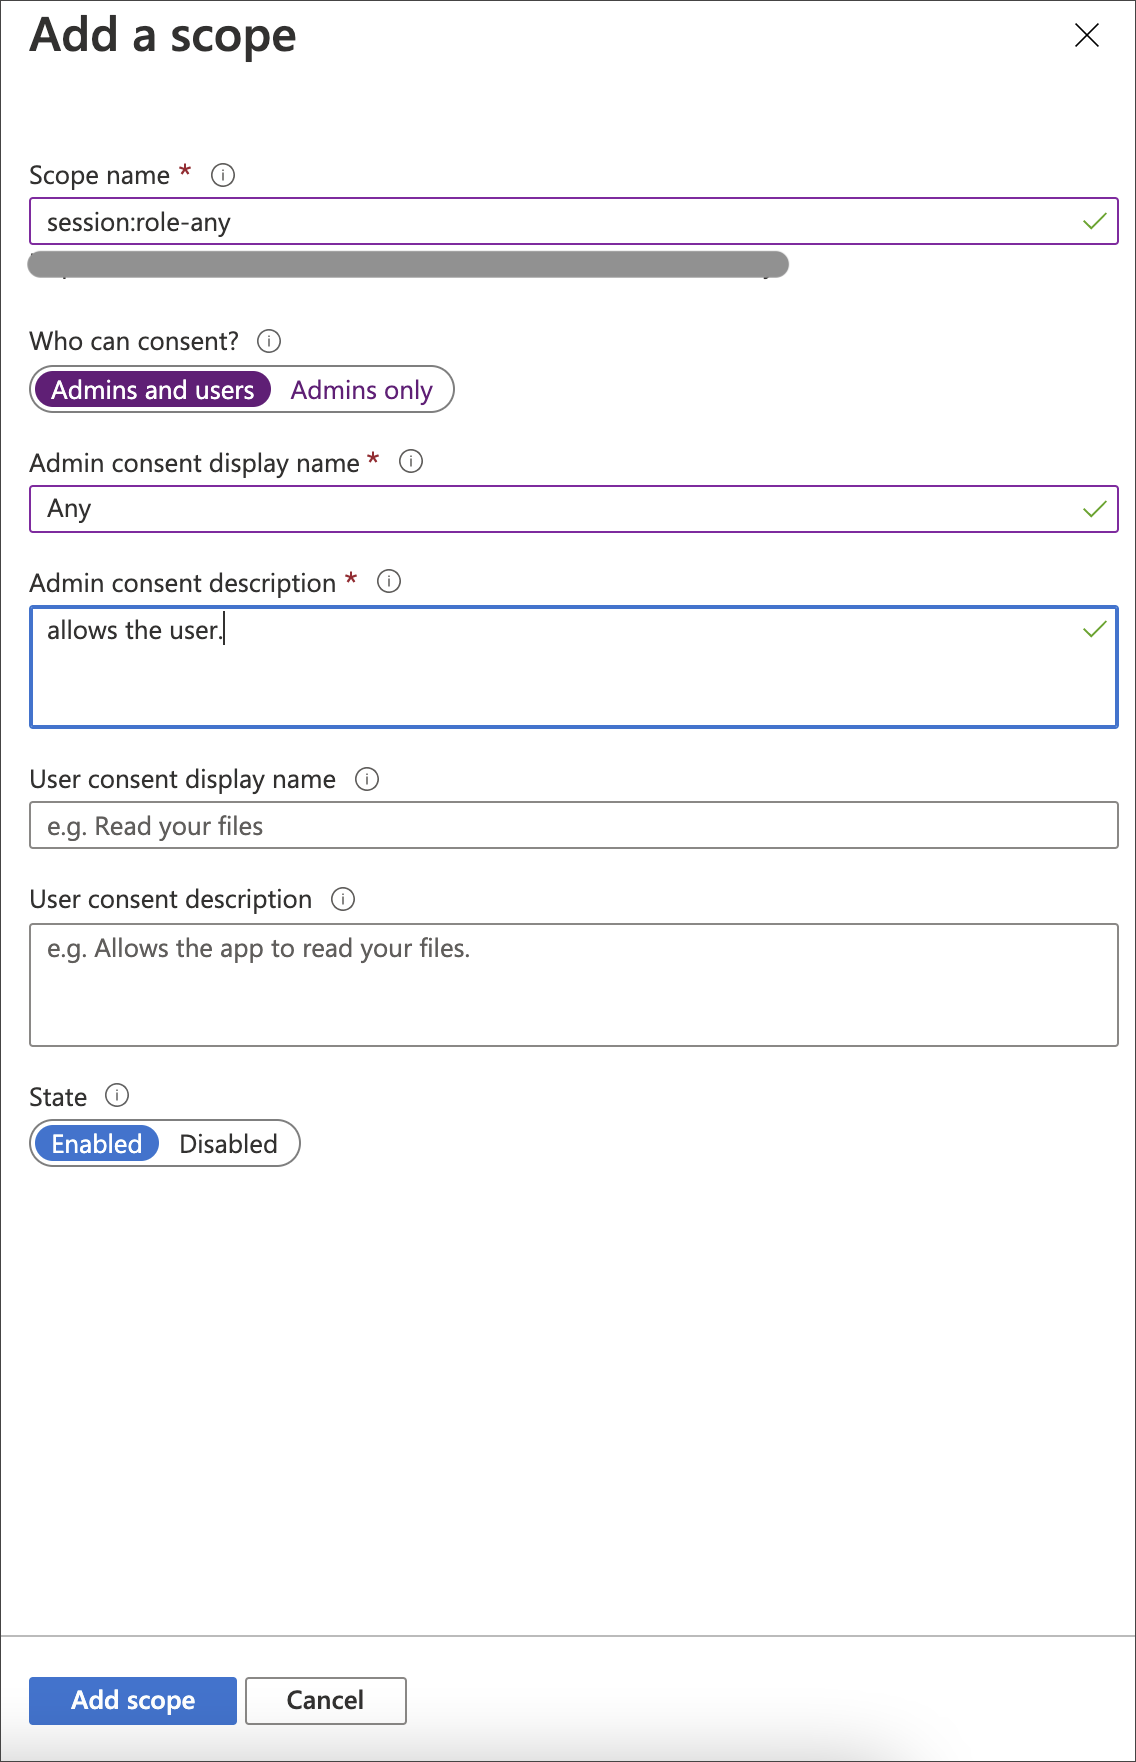
When you create the scope in your Azure AD application, you must set it to "any" so that a user can later switch to any of their allowed roles when making a JDBC connection using the obtained token. -
After the scope is added, note down the application ID URI and API scope in order to register the IdP in Amazon Redshift later. In the following section, <Microsoft_Azure_Application_ID_URI> refers to the application ID URI.
Step 2: Create Redshift Client application
To create a Redshift client application, do the following:
-
Sign in to the Microsoft Azure portal and navigate to Azure Active Directory, if needed.
-
Select App registrations, then select New registration.
-
For Name, enter a name for the client (for example,
redshift_client. Keep the default settings for the remaining fields. -
Select Register.
-
Once the app is created, select Overview.
-
From the Application (client) ID field, copy the ID. This ID is referred to as
<OAUTH_CLIENT_ID>in the steps that follow.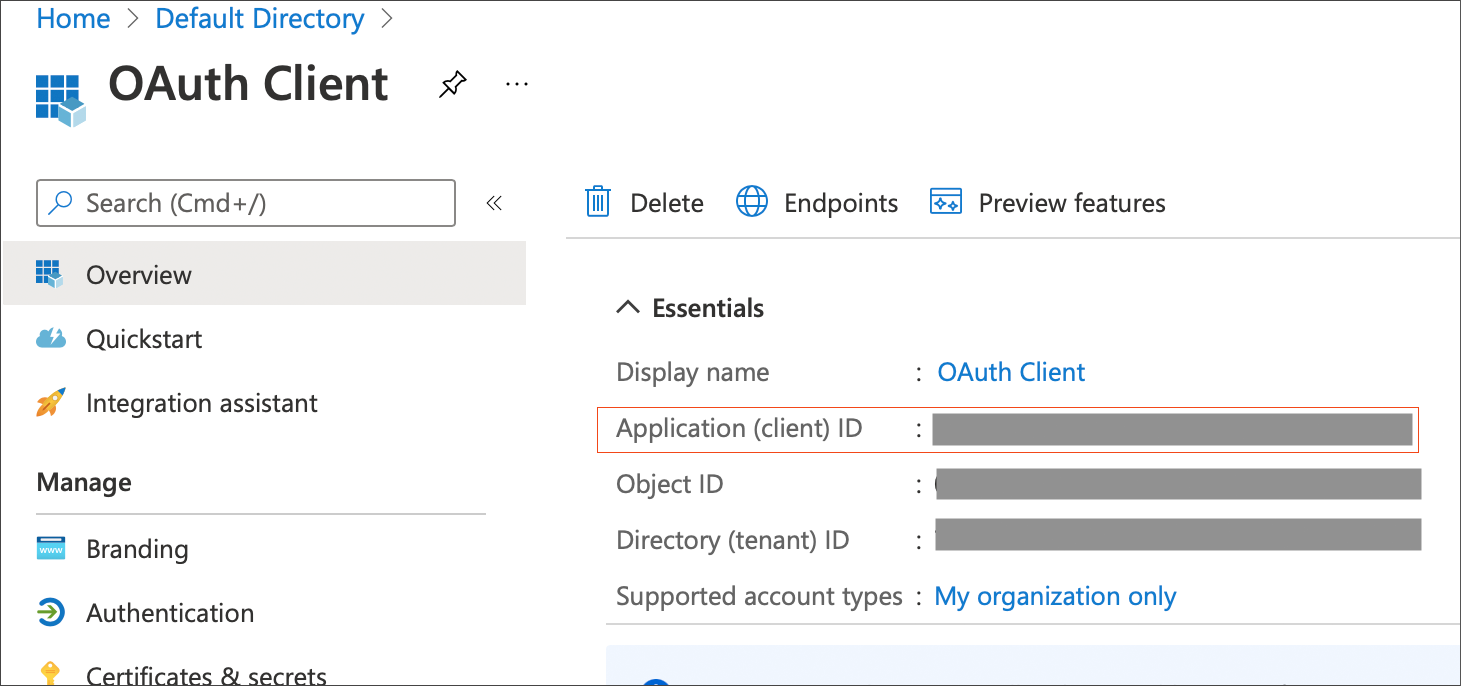
-
From the Directory (tenant) ID field, copy the ID. This ID is referred to as
<OAUTH_TENANT_ID>in the steps that follow. -
Select Authentication from the left navigation pane, and under Web, specify the redirect URI using the following format:
<https://<public url of your ThoughtSpot instance>/callosum/v1/connection/generateTokens>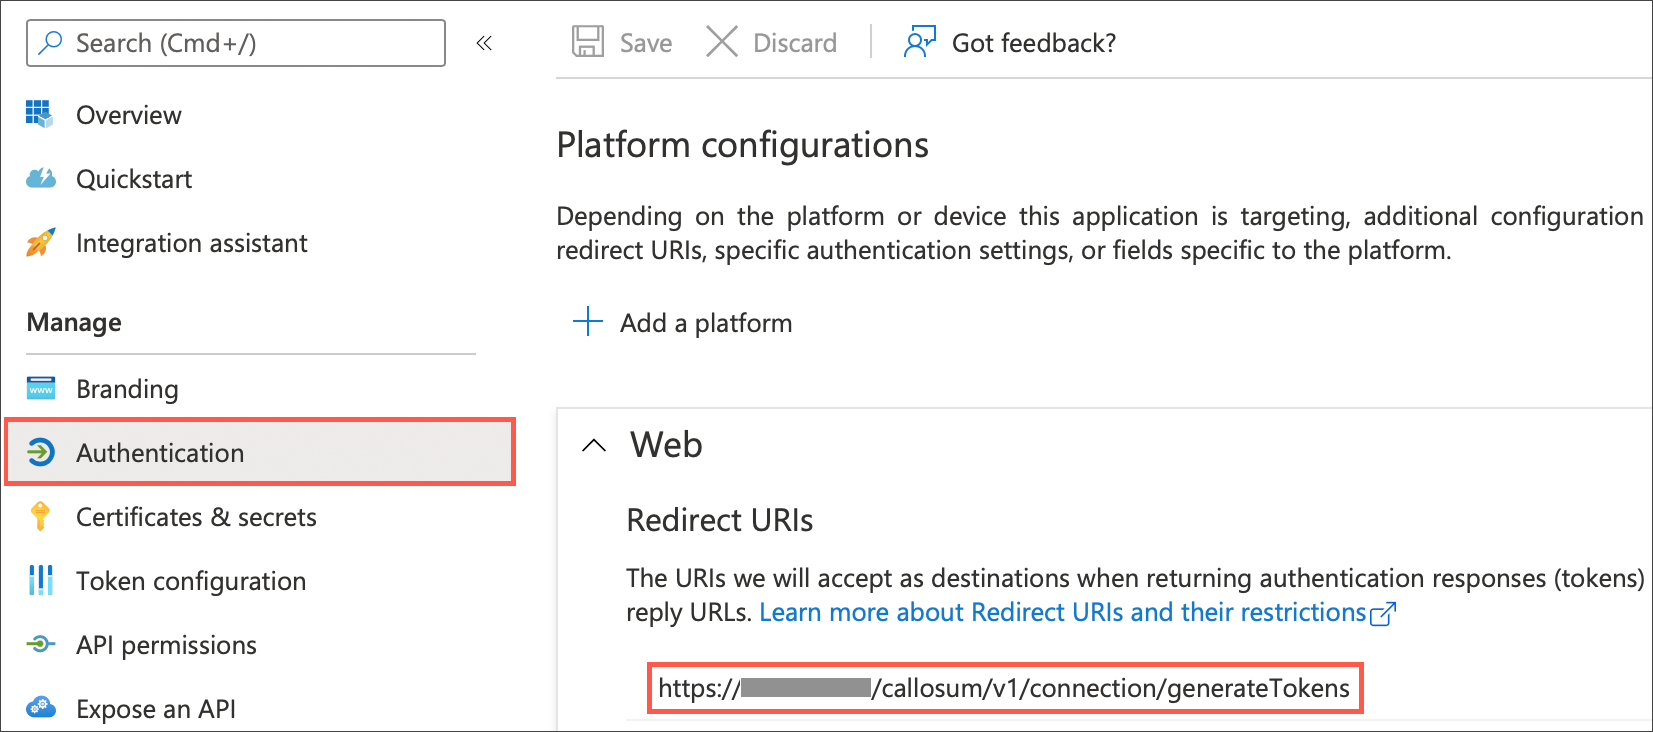
-
Select Certificates & secrets from the left navigation pane, then select New client secret.
-
Enter a description, select an expiration for the secret or specify a custom lifetime. The Microsoft recommended default expiration value is 6 months.
-
Choose Add.
-
Copy the Value of the secret you just created. This is referred to as
<OAUTH_CLIENT_SECRET>in the steps that follow. Note that the secret value will be visible for one time only and cannot be read afterwards. -
Select API permissions from the left navigation pane.
-
Select Add a permission and select Microsoft Graph.
-
Select Application permissions.
-
Search the directory and select the
Directory.Read.Allpermission. -
Select Add permissions.
-
After the permission is created, select Grant admin consent.
-
In the pop-up box, choose Yes to grant the admin consent.
The status for the permission shows as Granted for aws with a green check mark.
Step 3: Create Azure AD Group
To create an Azure AD group, do the following:
-
On the Azure Ad home page, under the Manage section of the navigation pane, choose Groups.
-
Choose New group.
-
In the New Group section, provide the following information:
-
Group type
-
Group name
-
Membership type
-
-
Click No members selected and then search for the members in the right search bar.
-
Select the members and choose Select. You can see the number of members in the Members section.
-
Select Create.
Collect Azure AD information
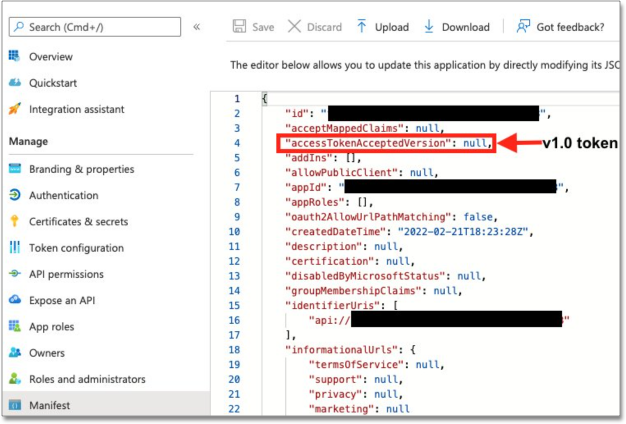
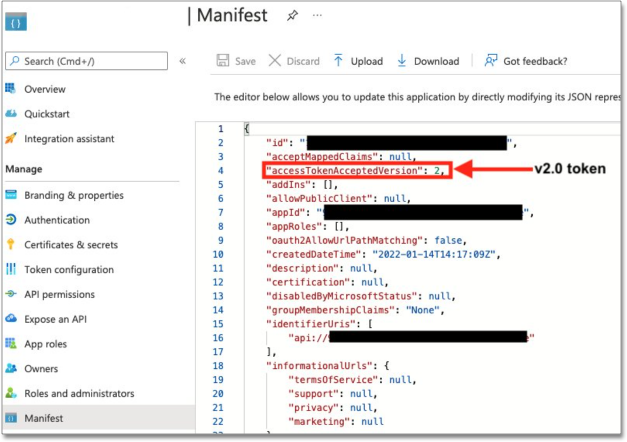
Before collecting the Azure AD information, you must identify the access token version from the application you created earlier on the Azure portal in Step 1: Create OAuth Application. Under the Manage section of the navigation pane, select Manifest, then view the accessTokenAcceptedVersion parameter. Null and 1 values indicate v1.0 tokens, and 2 values indicate v2.0 tokens.
To configure your IdP in Amazon Redshift, do the following:
-
Sign in to the Microsoft Azure portal and navigate to Azure Active Directory, if needed.
-
Collect the issuer, referred to as <Microsoft_Azure_issuer_value> in the following steps. If you’re using the v1.0 token, use
https://sts.windows.net/<Microsoft_Azure_tenantid_value>/. If you’re using the v2.0 token, usehttps://login.microsoftonline.com/<Microsoft_Azure_tenantid_value>/v2.0.-
For the issuer, select the
<OAUTH_TENANT_ID>found in Step 2: Create Redshift Client application.
-
-
For the client_id, collect the
<OAUTH_CLIENT_ID>found in Step 2: Create Redshift Client application. -
For the client_secret, collect the
<OAUTH_CLIENT_SECRET>found in Step 2: Create Redshift Client application. -
Collect the audience. If you’re using a v1.0 token, the audience value is the application ID URI (for example,
https://991abc78-78ab-4ad8-a123-zf123ab03612p). If you’re using a v2.0 token, the audience value is the client ID value (for example,991abc78-78ab-4ad8-a123-zf123ab03612p).Both application ID URI and client ID can be found by clicking Overview from the left navigation pane and reading the Essentials section.
Set up the IdP on Amazon Redshift
To set up the IdP on Amazon Redshift, do the following:
-
Sign in to Amazon Redshift with a superuser username and password using query editor v2 or any SQL client.
-
Run the following SQL:
CREATE IDENTITY PROVIDER <idp_name> TYPE azure
NAMESPACE '<namespace_name>'
PARAMETERS '{
"issuer":"<Microsoft_Azure_issuer_value>",
"audience":["<Microsoft_Azure_token_audience_value>"],
"client_id":"<Microsoft_Azure_clientid_value>",
"client_secret":"<Microsoft_Azure_client_secret_value>"
}';
For example, the following code uses a v1.0 access token:
CREATE IDENTITY PROVIDER test_idp TYPE
azure NAMESPACE 'oauth_aad'
PARAMETERS '{
"issuer":"https://sts.windows.net/87f4aa26-78b7-410e-bf29-57b39929ef9a/",
"audience":["api://991abc78-78ab-4ad8-a123-zf123ab03612p"],
"client_id":"123ab555-a321-666d-7890-11a123a44890",
"client_secret":"KiG7Q~FEDnE.VsWS1IIl7LV1R2BtA4qVv2ixB"
}';
The following code uses a v2.0 access token:
CREATE IDENTITY PROVIDER test_idp TYPE azure NAMESPACE 'oauth_aad' PARAMETERS '{ "issuer": "https://login.microsoftonline.com/87f4aa26-78b7-410e-bf29-57b39929ef9a/v2.0", "audience":["991abc78-78ab-4ad8-a123-zf123ab03612p"], "client_id":"123ab555-a321-666d-7890-11a123a44890", "client_secret":"KiG7Q~FEDnE.VsWS1IIl7LV1R2BtA4qVv2ixB" }'; -
To alter the IdP, use the following command (this new set of parameter values completely replaces the current values):
ALTER IDENTITY PROVIDER <idp_name> PARAMETERS '{ "issuer":"<Microsoft_Azure_issuer_value>/", "audience":["<Microsoft_Azure_token_audience_value>"], "client_id":"<Microsoft_Azure_clientid_value>", "client_secret":"<Microsoft_Azure_client_secret_value>" }'; -
To view a single registered IdP in the cluster, use the following code:
DESC IDENTITY PROVIDER <idp_name>; -
To view all registered IdPs in the cluster, use the following code:
select * from svv_identity_providers; -
To drop the IdP, use the following command:
DROP IDENTITY PROVIDER <idp_name> [CASCADE];
Set up Amazon Redshift permissions to external identities
The users, roles,and role assignments are automatically created in your Amazon redshift cluster during the first login using your native IdP unless they were manually created earlier.
Create and assign permission to Amazon Redshift roles
In this step, we create a role in the Amazon Redshift cluster based on the groups that you created on the Azure AD portal. This helps us avoid creating multiple usernames manually on the Amazon Redshift side and assign permissions for multiple users individually.
The role name in the Amazon Redshift cluster looks like <namespace>:<azure_ad_group_name>, where the namespace is the one we provided in the IdP creation command and the group name is the one we specified when we were setting up the Azure application. In our example, it’s oauth_aad:rsgroup.
Run the following command in the Amazon Redshift cluster to create the role:
create role "<namespace_name>:<Azure AD groupname>";For example:
create role "oauth_aad:rsgroup";To grant permission to the Amazon Redshift role, enter the following command:
GRANT { { SELECT | INSERT | UPDATE | DELETE | DROP | REFERENCES } [,...]
 | ALL [ PRIVILEGES ] }
ON { [ TABLE ] table_name [, ...] | ALL TABLES IN SCHEMA schema_name [, ...] }
TO role "<namespace_name>:<Azure AD groupname>";
Then grant relevant permission to the role as per your requirement. For example:
grant select on all tables in schema public to role "oauth_aad:rsgroup";Create and assign permission to an Amazon Redshift user
This step is only required if you want to grant permission to an Amazon Redshift user instead of roles. We create an Amazon Redshift user that maps to an Azure AD user and then grant permission to it. If you don’t want to explicitly assign permission to an Amazon Redshift user, you can skip this step.
To create the user, use the following syntax:
CREATE USER "<namespace_name>:<Azure AD username>" PASSWORD DISABLE;For example:
CREATE USER "oauth_aad:[email protected]" PASSWORD DISABLE;We use the following syntax to grant permission to the Amazon Redshift user:
GRANT { { SELECT | INSERT | UPDATE | DELETE | DROP | REFERENCES } [,...]
 | ALL [ PRIVILEGES ] }
ON { [ TABLE ] table_name [, ...] | ALL TABLES IN SCHEMA schema_name [, ...] }
TO "<namespace_name>:<Azure AD username>";
For example:
grant select on all tables in schema public to "oauth_aad:[email protected]";OAuth connection improvements
If you do not have a valid OAuth access token, you can now directly navigate to the OAuth authorization screen when performing one of the following actions on a connection shared with you:
-
View sample data
-
Create a custom SQL view
-
Edit the connection