Configure OAuth for a Google BigQuery connection
Learn how to configure OAuth in your Google Cloud project. In order to use the OAuth authentication type for a Google BigQuery connection in ThoughtSpot, you must complete these steps. These steps are a representative example that serve as a guide to set up OAuth credentials in your Google Cloud project. For more information, refer to the official Google documentation links provided at the end of this article.
|
OAuth requires users to log in and authorize. The frequency of login will depend on the token expiry. ThoughtSpot supports Authorization Code grant flow in OAuth authentication. |
Each ThoughtSpot instance requires a unique Google BigQuery security integration. Each user in Google BigQuery must have a default warehouse and default role.
The following sections describe how to configure an OAuth consent screen and generate OAuth credentials. If you’ve already configured an OAuth consent screen for another application in your project, you won’t need to create another; you configure only one consent screen for all applications in a project.
| For more information about configuring the Google OAuth consent screen, see the Google Support documentation. |
Configure an OAuth consent screen
-
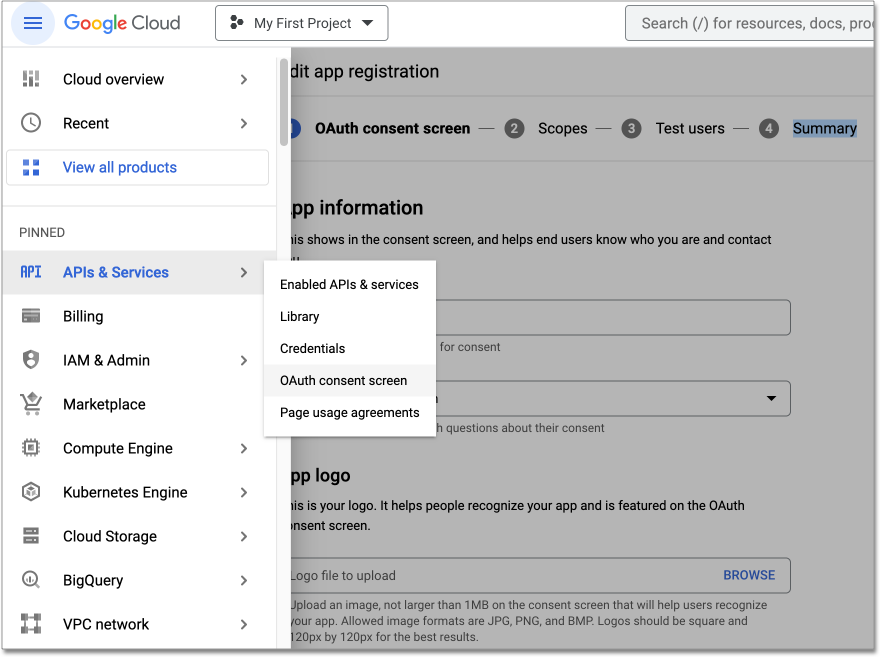
Sign in to your Google Cloud project.
-
In the left menu, select APIs & Services and click OAuth consent screen.
-
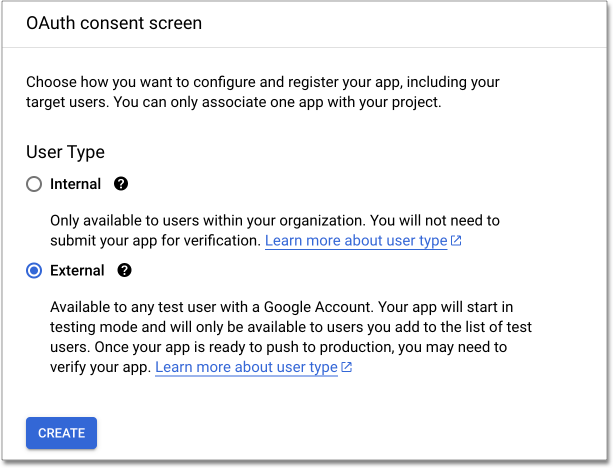
For User Type, select External, and click Create.
-
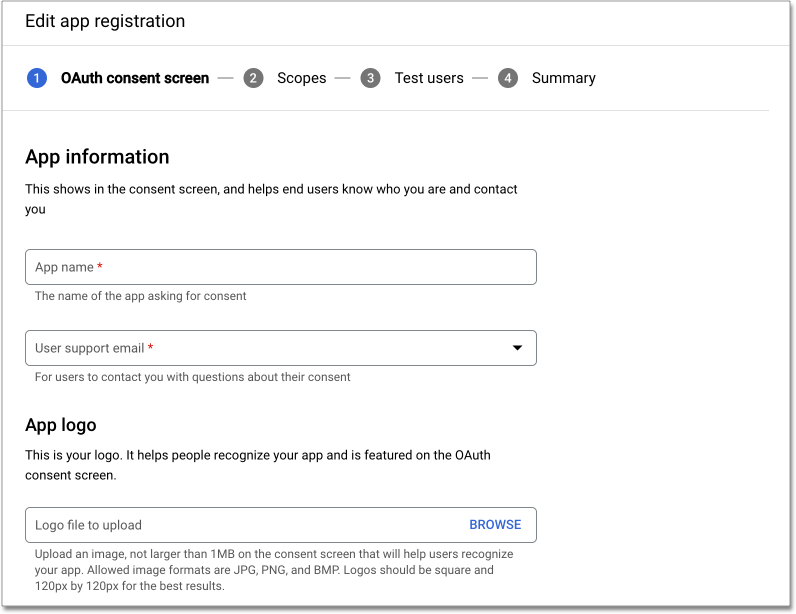
Google displays the OAuth consent screen page. Fill out the fields as follows:
-
For App name, enter the name of the application. In this case, the name is ThoughtSpot_GBQ.
-
For User support email, enter the support email that users should contact with login or consent issues.
-
Click + ADD DOMAIN to reveal the Authorized domain 1 field. In this field, enter the domain of the URL to your ThoughtSpot instance. For example, if ThoughtSpot hosts your instance at
https://<instance_name>.thoughtspot.cloud, the domain isthoughtspot.cloud.com.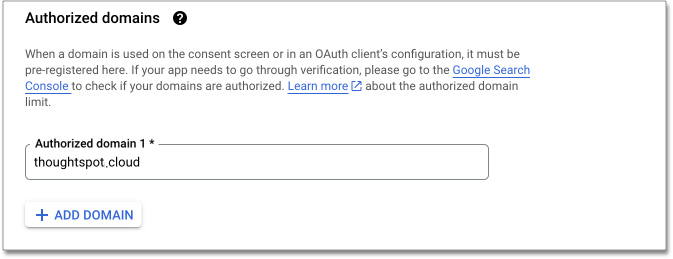
-
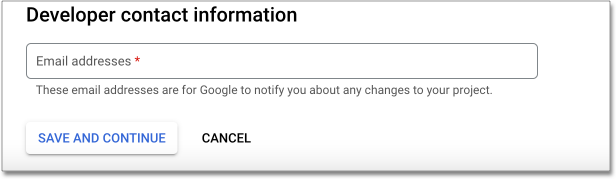
In the Developer contact information section, enter one or more emails addresses that Google can use to contact you about your project. The remaining fields are optional, but you can use them to further customize your consent screen.
-
-
Click SAVE AND CONTINUE.
-
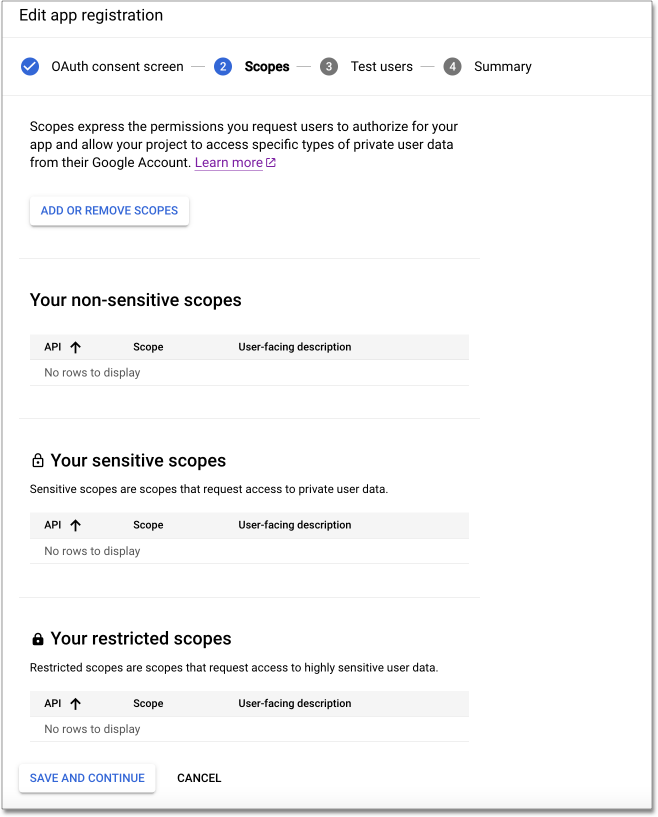
Google displays the Scopes page. You can add scopes as shown in the following image. Click SAVE AND CONTINUE.
-
The scope selected in the following image is sufficient to create a connection and view data in Google BigQuery.
https://www.googleapis.com/auth/bigquery.readonly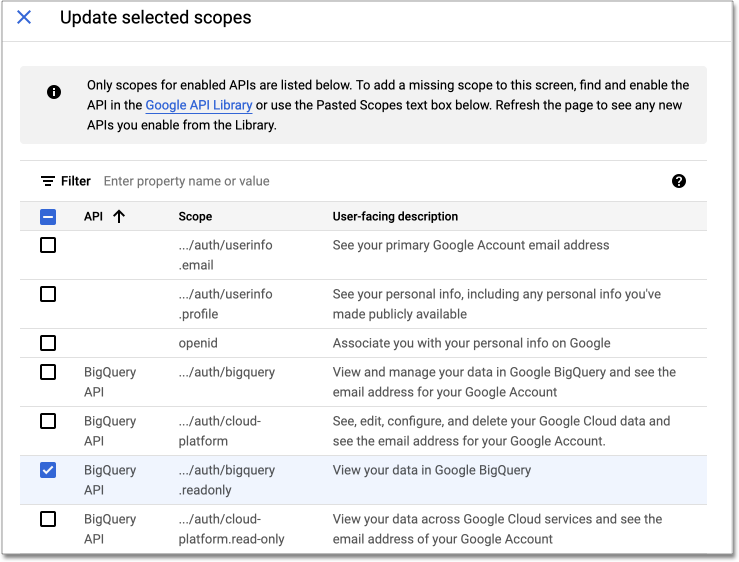
-
On the Summary page, click BACK TO DASHBOARD.
Generate Google OAuth credentials
-
Go to the Google Cloud console.
-
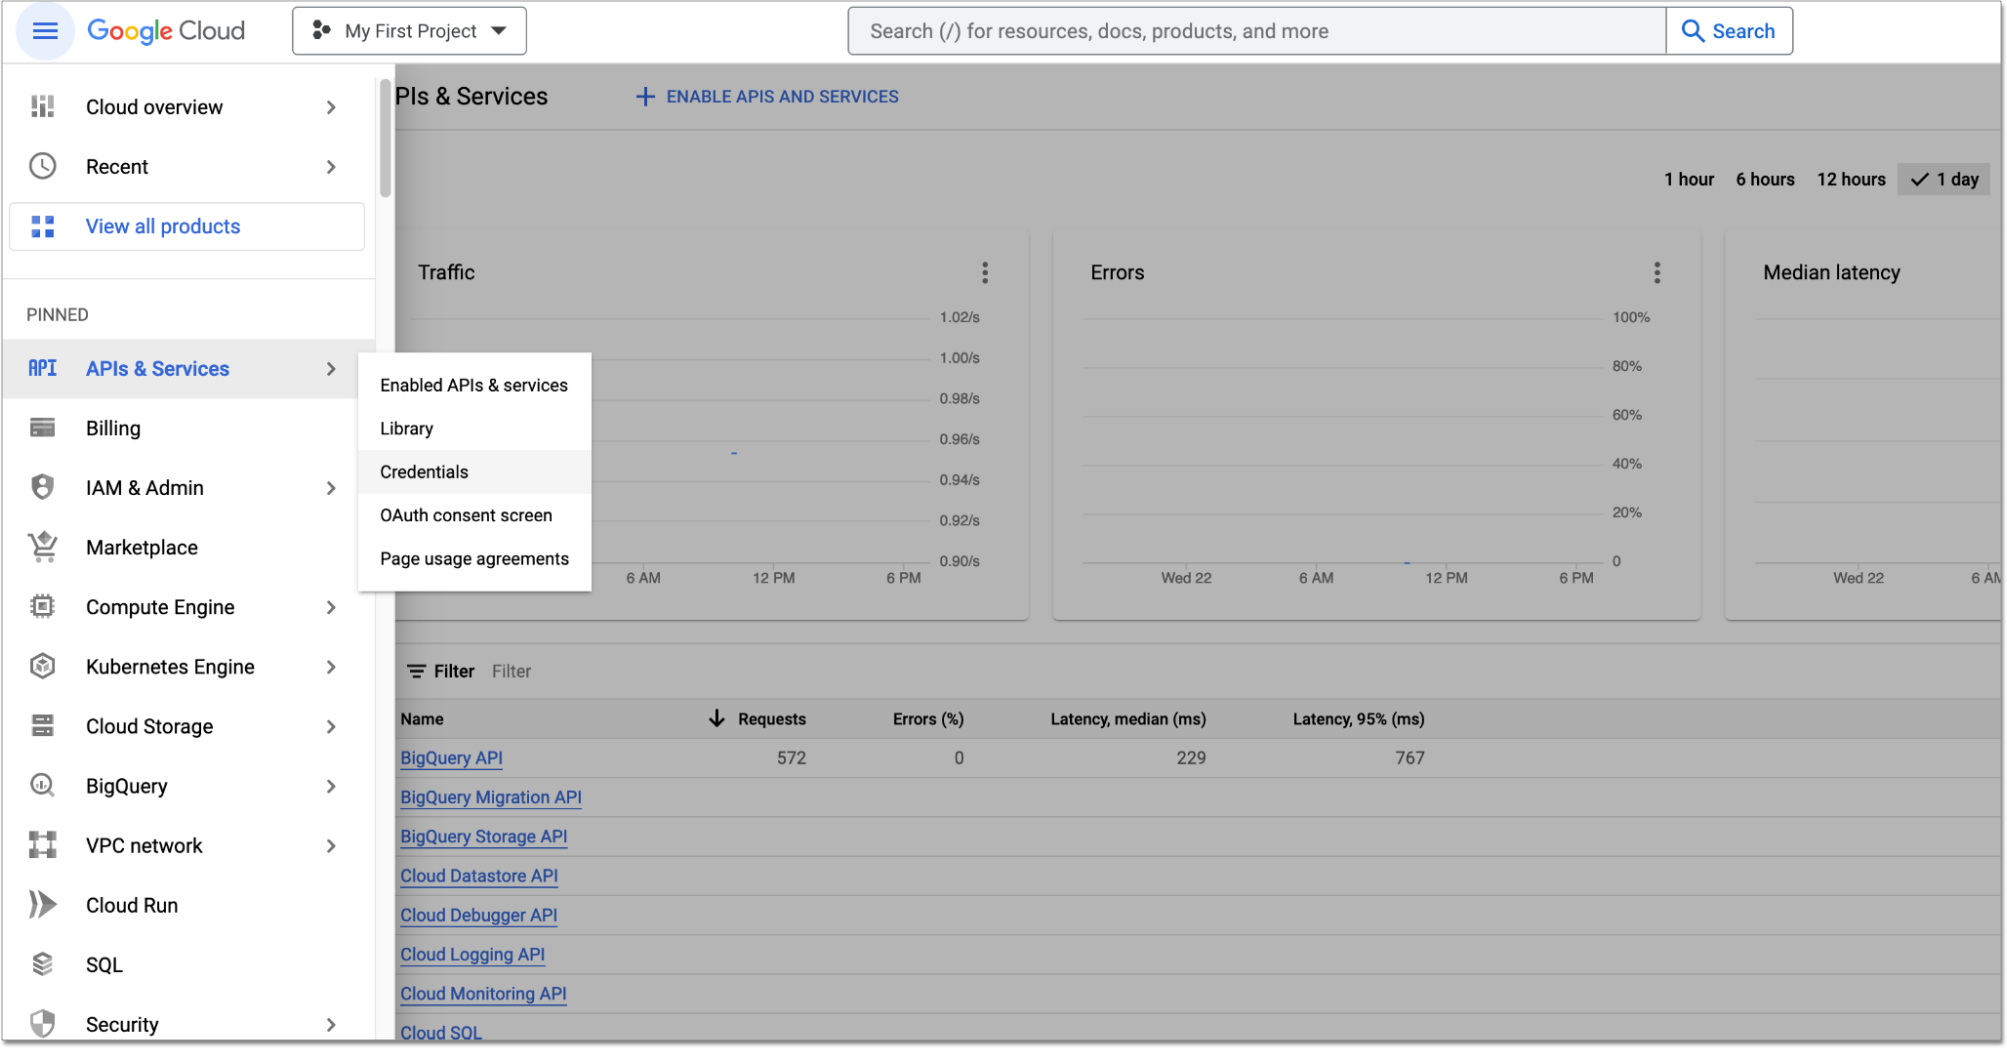
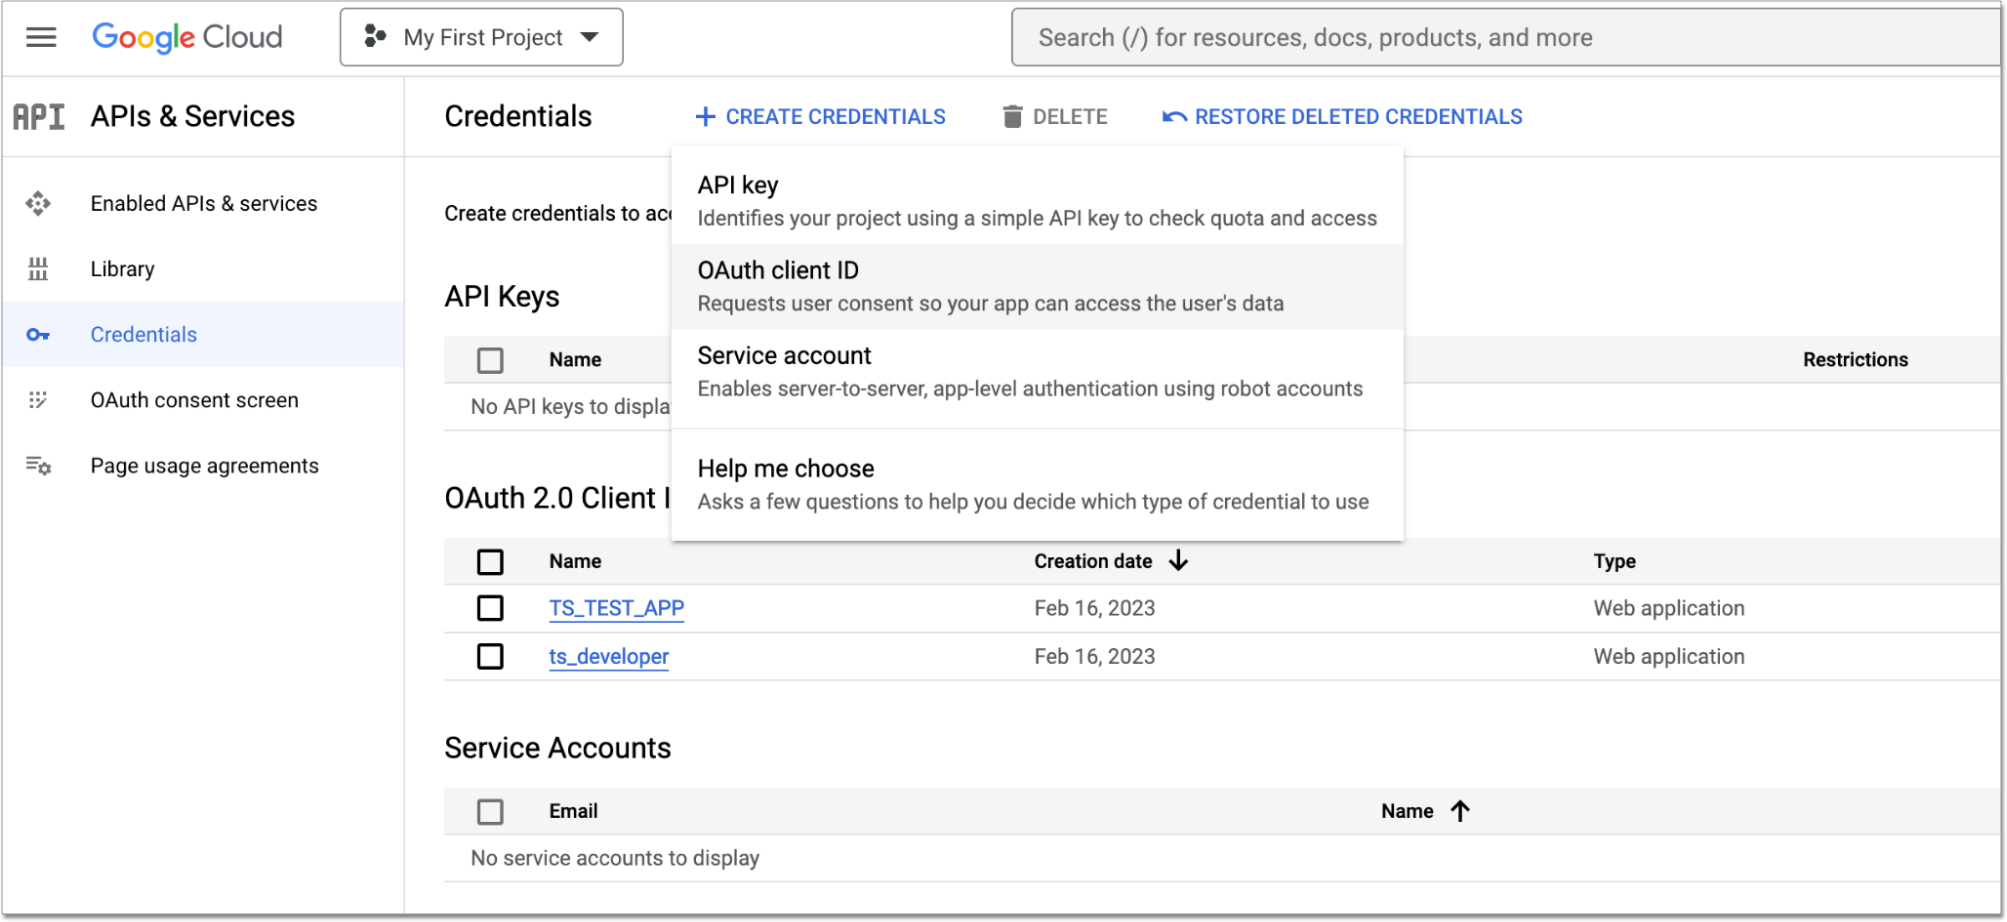
In the left menu, select the APIs & Services page. Then click Credentials.
-
On the Credentials page, click the down arrow in the Create credentials button, and select OAuth client ID from the dropdown menu.
-
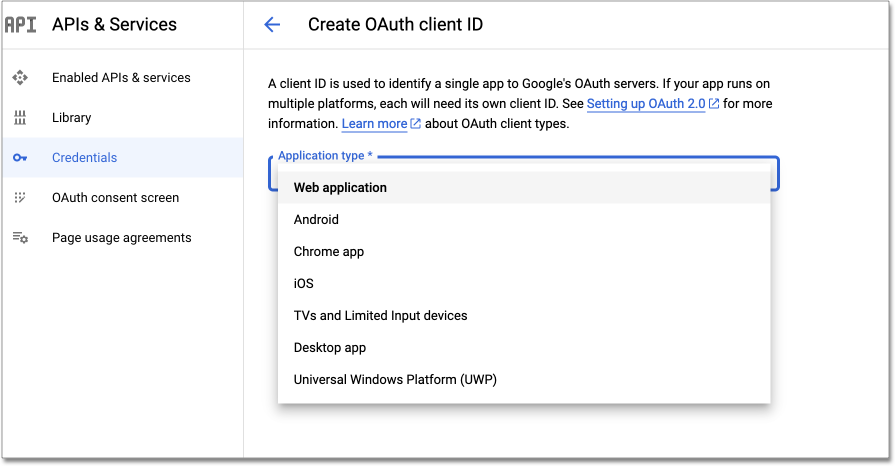
If you’ve already configured an OAuth consent screen, Google displays the Create OAuth client ID page, which lets you create and OAuth client ID and client secret to use in your Google BigQuery connection in ThoughtSpot.
-
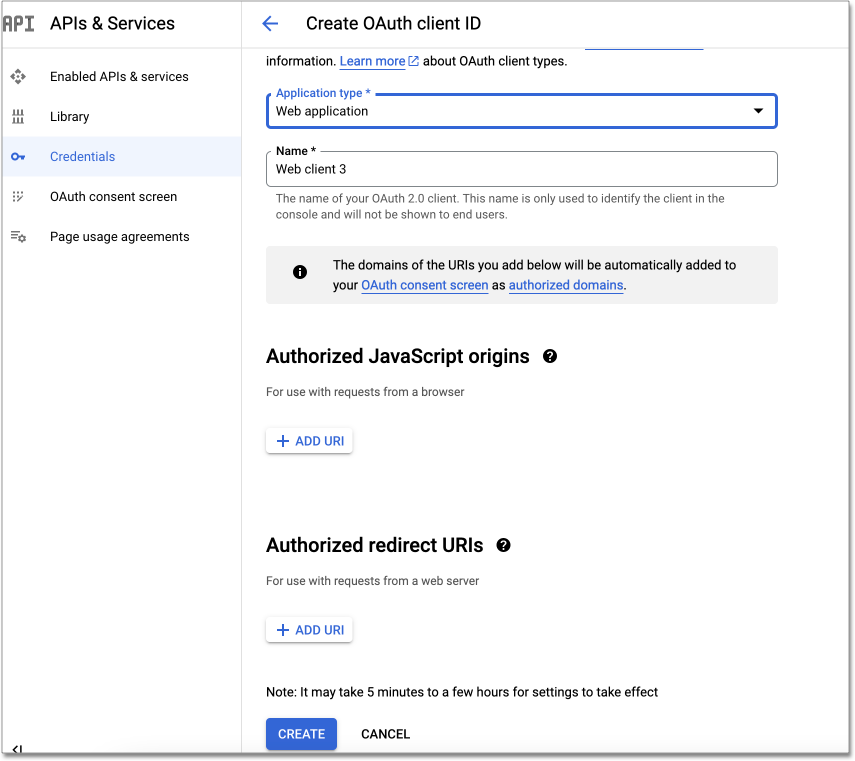
From the Application type dropdown, select Web application. The page expands to display additional options.
-
For Name, enter a name for the app, such as ConnectionsOAuth.
-
The Authorized Javascript origins section is optional, unless you are redirecting using javascript.
-
For Authorized redirect URIS, click + ADD URI to display the URIs 1 field. For URIs 1, enter the URL to your ThoughtSpot instance, followed by
/callosum/v1/connection/generateTokens.
For example,
https://thoughtspot.cloud/callosum/v1/connection/generateTokens.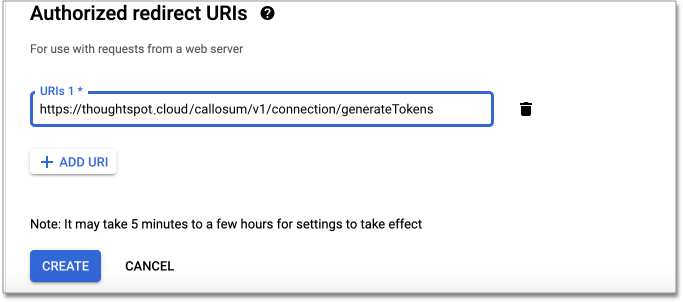
If your IdP supports rotation of refresh tokens with every usage, please ensure that this option is NOT chosen. ThoughtSpot does not support one-time use refresh tokens.
-
-
Click Create. Google displays your Client ID and your Client Secret in a pop-up dialog box.
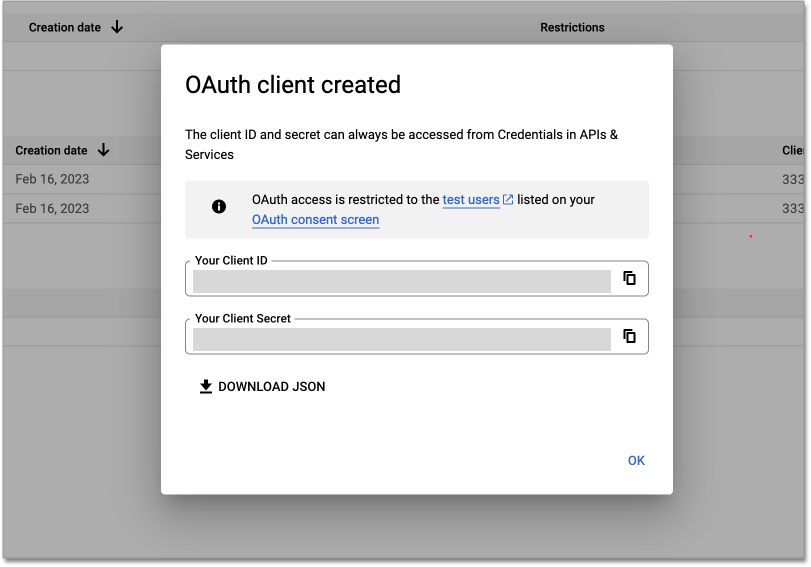
-
Copy your client ID and your client secret values. You will need them to configure OAuth for the Google BigQuery connection in ThoughtSpot.
Logging in to a connection created by another user using OAuth
As an admin user, you may run into an issue logging in to connections created using OAuth. To resolve this issue, complete the following steps:
-
Search on a table belonging to the connection you are trying to edit. The following error appears:
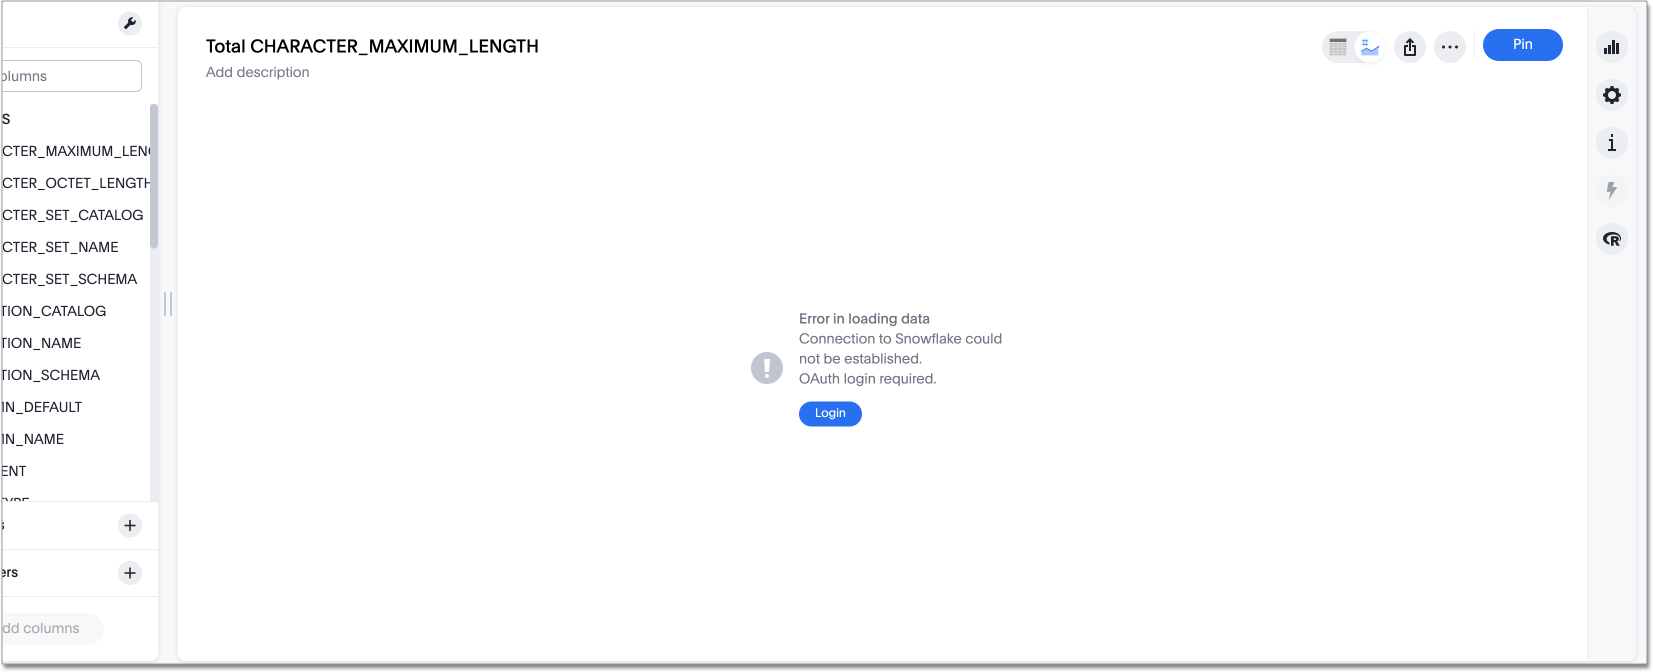
-
Click Login. You will be directed to the IDP login page.
-
Enter your login credentials.
-
You will now have access to edit the connection.
OAuth connection improvements
If you do not have a valid OAuth access token, you can now directly navigate to the OAuth authorization screen when performing one of the following actions on a connection shared with you:
-
View sample data
-
Create a custom SQL view
-
Edit the connection
Related information