Use tags to organize
You can create tags to make it easier for people to find data sources and Liveboards. Tags are global in scope. This means that everyone can see the tags and use them to tag objects. They can also filter lists of objects by tag. Tags are often used to designate subject areas, such as sales, HR, and finance, but you can use them any way you like.
Keep in mind these permissions when working with tags:
-
Only administrators can create tags.
-
Anyone can apply a tag.
-
Anyone can filter by a tag.
-
You can only filter by one tag at a time from the UI.
-
Free Trial and Team Edition users do not have access to tags functionality.
Create a tag
Only administrator users can create tags. Anyone can apply the tags you create, or use them as filters when selecting from a list of sources or Liveboards.
Create a tag from the Answer or Liveboard page
To create a tag from the Answer or Liveboard page, follow these steps:
-
Select Answers or Liveboards from the top navigation bar.
-
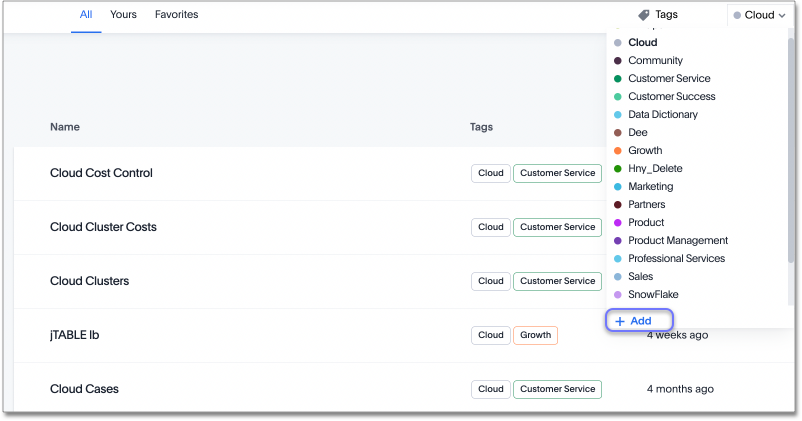
Click the currently selected tag, scroll to the bottom of the list, and click + Add.
-
Type the name for the new tag.
-
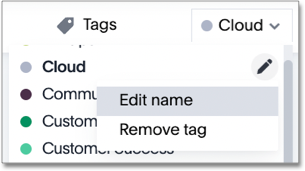
You can change the name of a tag by selecting the edit icon next to its name.
-
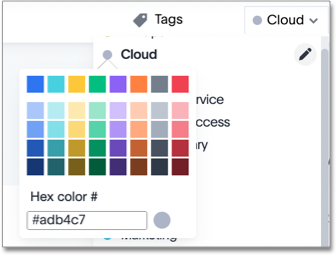
You can change the color of a tag by selecting the color circle next to its name.
Create a tag from the Data workspace
To create a tag from the Data workspace, follow these steps. Note that you must be an administrator to create a tag.
-
Select the empty checkbox next to an object that you would like to tag.
-
Select Edit tags from the options at the top of the object list.
-
The Edit tags modal appears.
-
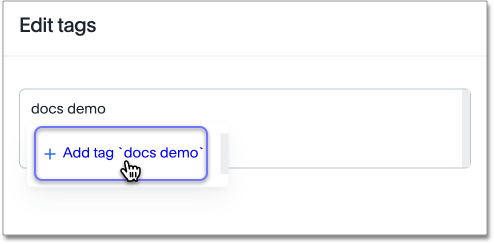
Type the name of the tag you would like to create.
-
Select + Add tag `<tag name>`.
-
Type the names of any additional tags you would like to create, and select + Add tag `<tag name>`.
-
If you would like to create the tag without adding it to the object(s), select Cancel in the Edit tags modal. If you would like to create the tag and add it to the object, select Save in the Edit tags modal.
Apply a tag
Only administrators create tags, but anyone with edit privileges can tag an object with a tag. The workflow for applying a tag is different depending on the type of object, and depending on where in the product you apply the tag from:
Apply tags to Answers or Liveboards
To tag an Answer or Liveboard with a tag, follow these steps:
-
From the top menu, choose Answers or Liveboards.
-
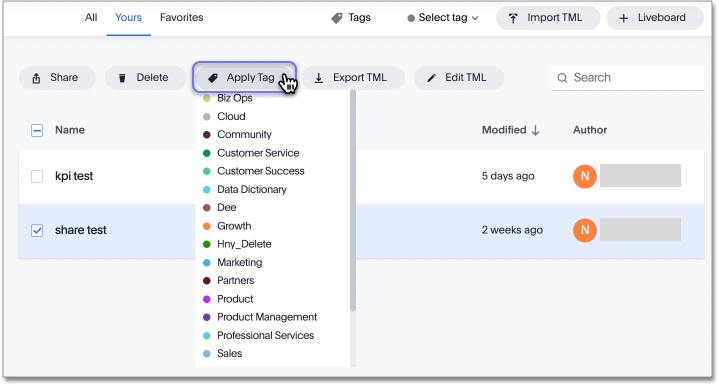
Find the item(s) you want to tag in the list, and check the box next to its name.
-
Select the apply tag icon and choose one from the list. You can apply as many tags as you like to an object.
Apply tags to Answers and Liveboards from the Home page
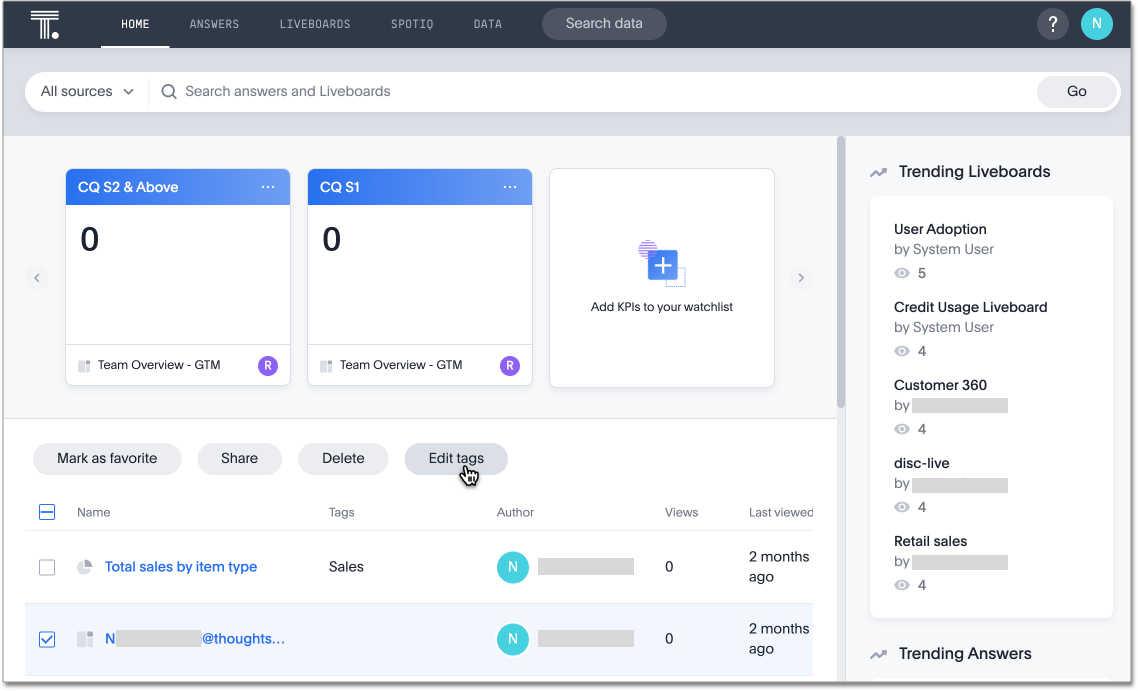
To apply tags to Answers and Liveboards from your home page, follow these steps:
-
Click the checkbox next to the name(s) of the Answer(s) or Liveboard(s) you would like to tag and select the Edit tags button that appears.
Note that you cannot select multiple objects across pages. If you select an Answer on the first page, and then click Next to view and tag more objects, ThoughtSpot discards your selection on the first page.
-
In the Edit tags pop-up window, enter the name(s) of the tag(s) you would like to apply, or select the x icon to remove a tag.
-
Select Save.
Apply tags to tables, Worksheets, views, or SQL views
To apply a tag to a table, Worksheet, view, or SQL view, follow these steps:
-
From the top navigation bar, select Data.
-
Select the checkbox next to the names of the object(s).
-
Select Edit tags from the options at the top of the object list.
-
The Edit tags modal appears. To see all tags, select anywhere in the text box of the modal. To narrow down the results in the dropdown menu, start typing. For example, type
salesto see all tags related to sales. -
To create a new tag, type the new tag name, and select + Add tag `<tag name>`.
-
Select a tag. You can continue to add tags as necessary.
-
Select Save.
Apply tags from the Home page
To apply tags to Answers and Liveboards from your home page, follow these steps:
-
Click the checkbox next to the name(s) of the Answer(s) or Liveboard(s) you would like to tag and select the Edit tags button that appears.
Note that you cannot select multiple objects across pages. If you select an Answer on the first page, and then click Next to view and tag more objects, ThoughtSpot discards your selection on the first page.

-
In the Edit tags pop-up window, enter the name(s) of the tag(s) you would like to apply, or select the x icon to remove a tag.
-
Select Save.
Filter by tags
Whenever you are selecting objects from a list, you can filter by tag to find what you’re looking for. Anyone can use tags to filter lists of Liveboards or data sources. You can also filter by a tag when selecting data sources.
Note that you can only filter by one tag at a time in the UI. To get a list of ThoughtSpot objects or object headers that is filtered by multiple tag, use the Metadata API. The list and listobjectheaders endpoints allow you to filter by multiple tags.
To filter by tag:
-
From the top menu, choose Answers, Liveboards, or Data.
-
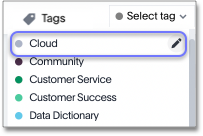
On the Answers or Liveboards page, click Select tag, and choose the name of the tag you want to filter by.
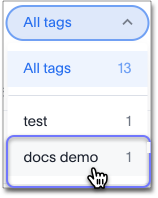
On the Data workspace home page, click the All tags dropdown menu, and select the name of the tag you want to filter by.
Remove a tag
You can remove a tag from an object from the object list page, for Answers and Liveboards, or the Data Workspace home page, for tables, Worksheets, views, and SQL views.
To remove a tag for an Answer or Liveboard, follow these steps:
-
Navigate to the Answers or Liveboards page, from the top navigation bar.
-
Select the x that appears when you hover over the tag name for the object.
To remove a tag for a table, Worksheet, view, or SQL view, follow these steps:
-
Navigate to the Data workspace by selecting Data from the top navigation bar.
-
Select the checkbox next to the names of the object(s).
-
Select Edit tags from the options at the top of the object list.
-
The Edit tags modal appears. Select the x next to the tag(s) you would like to remove.
-
Select Save.


