Modify joins within a Worksheet
When you create a Worksheet, you select a join rule. The join rule works together with the joins defined within the Worksheet determine how the tables that make up the Worksheet are joined, and how those joins behave when searching on the Worksheet.
Starting with ThoughtSpot version 5.0, you are not limited to just one join rule for the entire Worksheet. You can define different types of joins for each join between tables in a Worksheet. Be default, each of these individual table joins uses an inner join. But you can override this at the individual join level.
You must have either the Can administer ThoughtSpot privilege or the Can manage data privilege to modify joins within Worksheets.
Modify a join
To modify the join types within a Worksheet, follow these steps:
-
Select the Data tab in the top menu.
-
Select Table, and then select Worksheets.
-
Select the name of the Worksheet. Here, we selected the Worksheet West Regional Sales.
-
Under the Worksheet name and description, select the Joins tab.
-
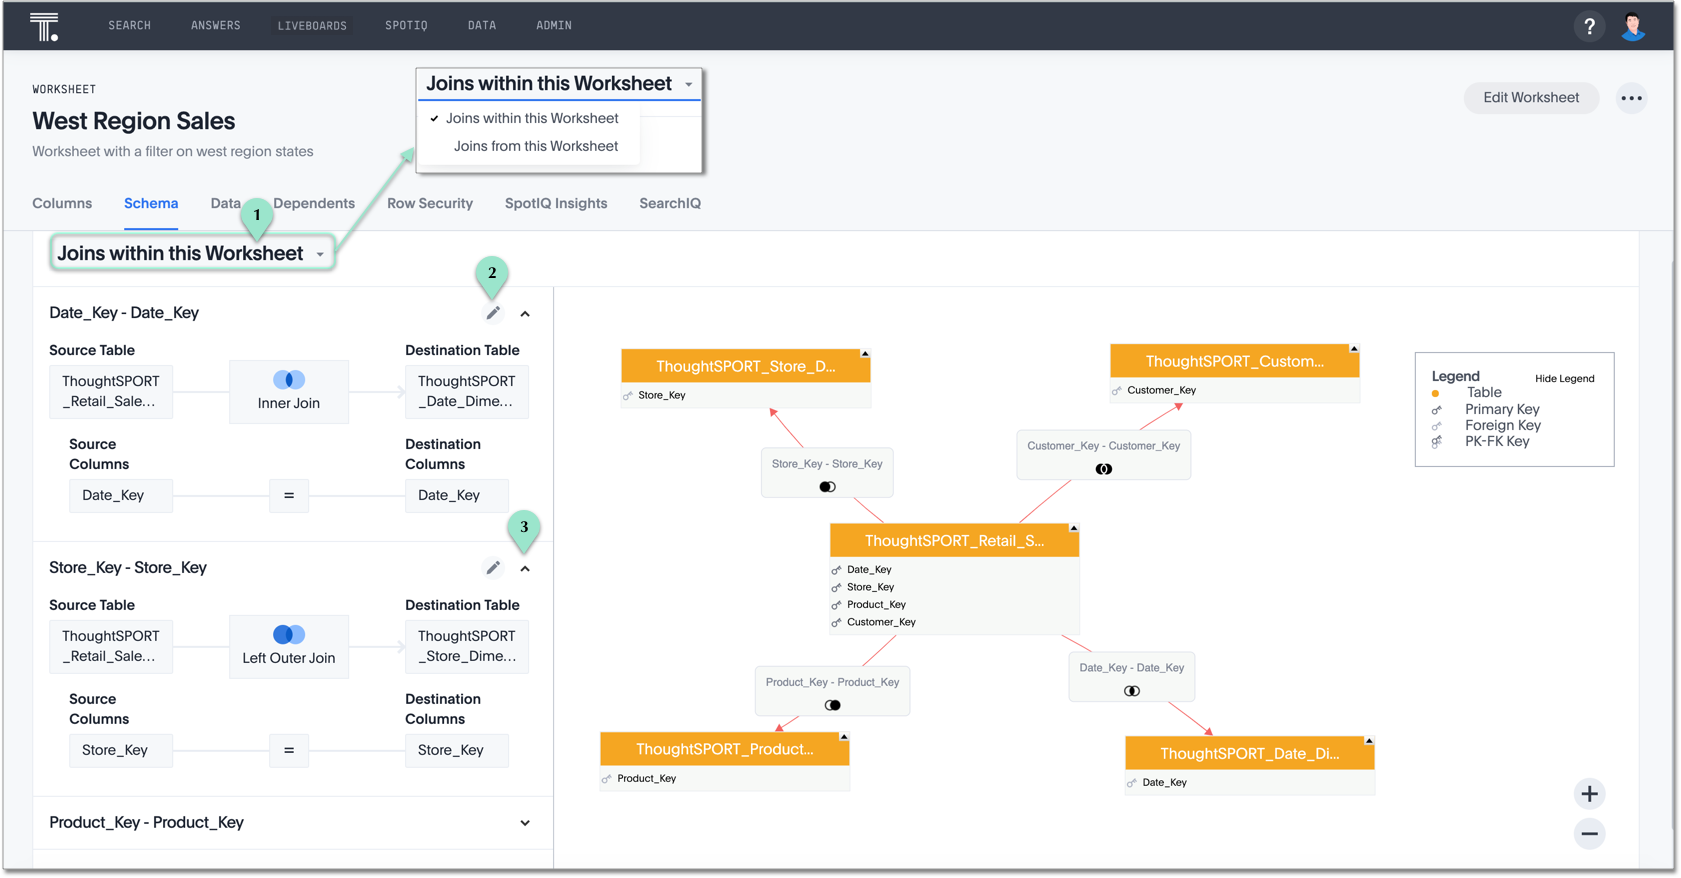
The join information and the schema for the Worksheet appear.
-
The schema representation includes the join type.
-
You can see the list of Joins within the worksheet, which include all joins between the underlying tables created in the browser.
-
The fact table is always on the left side of the join, and it appears on the left side.

Note the available actions for the join view.
1. See either Join within this Worksheet (Default), or Joins from this Worksheet.
2. Select the pencil icon to edit the join.
3. Select the up arrow icon to collapse the join detail.
-
-
Select the join you plan to modify, and select the Edit (pencil) icon next to it.
-
In the Edit Join window modal, make the necessary changes:

-
Under Join Type, select one of Inner Join, Left Outer Join, Right Outer Join, or Full Outer Join.
-
Under Join Cardinality, select either Many to One, or One to One.
-
-
Select Save.


