Set up the JDBC driver for Pentaho
Use Pentaho to create a JDBC connection to ThoughtSpot.
You can use the Pentaho Data Integration (PDI) to create a JDBC connection. The Pentaho Data Integration (PDI) suite is a comprehensive data integration and business analytics platform. You can use it to create a JDBC connection to ThoughtSpot.
PDI consists of a core data integration (ETL) engine and GUI applications that allow you to define data integration jobs and transformations. Through Pentaho, we primarily use the JDBC driver to set up a connection. The process is not as complicated as with SSIS, and is much more lenient.
Community and enterprise editions of PDI are available. Using the community edition is sufficient, though you may use the enterprise edition, which is subscription based, and therefore contains extra features and provides technical support.
Use JDBC to connect to the ThoughtSpot Simba server from Pentaho. The connection will be made between a new ThoughtSpot Table Input and Output objects.
Check the ThoughtSpot IP and the simba_server status
Before you begin, you need to know the IP address or DNS name of the server you intend to connect your server to.
-
SSH as
adminor thethoughtspotuser to your ThoughtSpot node. -
Verify the node IP(s).
$ tscli node ls 172.18.231.17 172.18.231.18 -
Make a note of each IP; there may be more than one.
-
Configure the ThoughtSpot firewall to allow connections from your ETL client, by running the following command on any ThoughtSpot node:
tscli firewall open-ports --ports 12345 -
Exit or close the shell.
Install the Simba drivers in the Pentaho directories
Before starting the Pentaho Data Integration (PDI) client and creating the connection, ensure that the Simba JDBC client libraries are present in the Pentaho client/server machines. This will ensure that the drivers picked up at runtime.
-
Log in to the local machine where you have already installed the Pentaho Data Integration (PDI) client.
-
Click Here to download the JDBC driver.
-
Click JDBC Driver to download the file
thoughtspot_jdbc<version>.jar. -
Copy the
thoughtspot_jdbc<version>.jarfile to the following directories:-
<Pentaho_install_dir>/server/data-integration-server/tomcat/webapps/pentaho-di/WED-INF/lib/ -
<Pentaho_install_dir>/design-tools/data-integration/lib/ -
<Pentaho_install_dir>/server/data-integration-server/tomcat/lib/ -
<Pentaho_install_dir>/design-tools/data-integration/plugins/spoon/agile-bi/lib/
-
Set up the driver
This section explains how to set up the JDBC driver using Pentaho. These instructions use Spoon, the graphical transformation and job designer associated with the PDI suite. It is also known as the Kettle project.
Create a transformation
Do the following on your ETL workstation with the Pentaho client:
-
Open the PDI client.
./spoon.sh &>/dev/null &
-
Right click tab.
-
Click New to create a new transformation.

-
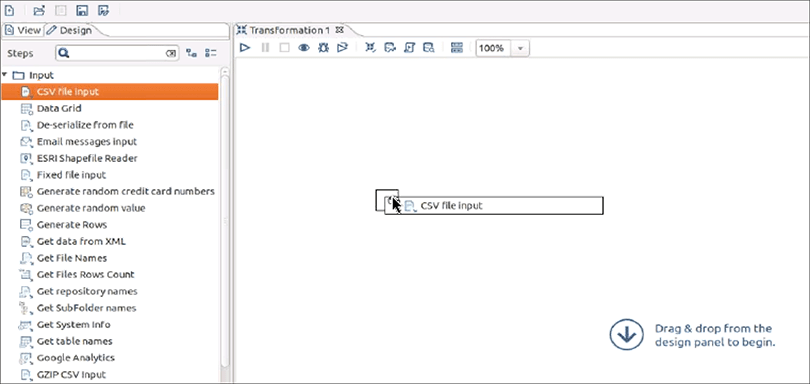
Click Input under the Design tab to expand it.
-
Drag and drop CSV File Input to the Transformation window.
This opens a new CSV file.
-
Double-click the CSV File Input icon to open the CSV Input dialog .
-
Name the Step.
-
Click Browse next to the Filename field and provide the file you want to read from.
-
Click OK.

-
In the CSV Input dialog, click Get Fields.
-
Enter the number of lines you would like to sample in the Sample size dialog.
The default setting is 100.
-
Click OK when you are ready.
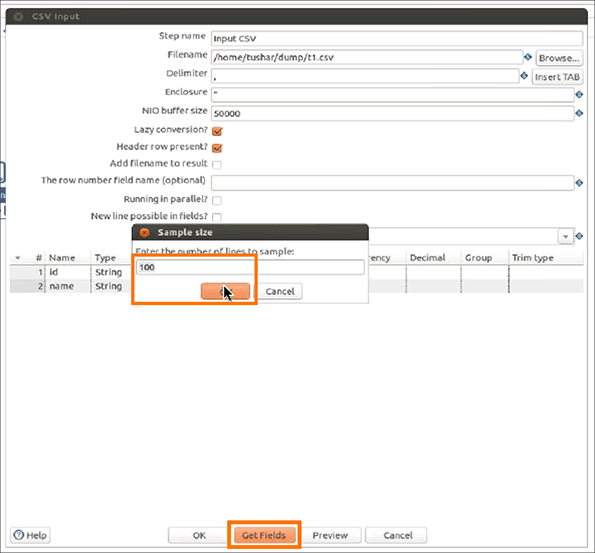
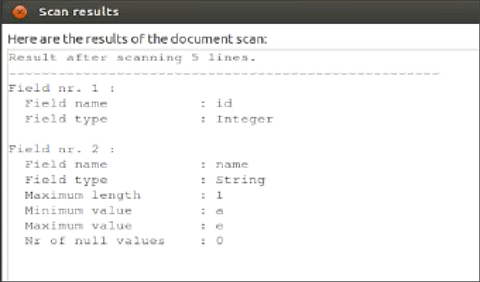
The tool reads the file and suggests the field name and type.
-
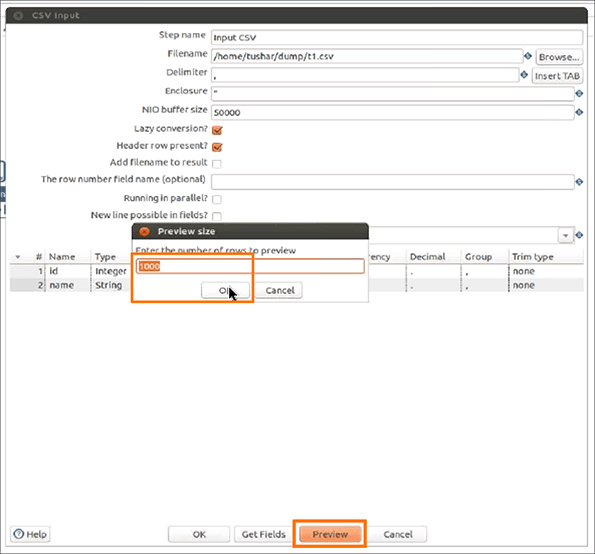
Click Preview to preview the data.
-
Enter the number of rows to preview in the Preview size dialog.
The default setting is 1000. Click OK to start the transformation in preview.
-
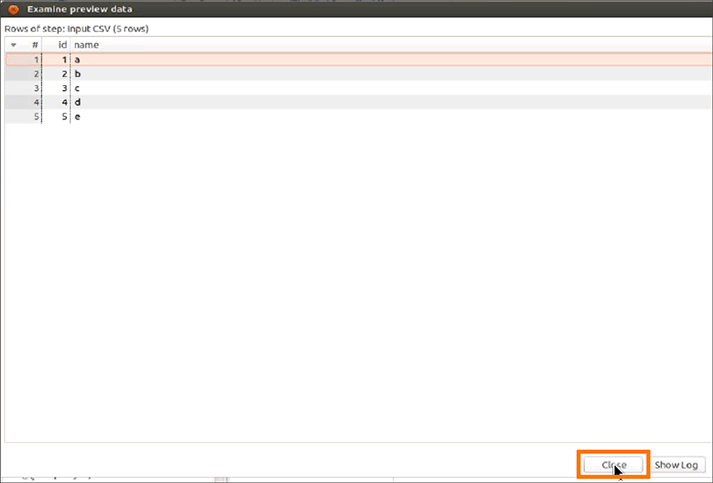
Examine the preview data, then click Close.
You may want to verify that you are able to read the data using the SQL query from ThoughtSpot.
-
Click OK in the CSV Input dialog to confirm your CSV input settings.
Define the Output
-
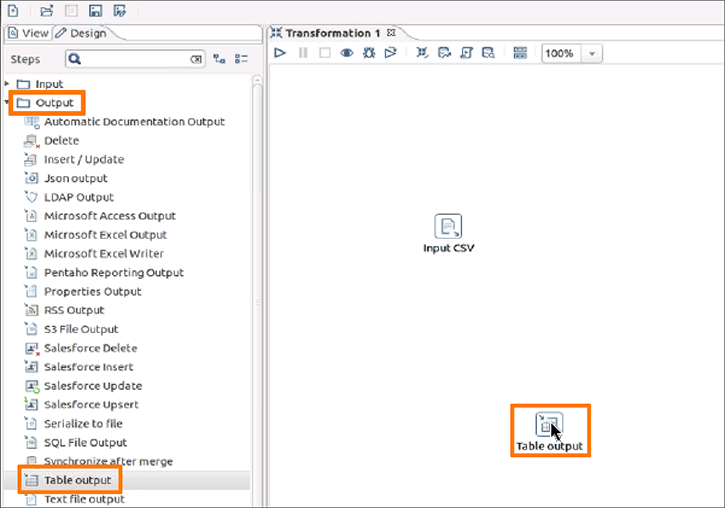
Click .
-
Drag and drop Table output to the Transformation window.
-
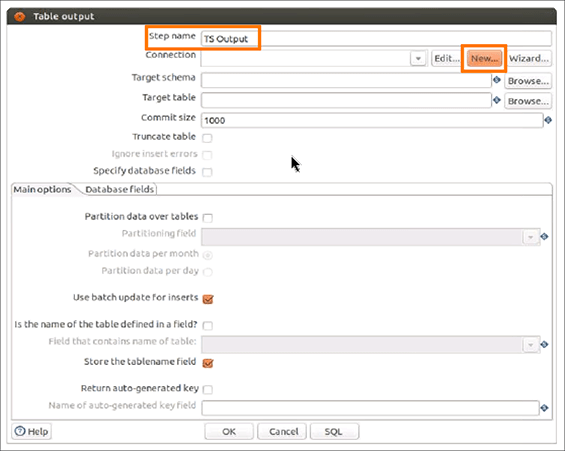
Double click the Table output icon to open the Table output dialog.
-
Enter a Step name.
-
Click New to create a new connection.
-
Enter or select the following information in the Database Connection dialog:
Field |
Description |
Connection Name |
Any string. |
Connection Type |
Generic database |
Access |
Native (JDBC) |
Custom Connection URL |
The IP is a node in your ThoughtSpot cluster. The name or schema of the database you want to connect to. Use TQL to create a database name if needed. Ensure that there are no leading or trailing spaces. |
Custom Driver Class Name |
|
User Name |
A ThoughtSpot username. If you leave this empty, you are prompted for it at connection time. This user should have Data Management privileges on ThoughtSpot. |
Password |
The password for the User Name. If you leave this empty, you are prompted for it at connection time. |
+ image::database_connection_pentaho.png[] . Click Test to test your database connection. . If you are able to make a successful connection to the ThoughtSpot Simba Server, click OK.
+ image::database_connection_test_pentaho.png[]
-
Click OK in the Database Connection dialog to create the new connection.
Import data
-
In the Table output dialog, select the connection you just created.
-
Click Browse next to the Target schema field and select your Target schema.
-
Click OK when you are done.
-
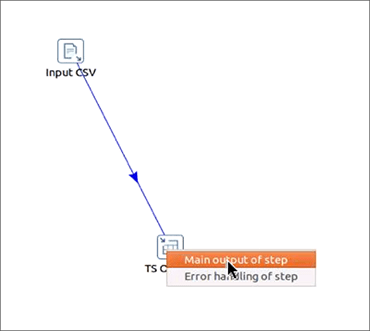
Connect the Input CSV icon to the Table output icon by clicking and dragging an arrow.
-
When prompted, choose Main output of step.
-
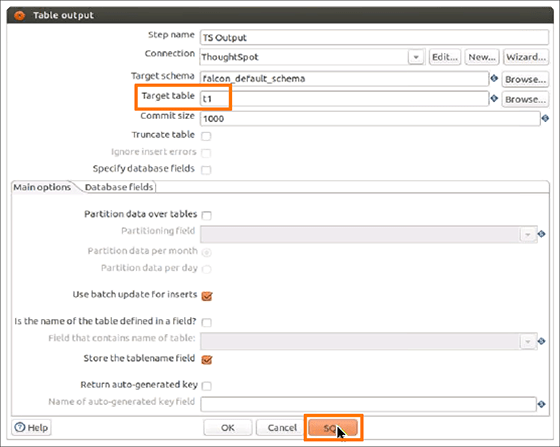
Double click the Table output icon to reopen the Table output dialog.
-
Enter a Target table name.
-
Click SQL.
-
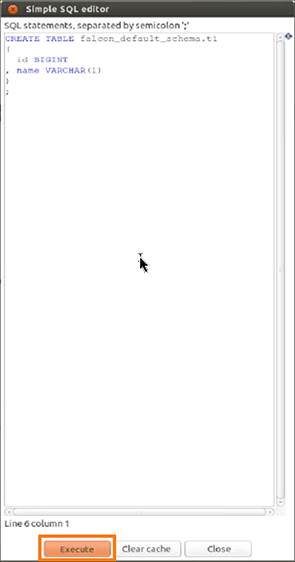
In the Simple SQL editor dialog, click Execute.
The system processes and then displays the results of the SQL statements.
-
Close all open dialogs.
-
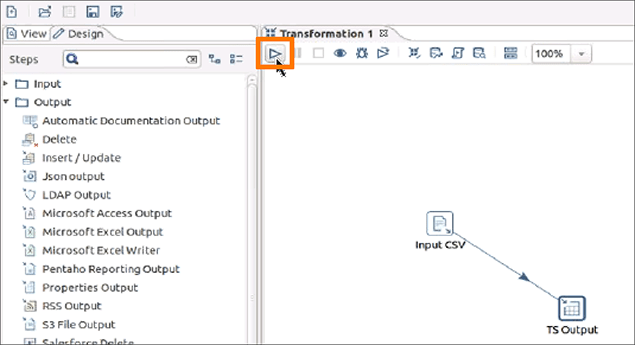
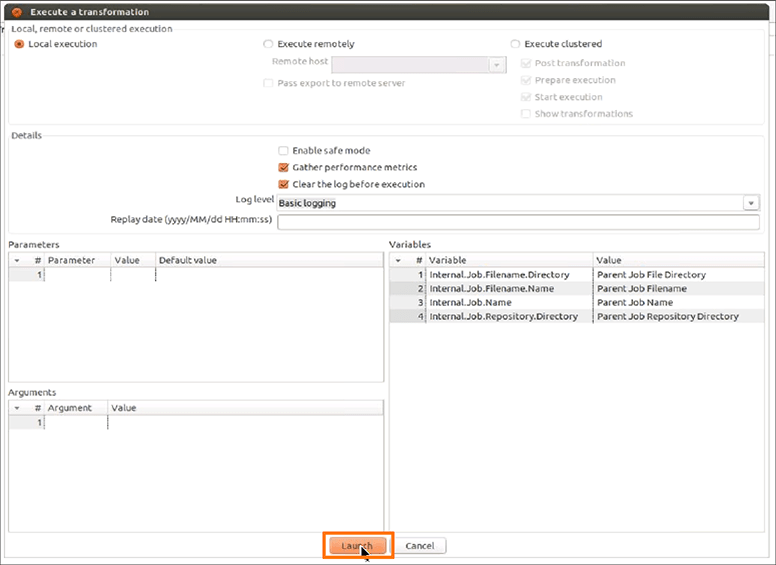
Click the Play button at the top of the Transformation window to execute the transformation.
-
Click Launch in the Execute a transformation dialog.
The system prompts you to save it if you have not already.
-
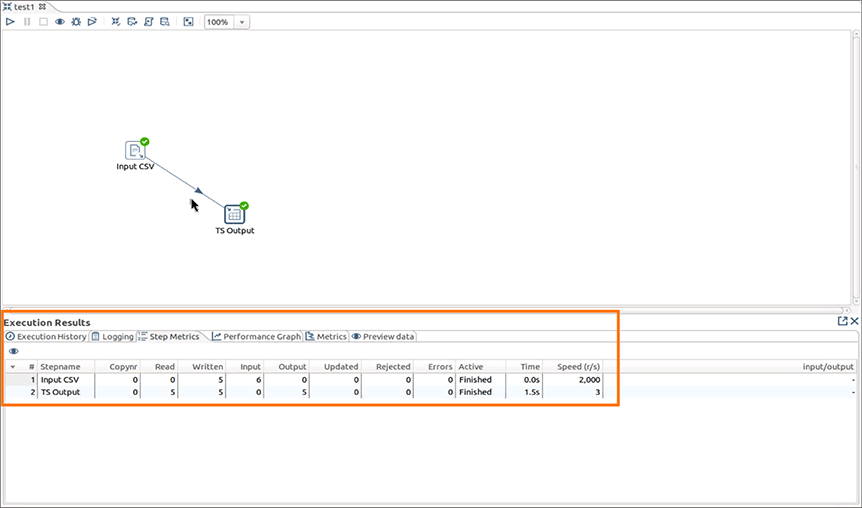
View the Execution Results.