Install the ODBC driver on Windows
Use this procedure to obtain the Microsoft Windows ODBC driver and install it.
ThoughtSpot’s ODBC connection relies on the SimbaEngine X SDK to connect through ODBC or JDBC to ThoughtSpot’s remote data stores. The instructions on this page explain how to configure the Simba ODBC driver on a Windows workstation.
Make sure you have read the overview material in the ODBC driver overview. This workstation is the same machine where you plan to run your ETL activities.
Prerequisites
These instructions include directions to use the ssh command.
Make sure your Windows workstation is equipped with a tool such as Putty for making ssh connections to your ThoughtSpot server.
The ODBC driver for Windows requires Visual C++ Redistributable for Visual Studio 2013. You are prompted to install it during installation of the driver if it isn’t already installed.
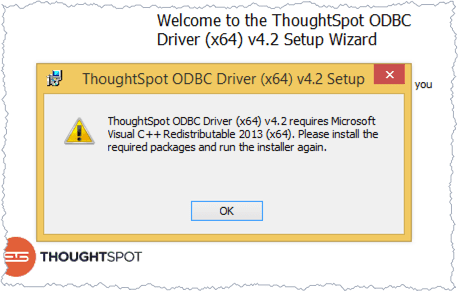
To check if this Microsoft tool is already installed, search for it on your workstation.

If it isn’t installed, make sure you download and install it before continuing.
Check the ThoughtSpot IP and the simba_server status
Before you begin, you need to know the IP address or DNS name of the server you intend to connect your server to.
-
SSH as
adminor thethoughtspotuser to your ThoughtSpot node. -
Verify the node IP(s).
$ tscli node ls 172.18.231.17 172.18.231.18 -
Make a note of each IP; there may be more than one.
-
Configure the ThoughtSpot firewall to allow connections from your ETL client, by running the following command on any ThoughtSpot node:
tscli firewall open-ports --ports 12345 -
Exit or close the shell.
Download the driver
On the workstation where you want to connect from, do the following:
-
Navigate to the Downloads page.
-
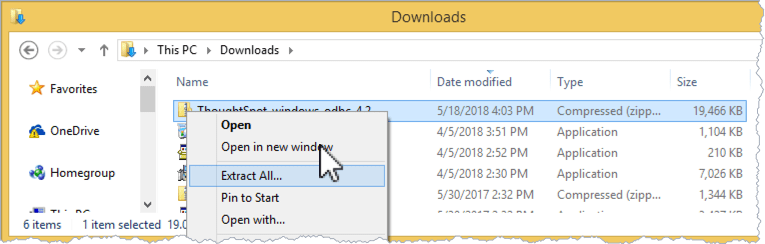
Download the ODBC Driver for Windows.
-
Unzip the file you downloaded at a convenient location on your workstation.
-
Take a moment to examine the contents of the new directory.
There are two different Windows ODBC installers included in the file you downloaded.
-
ThoughtSpotODBC (x86).msi for Windows 32-bit
-
ThoughtSpotODBC (x64).msi for Windows 64-bit
-
Install the driver and supporting software
The installation process installs the Simba driver and adds the ODBC Administrator software to your workstation. You use this software to configure the driver.
-
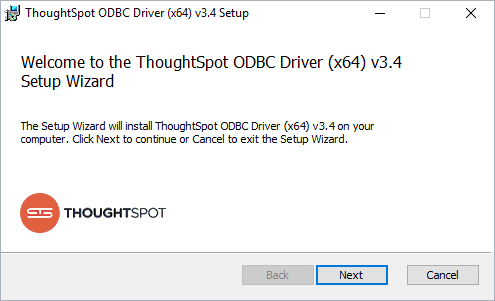
Launch the installer for your version of Windows.
-
Click Next to continue.
-
Accept the End User License Agreement (EULA), and click Next.
-
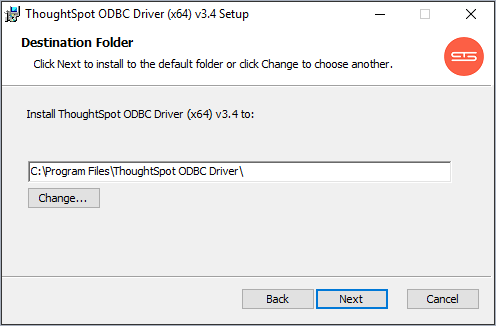
Specify the destination folder where the driver will be installed.
-
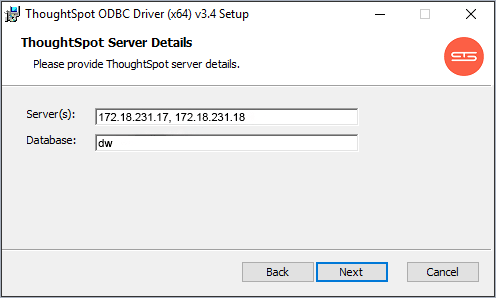
Enter the ThoughtSpot server details, and click Next.
-
For Server(s), provide a comma separated list of the IP addresses of each node on the ThoughtSpot instance.
-
For Database, optionally specify the database to use. If you skip this entry, you must provide the database each time you connect using ODBC.
-
-
Confirm that the install can begin by clicking Install.
-
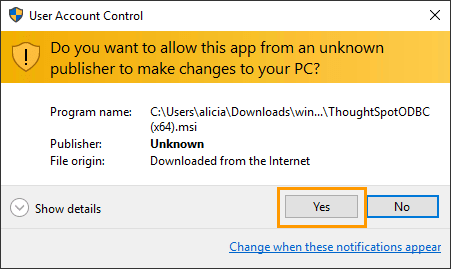
You may see a security warning.
-
Click Yes to continue.
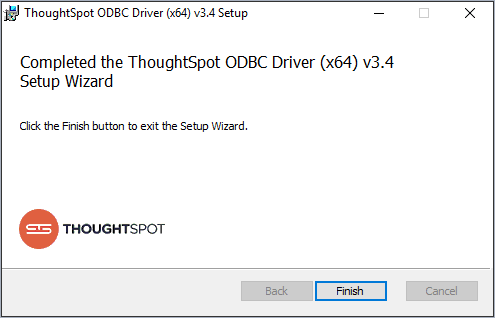
A confirmation message appears when the installation is complete.
-
Click Finish.
Configure the driver and test your connection
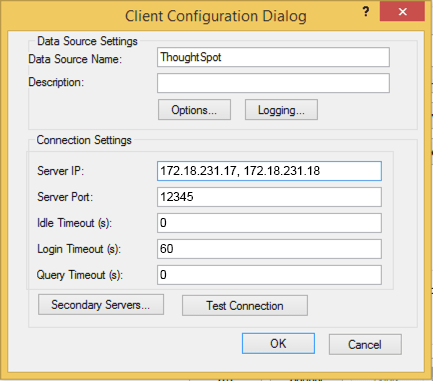
After installation completes, use the ODBC Administrator to configure the ODBC connection on your Windows workstation. For example, you may want to add a default schema or change the server IP address or the default database.
It is recommended to add a default schema. If you don’t specify a default schema, you must supply it every time you use the ODBC driver.
At this point, you can test your ODBC connection to ThoughtSpot. It is important to recall that the username/password you use belongs to a ThoughtSpot application user. Typically, this user is a user with data management or administrative privileges on the application.
-
Before trying the ODBC connection, confirm a username/password that can log in to the ThoughtSpot applications.
-
Click the Data tab, and confirm the user’s privileges.
-
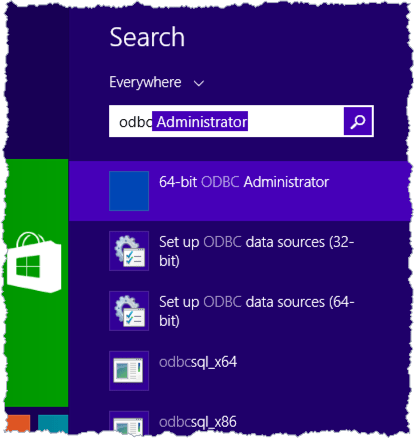
Return to your workstation.
-
Locate and open the ODBC Data Source Administrator (64-bit) application.
-
Click the System DSN tab.
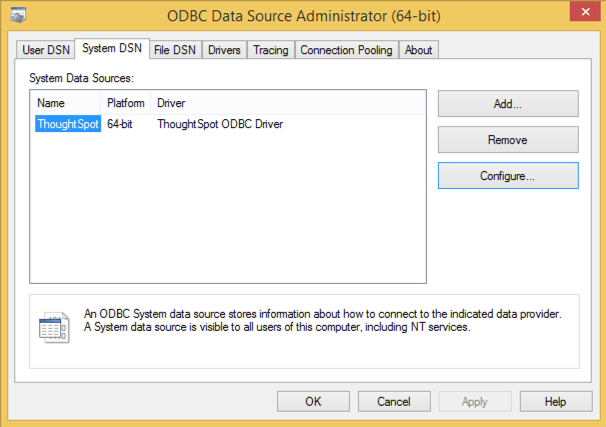
-
Select ThoughtSpot and click Configure…
-
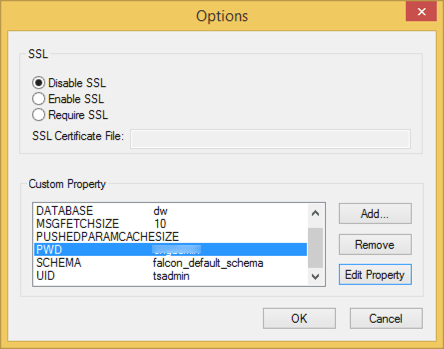
Click Options…
-
Ensure you have the following Custom Property values set:
Custom Property Value SCHEMAfalcon_default_schemais the defaultUIDThe username of a user with data management privilege.
PWDThe password for the username you specify.
You don’t have to use the ThoughtSpot default schema. You can specify your own. We recommend that you define a default schema. Otherwise, you must supply a schema every time you use the ODBC driver. Moreover, without a schema (or if the schema is not present), the ODBC driver returns an error that states that the schema could not be found.
Similarly, adding the
UIDandPWDproperties are not required. If you don’t add them, you are prompted to supply them each time you connect.When you are done, your options should look similar to the following:
-
When you are done, click OK to save your new properties.
-
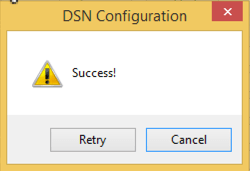
Click Test Connection to test your database connection.
-
Click Cancel to close the DSN Configuration dialog.
-
Click OK to close the Client Configuration Dialog the dialog.
-
Click OK to close the ODBC Data Source Administrator (64-bit) application.
Now, you are ready to begin using the connection you’ve configured.
Related information


