Join a table or view to another data source
Learn how to define joins between a table or view and another table, view, or worksheet
Joining a table or view to another table, view, or worksheet creates a relationship that allows them to be searched together. Choose a column to join on that both tables contain (e.g. employee ID or product key). This process creates a generic join between the table or view and the other table, view, or worksheet on the column you specify.
If you want to create a primary key/foreign key relationship, you need to use TQL rather than the web interface.
| Defining a generic relationship in the UI rather than using a primary key/ foreign key join through TQL has no impact on performance. However, when creating relationships in the UI, you must ensure that you create it in the right direction: many to one. To create many-to-many joins, or to create joins using >, <, >=, or <=, use TQL. |
You must have either the Can administrate ThoughtSpot or the Can manage data privilege to create a join relationship. If you’re not an administrator, you also need edit permissions on the table, view, or worksheet.
See this matrix for information about which joins you can create, and what permissions these joins require.
| Worksheets | View | Materialized View | Imported table (UI) | Table uploaded from backend (tsload) or through DataFlow | Table uploaded through Embrace | View on top of table uploaded through Embrace | ||
|---|---|---|---|---|---|---|---|---|
Necessary permissions: |
None |
None |
None |
Can manage data permission to load the table |
Admin privileges to access tsload |
None |
None |
|
Worksheets |
Can edit permission on the source Worksheet |
✗ |
✗ |
✗ |
✓ |
✗ |
✗ |
✗ |
View |
Can edit permission on the source View |
✗ |
✓ |
✓ |
✓ |
✓ |
✗ |
✗ |
Materialized View |
Can edit permission on the source Materialized View |
✗ |
✓ |
✓ |
✓ |
✓ Note: It is a best practice to create this join through the UI, rather than using TQL. |
✗ |
✗ |
Imported table (UI) |
Can edit permission on the source table |
✓ |
✓ |
✓ |
✓ |
✓ |
✗ |
✗ |
Table uploaded from backend (tsload) or through DataFlow |
Can edit permission on the source table |
✗ |
✗ |
✗ |
✗ |
✗ |
✗ |
✗ |
Table uploaded through Embrace |
Can edit permission on the source table, and can manage data permission |
✗ |
✗ |
✗ |
✗ |
✗ |
✓ Note: The two tables must be from the same connection. |
✓ Note: The View and the table must be from the same connection. |
View on top of table uploaded through Embrace |
Can edit permission on the source View |
✗ |
✗ |
✗ |
✗ |
✗ |
✓ Note: The View and the table must be from the same connection. |
✓ Note: The two Views must be from the same connection. |
When creating a join between the columns in two data sources, the linked columns must have the same data type, with the same meaning. That is, they must represent the same data. Normally, you can make this kind of link from a fact table column to a column in a dimension table that uniquely identifies a logical entity in your data such as Employee ID for a person, Product ID for a product, or Date Key for a specific date in a date lookup table.
To create a relationship through the Web interface:
-
To find your table or view, click Data in the top menu, and choose Tables or Views.
-
Click the name of your table or view.
-
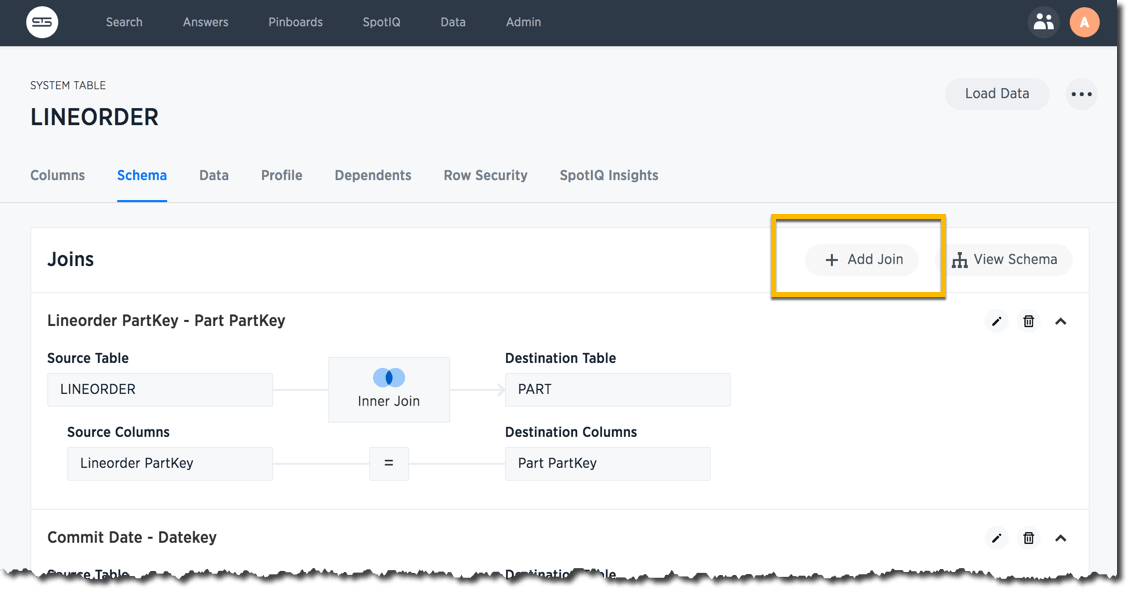
Click Schema. You will see the list showing existing joins.
-
Click the + Add Join button on the upper right side of the screen.
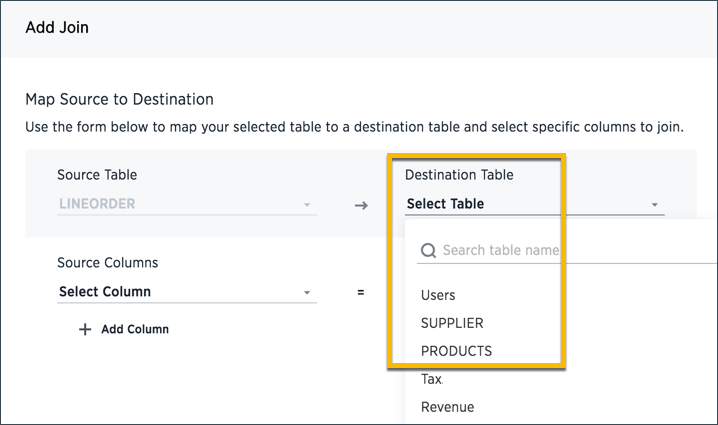
-
Use the Map source to destination dialog to choose the destination table, view, or worksheet you want to join to.
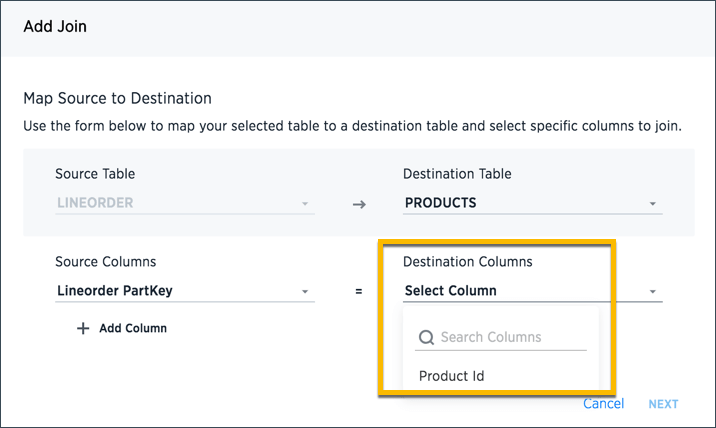
-
Choose the columns you want to join on from the table or view (source) and destination table, view, or worksheet. Click Next.
-
Give your join a name and description and click ADD JOIN.
-
Repeat these steps until all the joins you want to make have been created.
After creating the join, you may change its name and description by clicking the edit icon. If you want to change the data source or column being joined, you must delete the join and create a new one.
Related information


