Sync data from ThoughtSpot to Microsoft Teams
Use ThoughtSpot Sync to connect ThoughtSpot to your Microsoft account and deliver insights directly to Microsoft Teams.
| ThoughtSpot Sync is not supported for Answers v1 or Liveboards v1. To enable Sync, select the user icon in the upper-right corner of the menu bar, and set Answer experience and Liveboards experience to "New experience". |
Sync to Microsoft Teams from an Answer
To create a sync to Microsoft Teams from an Answer, follow these steps:
-
Select the desired Answer from the Answers page or the ThoughtSpot home page. You must have can manage sync permissions and view access to an Answer to create a sync.
-
In the upper-right corner of the Answer, select the more options menu icon
 . From the dropdown menu, select Sync to other apps, then select Microsoft Teams and click Next.
 -
If this is the first sync you have created for Microsoft Teams, a pop-up authorization window appears. To grant ThoughtSpot access to send data to your Microsoft Teams account, sign in to your Microsoft Teams account and select Allow.

-
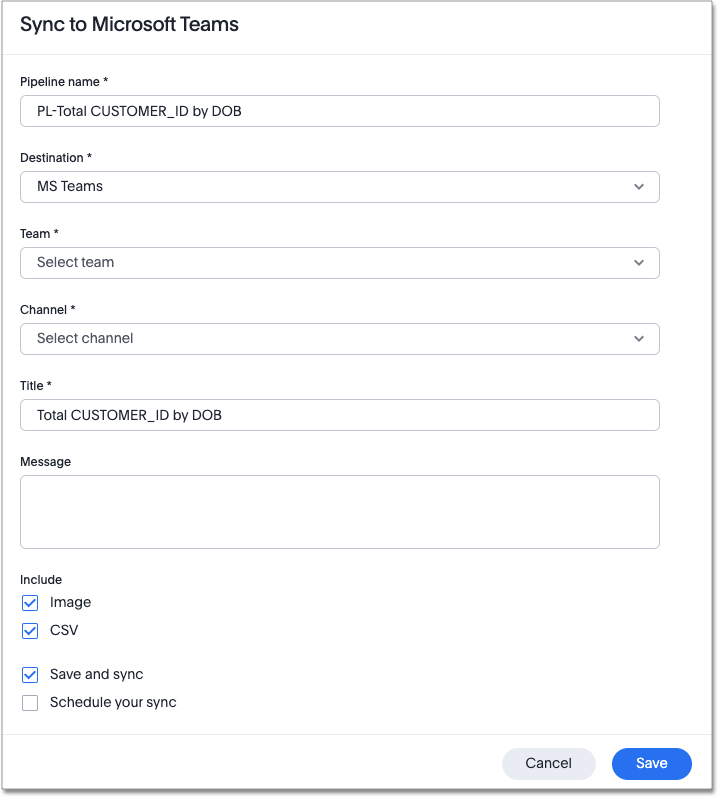
Within ThoughtSpot, fill in the following parameters:
-
Edit the Pipeline name if needed. By default, this field populates with PL-[Answer Name].
-
If you have more than one Microsoft destination set up, then the Destination field appears and you must select a Microsoft destination from the dropdown menu available. However, if no destinations have been set up before or if you have only one Microsoft destination, the Destination field does not appear.
-
Select your Team from the dropdown menu.
-
Select your Channel from the dropdown menu.
-
Edit the Answer’s Title.
-
[Optional] Enter a Message to send with your Answer.
-
By default, Include image and Include CSV are checked. This sends both the image of the Answer and the CSV file with the data.
Note: If the visualization is a table and not a chart, then Include image and Include CSV checkboxes do not appear and only the CSV file of data is sent on Microsoft Teams.
-
-
By default, "Sync and save" is selected. Select Save to send your Answer to Microsoft Teams.
-
[Optional] To set up a repeated sync, click Schedule your sync and select your timezone. From the options provided, choose whether the sync will occur every:
-
n minutes. You can choose to schedule a sync every 5, 10, 15, 20, 30, or 45 minutes.
-
n hours.
-
n days at a selected time. Note that you can choose not to send an update on weekends.
-
week at a selected time and day.
-
n months at a selected time and date.
-
| Any sync over 50,000 rows may result in an execution timeout. For optimal performance, keep your sync to below 50,000 rows. If you’re syncing a large number of rows and the sync fails, try applying filters like date filters to make your dataset smaller and then sync. |
Sync to Microsoft Teams from a Liveboard
To create a sync to Microsoft Teams from a Liveboard, follow these steps:
-
Select the desired Liveboard from the Liveboards page or the ThoughtSpot homepage. You must have can manage sync permissions and view access to a Liveboard to create a sync.
-
In the upper-right corner of the Liveboard, select the more options menu icon
. From the dropdown menu, select Sync to Teams.You cannot create a sync from an unsaved Liveboard. If the Sync to Teams option appears grayed-out in the menu, first save the Liveboard before trying again. -
If this is the first sync you have created for Microsoft Teams, a pop-up authorization window appears. To grant ThoughtSpot access to send data to your Microsoft Teams account, sign in to your Microsoft Teams account and select Allow.
-
Within ThoughtSpot, fill in the following parameters:
-
Edit the Pipeline name if needed. By default, this field populates with PL-[Liveboard Name].
-
If you have more than one Microsoft destination set up, then the Destination field appears and you must select a Microsoft destination from the dropdown menu available. However, if no destinations have been set up before or if you have only one Microsoft destination, the Destination field does not appear.
-
Select your Team from the dropdown menu.
-
Select your Channel from the dropdown menu.
-
Edit the Liveboard’s Title.
-
[Optional] Enter a Message to send with your Liveboard.
-
By default, Include image is selected. This sends the image of the first page of the Liveboard.
-
Select Include Liveboard link to send a link to the Liveboard.
-
-
By default, "Sync and save" is selected. Select Save to send your Liveboard to Microsoft Teams.
-
[Optional] To set up a repeated sync, click Schedule your sync and select your timezone. From the options provided, choose whether the sync will occur every:
-
n minutes. You can choose to schedule a sync every 5, 10, 15, 20, 30, or 45 minutes.
-
n hours.
-
n days at a selected time. Note that you can choose not to send an update on weekends.
-
week at a selected time and day.
-
n months at a selected time and date.
-
| Any sync over 50,000 rows may result in an execution timeout. For optimal performance, keep your sync to below 50,000 rows. If you’re syncing a large number of rows and the sync fails, try applying filters like date filters to make your dataset smaller and then sync. |
Sync to Microsoft Teams from a Custom SQL View
To sync to Microsoft Teams from a custom SQL view, follow these steps:
-
Navigate to your SQL view by selecting the Data workspace tab and searching from the Data workspace home page. Select the SQL view name.
-
In the upper-right corner, click the more options menu icon
and select Sync to other apps. Select Microsoft Teams and click Next. -
If this is the first sync you have created for Microsoft Teams, an authorization page appears. To grant ThoughtSpot access to send data to your Microsoft Teams account, sign in to your Microsoft Teams account and select Allow.
-
Within ThoughtSpot, fill in the following parameters:
-
Edit the Pipeline name if needed. By default, this field populates with PL-[Answer Name].
-
If you have more than one Microsoft destination set up, then the Destination field appears and you must select a Microsoft destination from the dropdown available. However, if no destinations have been set up before or if you have only one Microsoft destination, the Destination field does not appear.
-
Select your Team from the dropdown menu.
-
Select your Channel from the dropdown menu.
-
[Optional] Edit the Answer’s Title.
-
Enter a Message to send with your Answer.
-
By default, ThoughtSpot sends your data in CSV format.
-
-
By default, "Sync and save" is selected. Select Save to send your data to Microsoft Teams.
-
[Optional] To set up a repeated sync, click Schedule your sync and select your timezone. From the options provided, choose whether the sync will occur every:
-
n minutes. You can choose to schedule a sync every 5, 10, 15, 20, 30, or 45 minutes.
-
n hours.
-
n days at a selected time. Note that you can choose not to send an update on weekends.
-
week at a selected time and day.
-
n months at a selected time and date.
-
| Any sync over 50,000 rows may result in an execution timeout. For optimal performance, keep your sync to below 50,000 rows. If you’re syncing a large number of rows and the sync fails, try applying filters like date filters to make your dataset smaller and then sync. |
Sync to Microsoft Teams from the Data workspace
To create a sync to Microsoft Teams from the Data workspace, follow these steps:
-
Select the Data workspace tab.
-
On the left menu bar, select Sync.
-
Go to the Pipelines tab and select "Create New Pipeline". Note that if you do not already have a destination created to the intended destination app, you first need to create one in the Destinations tab.
-
Fill in the following parameters:
-
Edit the Pipeline name if needed. By default, this field populates with PL-[Answer Name].
-
If you have more than one Microsoft destination set up, then the Destination field appears, and you must select a Microsoft destination from the dropdown menu available. However, if no destinations have been set up before or if you have only one Microsoft destination, the Destination field does not appear.
-
Select your Source data. Here, you choose an Answer or a custom SQL view to send through sync.
-
Select your Team from the dropdown menu.
-
Select your Channel from the dropdown menu.
-
[Optional] Edit the Answer’s Title.
-
Enter a Message to send with your Answer.
-
If your chosen source is an Answer, the Include image and Include CSV checkboxes appear. Otherwise, ThoughtSpot sends your data as a CSV.
-
-
By default, "Sync and save" is selected. Select Save to send your data to Microsoft Teams.
-
[Optional] To set up a repeated sync, click Schedule your sync and select your timezone. From the options provided, choose whether the sync will occur every:
-
n minutes. You can choose to schedule a sync every 5, 10, 15, 20, 30, or 45 minutes.
-
n hours.
-
n days at a selected time. Note that you can choose not to send an update on weekends.
-
week at a selected time and day.
-
n months at a selected time and date.
-
| Any sync over 50,000 rows may result in an execution timeout. For optimal performance, keep your sync to below 50,000 rows. If you’re syncing a large number of rows and the sync fails, try applying filters like date filters to make your dataset smaller and then sync. |
Manage pipelines
While you can also manage a pipeline from the Pipelines tab in the Data workspace, accessing the Manage pipelines option from an Answer or view displays all pipelines local to that specific data object. To manage a pipeline from an Answer or view, follow these steps:
-
Click the more options menu icon
and select Manage pipelines. -
Scroll to the name of your pipeline from the list that appears. Next to the pipeline name, select the more options icon
. From the list that appears, select:-
Edit to edit the pipeline’s properties. For example, for a pipeline to Google Sheets, you can edit the pipeline name, file name, sheet name, or cell number. Note that you cannot edit the destination or source of a pipeline.
-
Delete to permanently delete the pipeline.
-
Sync now to sync your Answer or view to the designated destination.
-
View run history to see the pipeline’s Activity log in the Data workspace.

-
Related information


