Microsoft Excel
Overview
Analyst Studio’s Microsoft Excel integration allows you to connect to your Microsoft 365 accounts (via Azure AD) to import Excel data directly from OneDrive and SharePoint Online into Analyst Studio datasets.
This enables analysts and business users to quickly onboard ad hoc or external data, supporting data transformation and mashups within Analyst Studio before publishing. Published datasets land in the Data workspace, where they can be consumed by Liveboards and Spotter.
|
Data flow: The integration is read-only. Data is fetched securely via the Microsoft Graph API, and editing the dataset in Analyst Studio does not modify the original Excel file. |
Requirements
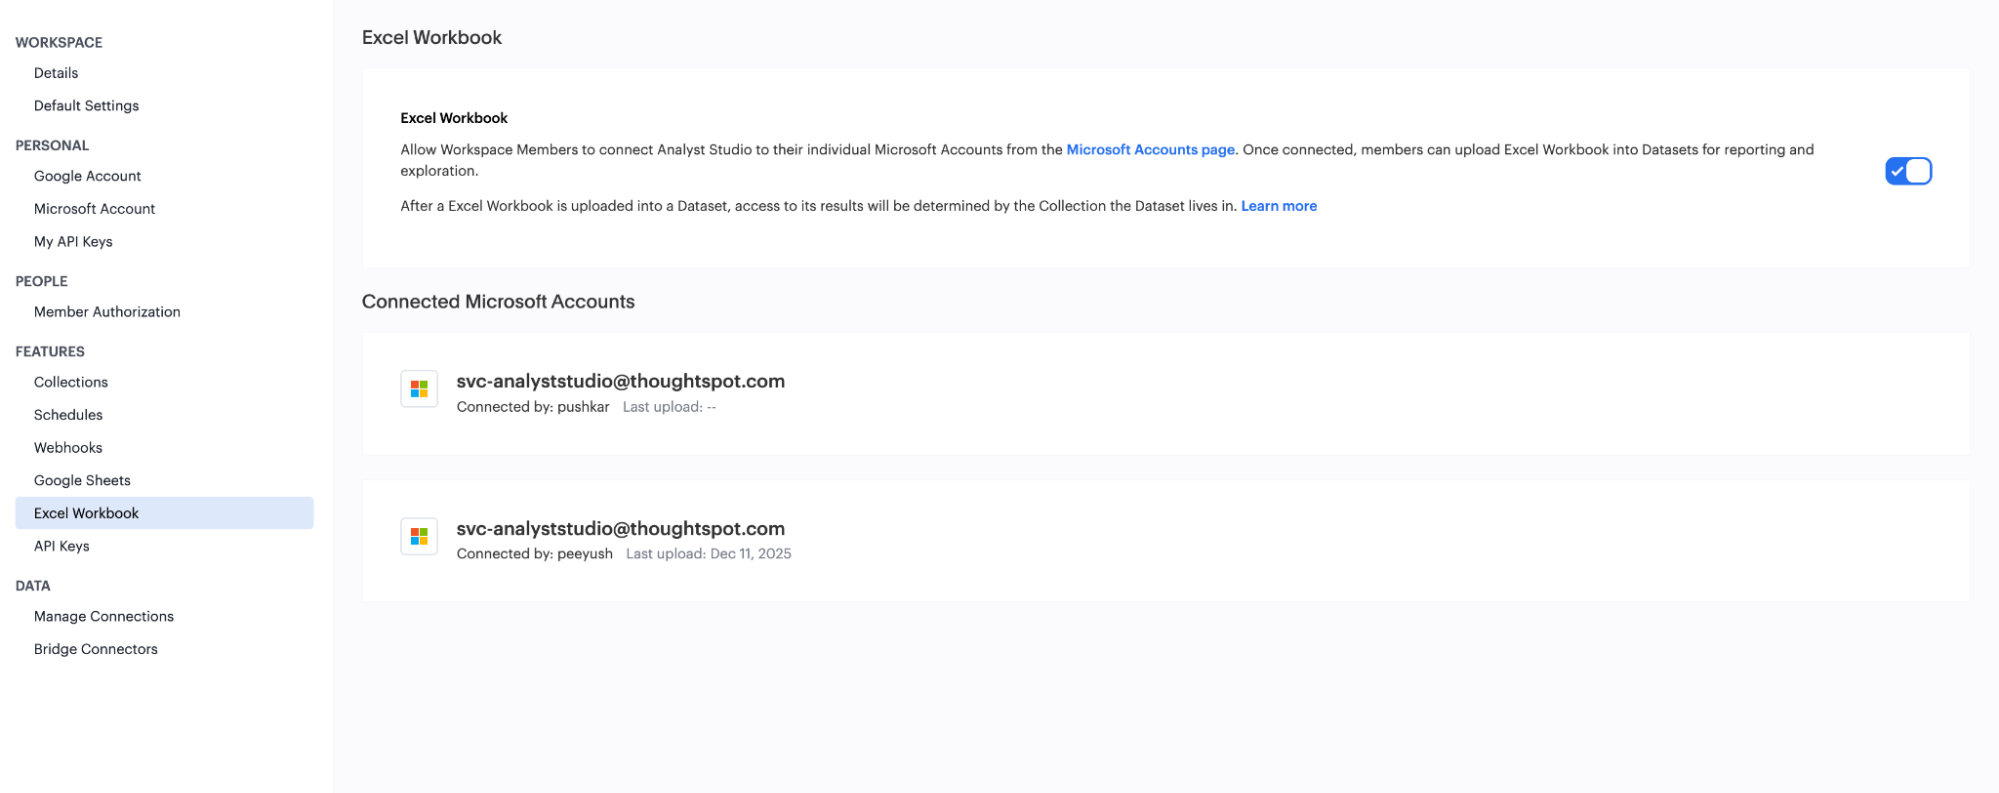
Before you get started, ensure that the Microsoft Excel integration is enabled for your Workspace.
- Admin setup
-
Analyst Studio admins must configure the feature and grant the necessary consent, typically involving registering the application in Azure AD. You must also enable the integration with Microsoft before any user can connect.

- User connection
-
Workspace Members must connect Analyst Studio to their individual Microsoft 365 account from the Workspace Settings.
- File format
-
Only Microsoft Excel files in the
.xlsxformat are supported for import. - Access
-
Your Microsoft 365 account must have read access to the Excel file you want to import.
OneDrive vs. SharePoint
Understanding the difference between OneDrive and SharePoint is important for data governance and ensuring the dataset remains accessible to your team.
| Feature | OneDrive for Business | SharePoint Online |
|---|---|---|
Primary purpose |
Individual file storage and personal work. |
Team collaboration and organizational document management. |
File ownership |
Tied to your individual Microsoft account. |
Tied to the team or organization/site. |
Default access |
Private by default; collaboration requires intentional sharing. |
Accessible by default to everyone who has site or folder access. |
Recommendation |
Use for ad hoc or draft analysis. |
Use for shared, production, or team reports. |
Prepare your Excel workbook
Following these guidelines ensures a clean, successful import and accurate schema mapping.
-
Avoid merged cells, and ensure each cell contains only data. Graphs, images, and macros are discarded during import.
-
Add headers to the first row. Column names are auto-generated from the first row.
-
Remove all non-data elements from the selected worksheet, such as footers and totals rows.
-
Formula handling: The system imports the final calculated value of a cell, not the formula itself.
Create an Excel workbook dataset
To create a new dataset from an Excel file:
-
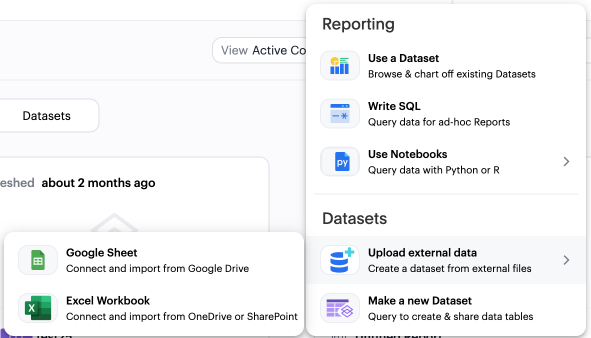
Click Create in the top right corner of your Analyst Studio home screen.
-
Choose Upload external data in the Datasets section.
-
In the upload modal, select Excel Workbook.
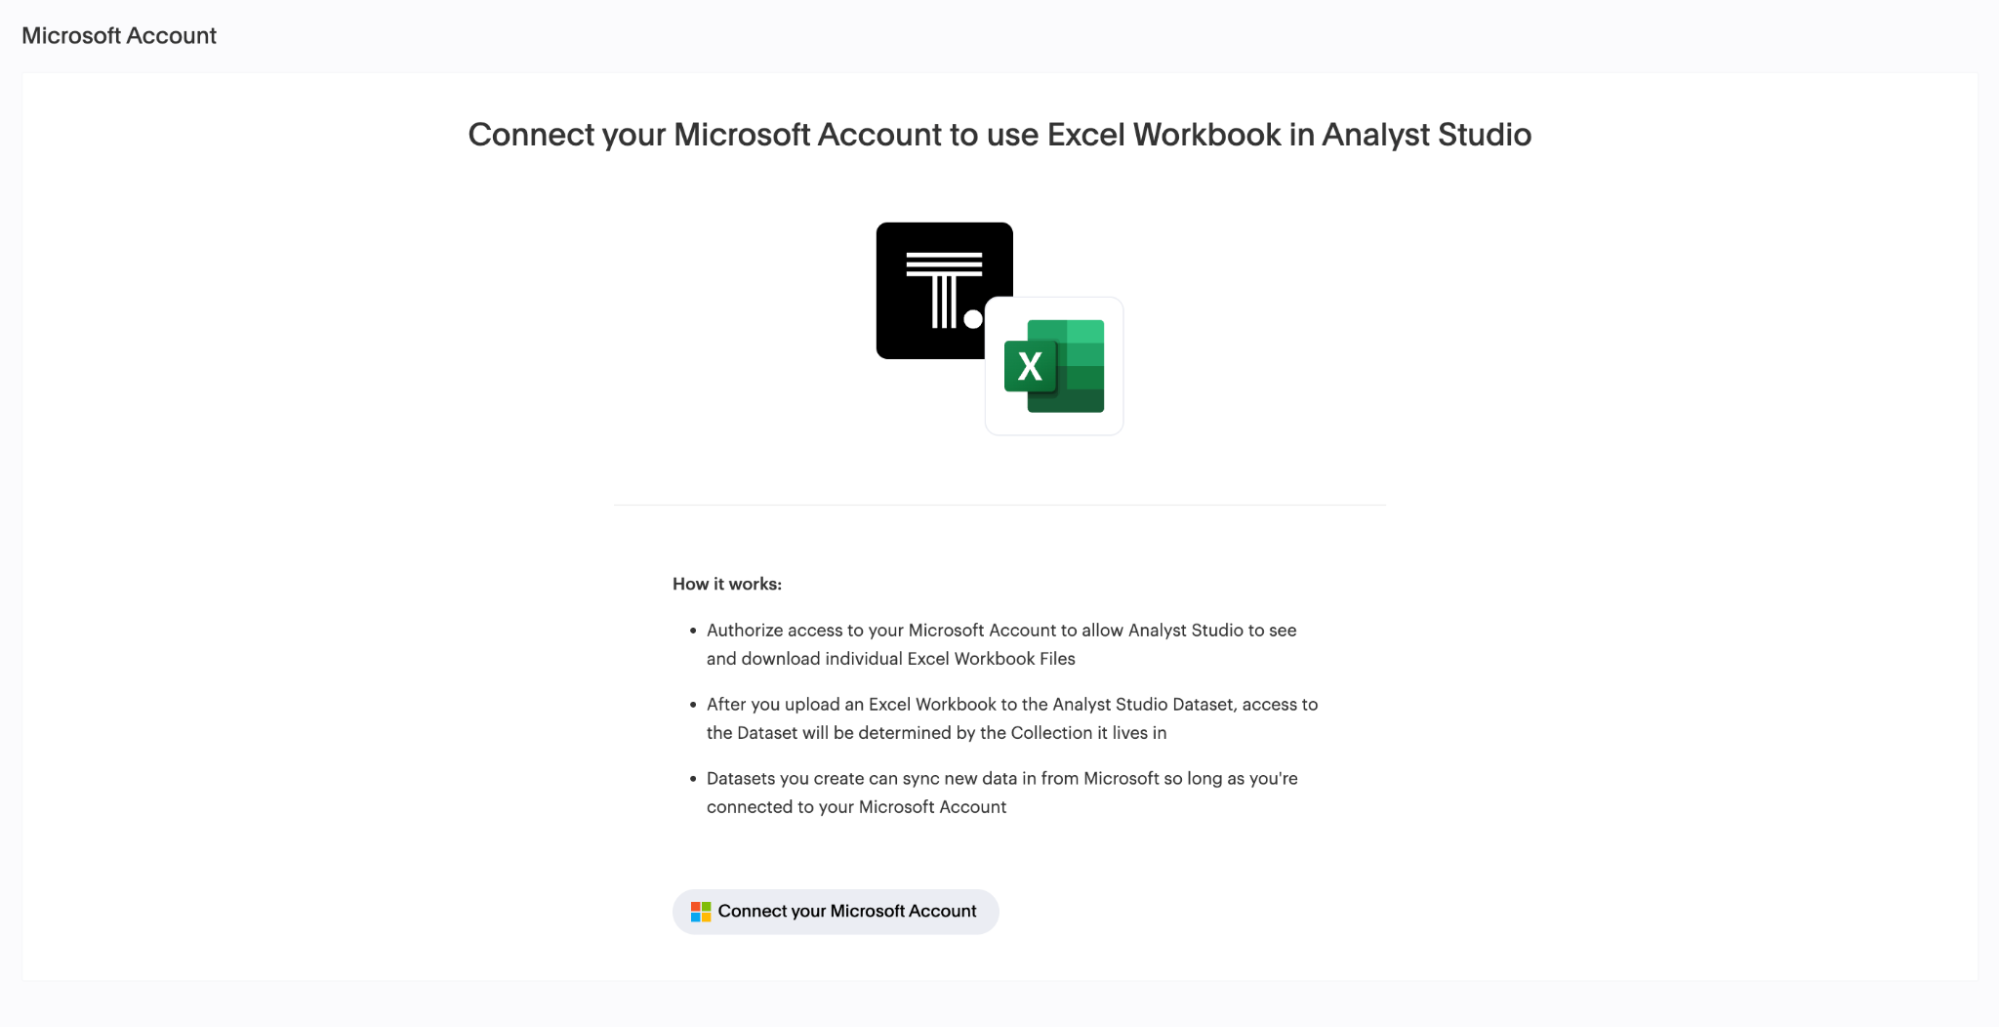
If you have not connected before, you are prompted to set up an account to access your Microsoft 365 data via OAuth.
-
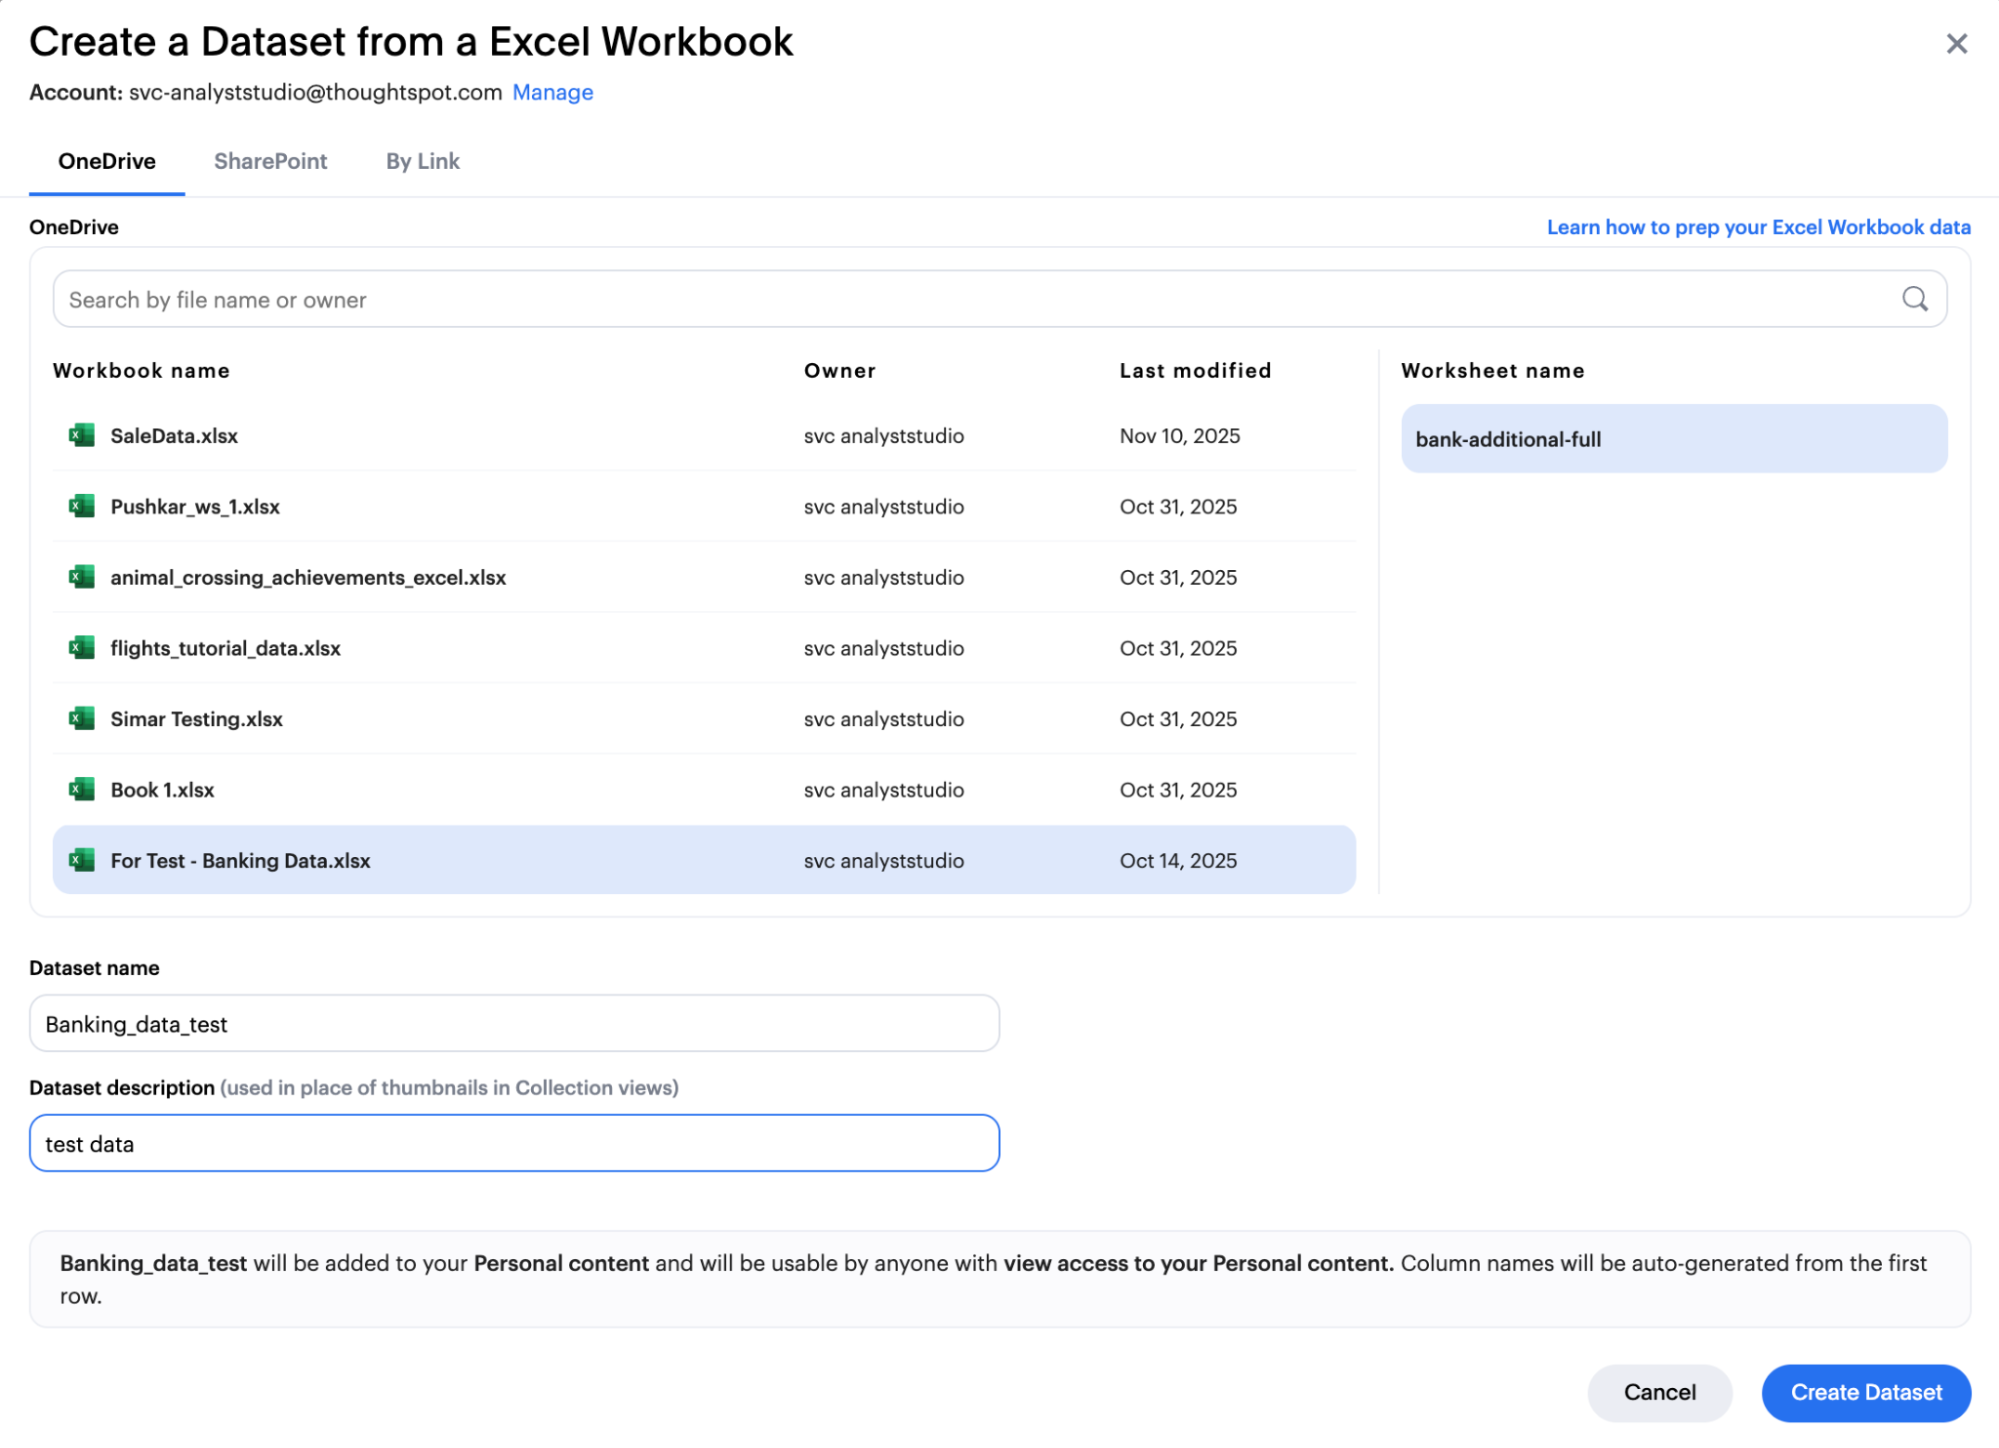
Browse for your file using one of the following options:
-
Use the Search in OneDrive or Search in SharePoint tabs to browse for your file.
-
Paste the direct URL of the Excel file into the By URL tab.
-
-
Select the Worksheet.
Analyst Studio currently supports importing only one Worksheet per Excel file for each dataset. To import more Worksheets, create additional datasets.
-
If you used the browser, select the desired Worksheet tab from the list below the file name.
-
If you pasted a URL, the system uses the specific sheet in the URL. If the URL points to the entire file, the system prompts you to select the Worksheet.
-
-
Enter a name and description for your dataset.
-
Click Create Dataset.
Edit your Excel workbook dataset
After your Excel workbook data is successfully imported and your dataset is created, you can do the following:
- View and edit columns
-
View and edit the generated columns in the Data, Fields, and Source tabs.
- Edit in Spreadsheet
-
Open the dataset in the Spreadsheet view to manipulate the data — cleaning, calculated fields, and formatting — before publishing.
- Sync new data
-
To pull new data from the underlying Excel file if the source has changed, navigate to the Data view and click Sync. The system uses the saved connection to fetch the latest version of the file and update the dataset. If the dataset is published to the Data workspace, a successful sync also automatically republishes the data to the Data workspace.
Publish your Excel workbook dataset
To publish the dataset to the Data workspace:
-
Click Publish in the top right corner.
-
In the Publish to the Data workspace window, enter the dataset name and click Publish.
The dataset is published as a table and can be consumed by Liveboards and Spotter.
|
Any manual or scheduled sync automatically republishes the dataset to the Data workspace. |
For detailed publish and republish dependency behavior, see Reusable datasets.
Describe the fields in your dataset
Adding field descriptions helps codify business definitions and logic, especially for imported ad hoc data where context can be lost.
-
Open any dataset and navigate to its Fields tab.
-
Double-click the row (field) you want to edit and add the description.
The following examples show how field descriptions can be used to create shared understanding:
| Use case | Sample field | Sample description |
|---|---|---|
Shared understanding |
Engagement rate |
Calculates the percentage of users who are engaged, where "engaged" is defined as any user who has logged in and taken more than one action in the past 14 days. |
Expectation setting |
Order status |
Segments orders by Canceled (Final), Completed (Credit Issued), or Returned (Removed from Funnel). |
Update your dataset’s name and description
You can update the name, description, and tags associated with the dataset from the Dataset properties view.
Schedule a Microsoft Excel dataset
You can configure the dataset to automatically refresh data from the source Excel file at scheduled intervals, for example daily or weekly. These schedules can be controlled at the Report level.
The platform handles token refresh using OAuth refresh tokens to keep the connection active.
Move a Microsoft Excel dataset to a Collection
Datasets you create can be moved into Collections for shared access, governance, and organization. The dataset permissions are determined by the Collection it resides in.
Use your Microsoft Excel dataset in a Report
Once created, the dataset can be selected as a source for creating Answers and Liveboards, just like any other connection.
Reports and Liveboards based on the Excel dataset automatically use the data from the last successful sync.
Dataset permissions
Access to the dataset is determined by the Collection it resides in. However, the ability to sync or refresh the data depends on the original creator’s Microsoft 365 connection remaining active and their continued read access to the source file.
Troubleshooting and FAQs
Why did my scheduled sync fail?
If a sync fails and you see the message Sync failed due to an error, the issue is usually related to permissions or connection status.
- Re-authenticate your account
-
Go to Workspace Settings > Microsoft Excel. If prompted to re-authenticate, your OAuth token has likely expired. Click the prompt and re-enter your Microsoft credentials to re-establish the connection.
- Verify file location and access
-
Ensure the original Excel file was not moved, deleted, or renamed in OneDrive or SharePoint. Confirm that you still have read permission to the file.
What Excel formats are supported?
Only files using the Office Open XML standard (.xlsx) are supported for import.
Older formats such as .xls are not supported.
What happens if the Excel file size is too large?
The file picker is subject to external limitations from Microsoft and internal performance limits. Files above 250 MB may result in slow or failed processing. We recommend keeping ad hoc files under this limit for the best experience.
Can I push my changes back to the Excel file?
No. The integration is strictly read-only. Any transformations or data edits performed in Analyst Studio are applied only to the dataset within the platform and do not modify the original Excel file. To make your transformed dataset available outside Analyst Studio, publish it to the Data workspace.