Add a Snowflake connection
You can easily add a connection to a Snowflake database, enabling you to run live queries of an external database, create answers and pinboards.
Prerequisites
Before you add a Snowflake connection, ensure the default role of the account being used has been granted usage on the database and the schema, and select on the tables that will be added to the connection.
Example:
-
Grant usage on database
<databasename>to role<rolename> -
Grant usage on schema
<databasename>.<schemaname>to role<rolename> -
Grant select on all tables in schema
<databasename>.<schemaname>to role<rolename>
Connecting to Snowflake
To add a new connection to Snowflake:
-
Click Data in the top navigation bar.
-
Click the Connections tab at the top of the page, and click + Add connection at the upper-right-hand side of the page.

-
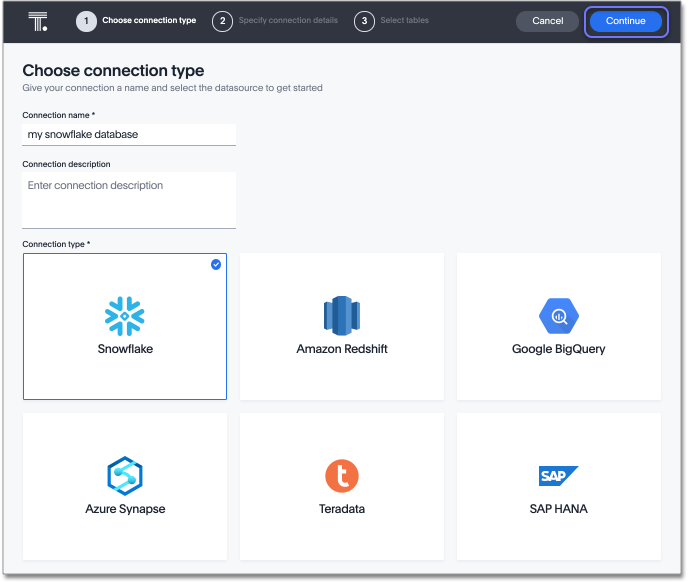
Create a name for your connection, a description (optional), then select the Snowflake connection type, and click Continue.
-
Enter the connection details for your Snowflake data source using either OAuth or service account authentication:
ThoughtSpot supports Snowflake OAuth authentication, but not External OAuth.
Before selecting OAuth authentication in ThoughtSpot, you must configure OAuth in Snowflake. For details, see Configure OAuth for a Snowflake connection.
For the best experience using Snowflake OAuth, you should have a Snowflake user account with ACCOUNTADMIN permission. -
For OAuth authentication, do the following:
-
Enter Account name, OAuth Client ID, OAuth Client Secret, and (optional) Database.
-
If you wish to provide the optional additional key-value pairs for your Snowflake connection, complete the procedure in step 5, and then click Continue. If not, click Continue.
-
When the Snowflake login screen appears, enter your Snowflake User Name and Password and click Log In, or use the Single-Sign-On option.
-
In the next Snowflake screen, allow ThoughtSpot to access your Snowflake account by clicking Allow, and then go to step 7 to select tables for your connection.
Using security passthrough may have implications for your Row Level Security. See About row level security (RLS) for more information.
-
-
For Service account authentication, do the following:
-
Enter Account name, User, Password, Role, Warehouse, and (optional) Database.
Refer to the Snowflake connection reference for more information on each of the specific attributes you must enter for your connection.
-
-
-
(Optional) Configure proxy for your Snowflake connection by doing the following:
-
Click the Advanced Config menu to reveal the Key and Value fields.
-
For Key, enter useProxy, and for Value, enter true.
-
Click the plus sign (+) to add additional Key and Value fields.
-
For Key, enter proxyHost, and for Value, enter the URL of your proxy server.
-
Click the plus sign (+) to add additional Key and Value fields.
-
For Key, enter proxyPort, and for Value, enter your proxy port number.
Snowflake shared proxy limitationSnowflake uses proxy settings from the first connection, and reuses the proxy configuration across all connections.
When setting up a proxy with Snowflake ensure that:
-
There are no other connections which use a different proxy or are without a proxy.
-
Ensure each new connection has the same proxy details. If there was an unsuccessful attempt to fetch metadata without a proxy, adding a proxy later might not work because the Snowflake driver might assume there is no proxy.
-
-
-
(Optional) Provide additional key-value pairs that you need to set up your connection to Snowflake or customize additional JDBC parameters supported by Snowflake, by doing the following:
-
Click the Advanced Config menu to reveal the Key and Value fields.
-
Enter your key and value information. Refer to the Snowflake JDBC documentation.
-
To add more keys and values, click the plus sign (+), and enter them.
Any key-value pairs that you enter must be defined in your Snowflake data source. Key-value pairs are case-sensitive.
-
-
Click Continue.
-
Select tables (on the left) and the columns from each table (on the right), and then click Create connection.
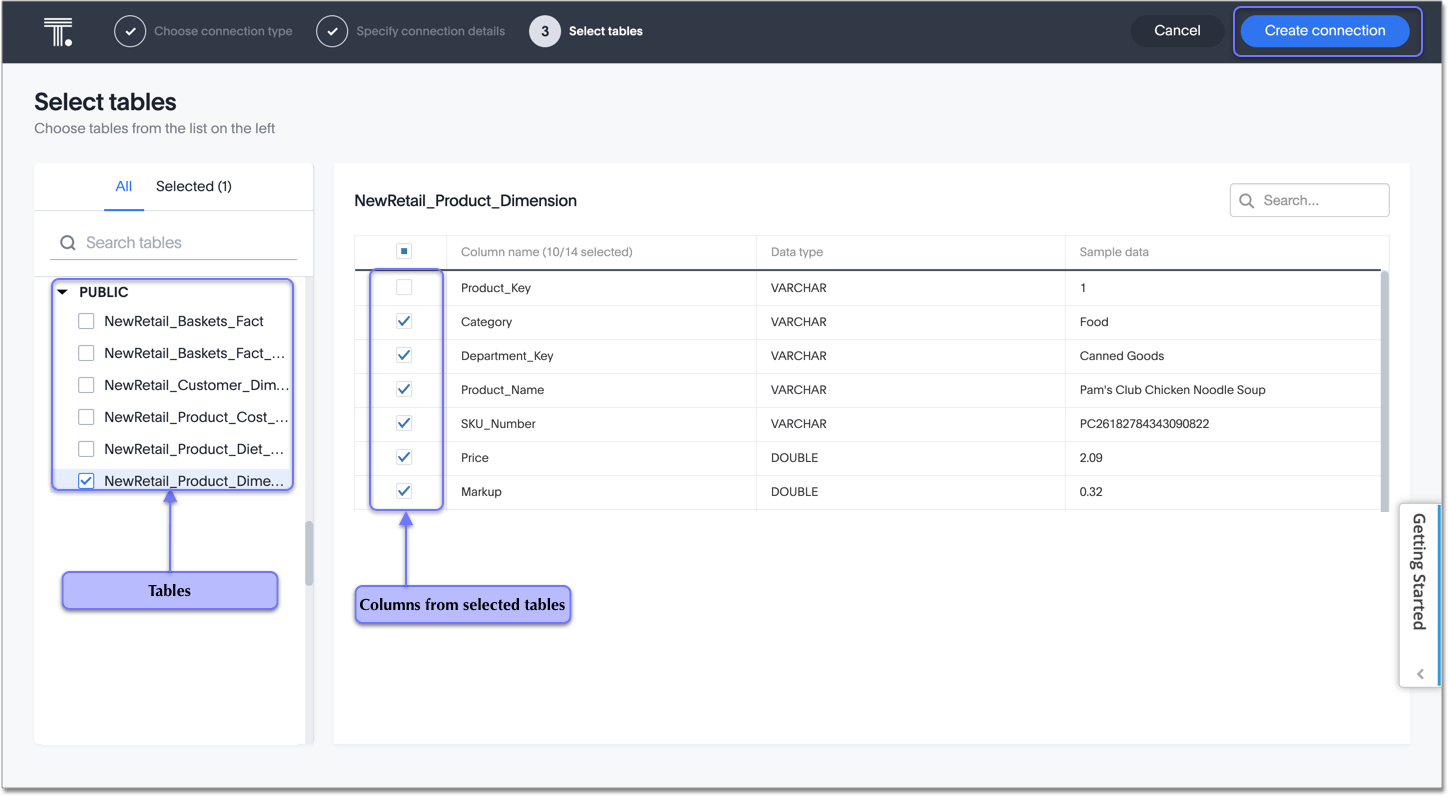
A message appears indicating the number of tables and columns that will be added to your connection.
-
Click Confirm.
After you add the connection, you can search your Snowflake database right away by clicking Search now.

Your new connection appears on the Data > Connections page. You can click the name of your connection to view the tables and columns in your connection.
The connection you just created is a link to the external data source. If there are any joins in the selected tables of the external data source, those are imported into ThoughtSpot.
You can now perform a live query on the selected tables and columns of your connection. Because the selected tables and columns in your connection are linked, it may take a while to initially render the search results. This is because ThoughtSpot does not cache linked data. With linked data, ThoughtSpot queries the external database directly, which is slower than querying data that is stored in ThoughtSpot’s database.
Related information
Delete a table with dependencies from a Snowflake connection
Partner Connect, with an accompanying Tutorial


