Set up the ODBC Driver for SSIS
Use SSIS to set up the ODBC Driver.
Microsoft SSIS (SQL Server Integration Services) is a data integration and workflow applications platform you can use to connect to ThoughtSpot. The platform is a component of the Microsoft SQL Server database software.
You can use a SSIS connection to perform data migration tasks. Its data warehousing tool is useful for data ETL (extraction, transformation, and loading). The SSIS Import/Export Wizard creates packages that transfer data with no transformations. It can move data from a variety of source types to a variety of destination types, including text files and other SQL Server instances.
Use SSIS to set up the ODBC Driver by creating a connection manager. This manager connects an OLE DB Source and the ODBC Destination.
Prerequisites
On Windows 64-bit, you have to install both the 32-bit and 64-bit ThoughtSpot ODBC drivers. In addition, they must be named the same, such as ThoughtSpot. By default they are named ThoughtSpot-32 and ThoughtSpot-64. This is required because the 64-bit SSIS shows a list of 32-bit ODBC drivers when you configure an ODBC target. However, it executes the 64-bit driver. If the drivers aren’t named the same, then you can get an error stating the driver doesn’t exist.
You can find the ThoughtSpot ODBC drivers here.
Set up the driver
To set up the ODBC driver using SSIS:
-
Open your SQL Server visual development tool that is based on Microsoft Visual Studio.
-
Select OLE DB Source, and click New.
Where ODBC provides access only to relational databases, OLE DB provides access to data regardless of its format or location.
-
Add the server by name from the machine accessible list.
-
Enter the authentication information: db name, user name, password, and test connection.
You can add the UID and password by clicking on Options.
-
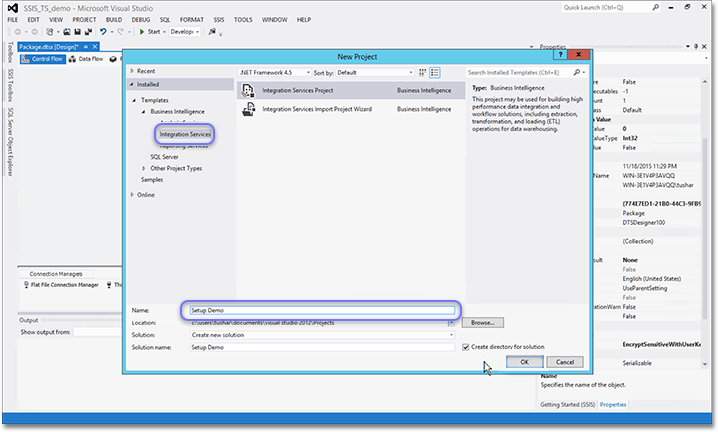
Click File and select New, then Project.
-
Select the Integration Services tab under .
-
Enter a name in the Name field and click OK.
-
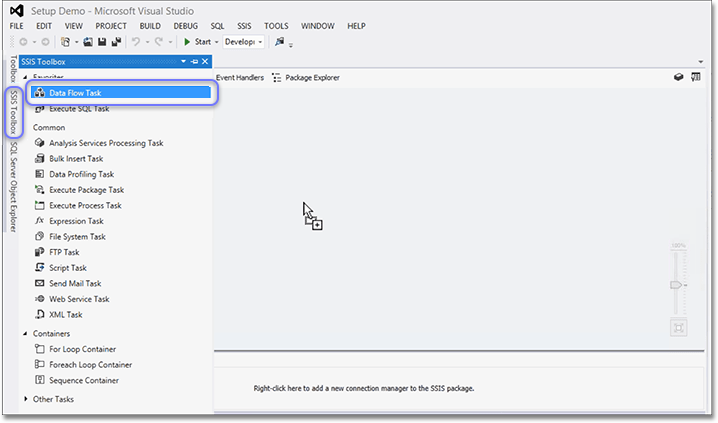
Select the SSIS Toolbox tab on the left hand side of the platform, and drag and drop Data Flow Task to the main window.
-
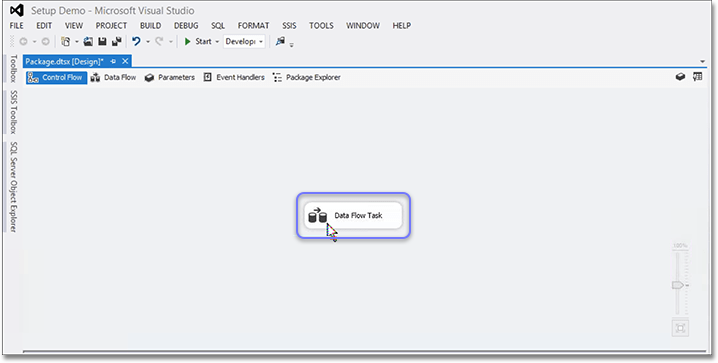
Double click the Data Flow Task icon when it appears in the center of the page.
-
Navigate back to the SSIS Toolbox tab. You now want to create sources and destinations.
Create sources and destinations
-
Under Other Sources, find OLE DB Source and drag and drop it to the main window.
-
Double click the OLE DB Source icon when it appears in the center of the page to open the OLE DB Source Editor.
-
Select a new OLE DB connection manager by clicking New.
-
In the Configure OLE DB Connection Manager window, select your Data connection and click OK.
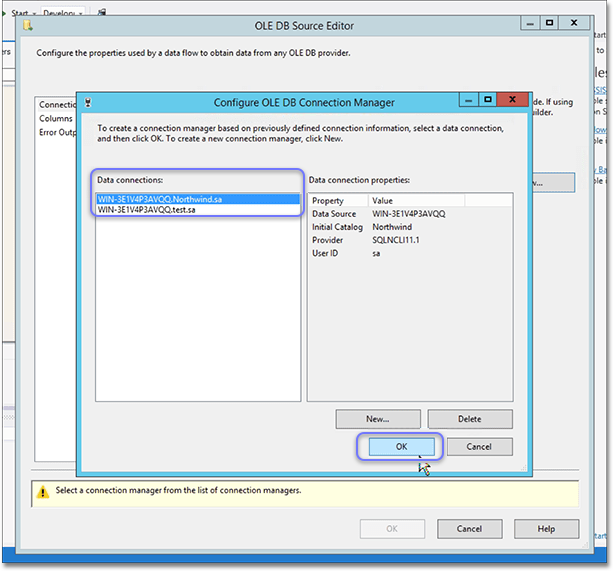
If you do not see your data connection, you will have to create a new one in the Connection Manager by clicking New.
-
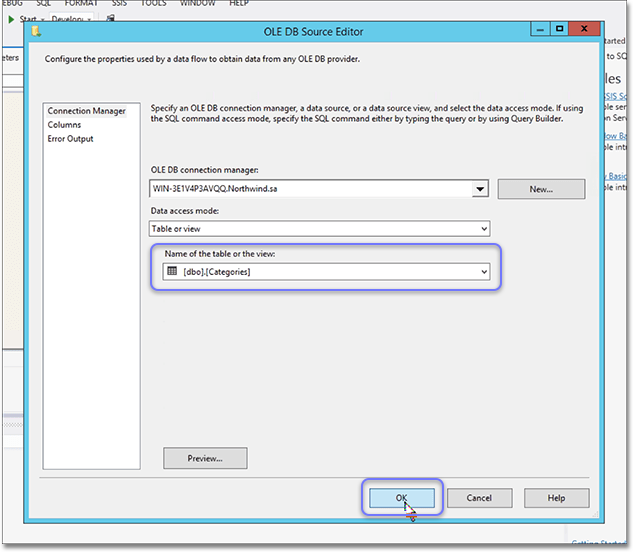
Back in the OLE DB Source Editor, select the Name of the table or the view, and click OK.
-
Select the table, and see what columns are in it.
In this example, a single column,
c1, is selected.
Configure the ODBC Data Source Administrator
The ODBC Data Source Administrator has to be configured to connect to ThoughtSpot and bring the table in.
-
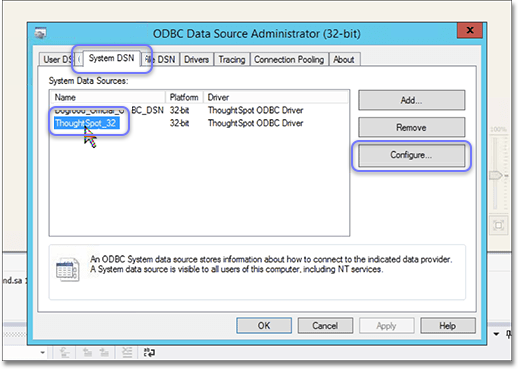
Search for and open your ODBC Data Sources (32-bit) program.
-
Click the System DSN tab and select ThoughtSpot_32.
-
Click Configure.
-
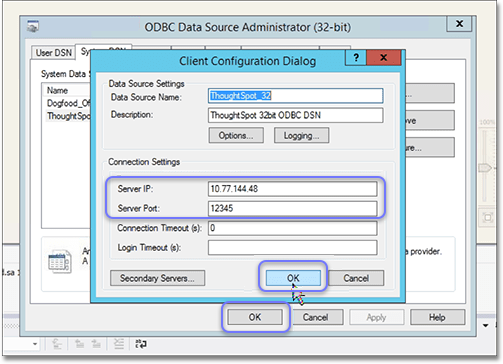
In the Client Configuration Dialog, enter the Server IP and Server Port.
Enter any node IP that has Simba server running on it. In Secondary Servers, you must specify all node IPs, because ThoughtSpot must resolve to the server Simba runs on, and that server can change after an upgrade. Enter one server IP per line. The line return serves as a separator. Comma separated values are not supported.
-
Click OK twice to close the Client Configuration Dialog and the ODBC Data Source Administrator.
Create a file to take the feed
Now that you have set up your source, create the empty table in ThoughtSpot to take this feed. SSIS does not allow you to create the table in ThoughtSpot. You have to do this first in TQL. In Pentaho, it will create the table in ThoughtSpot, but not in SSIS.
Create the ODBC Destination. Use the one you created and named in the ODBC Data Source Administrator.
-
In the SSIS Toolbox tab, under Other Destinations, drag and drop ODBC Destination to the main window.
-
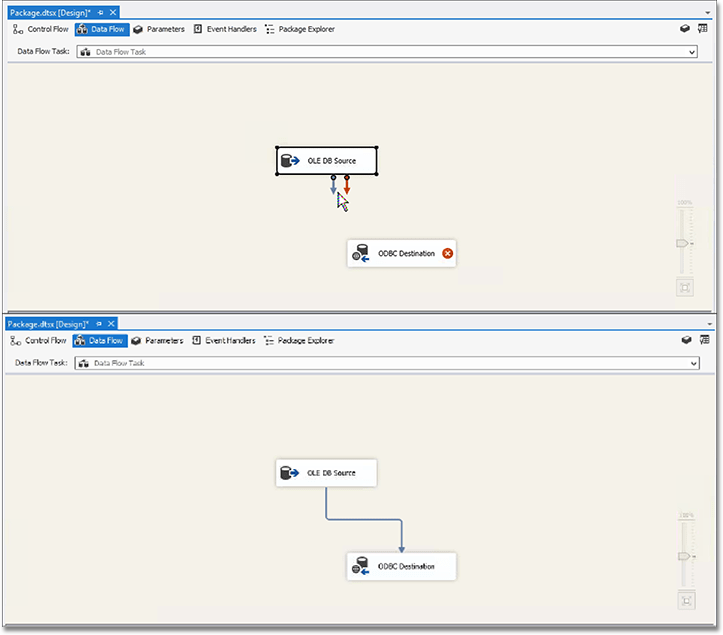
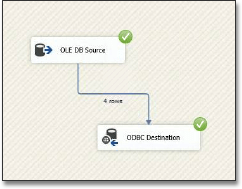
Drag the blue arrow to connect the OLE DB Source icon to the ODBC Destination icon.
-
Double click the ODBC Destination icon.
-
Use ODBC Destination to set the Batch size for the connection in the Connection Manager tab. You can set the size to be up to 10,000.
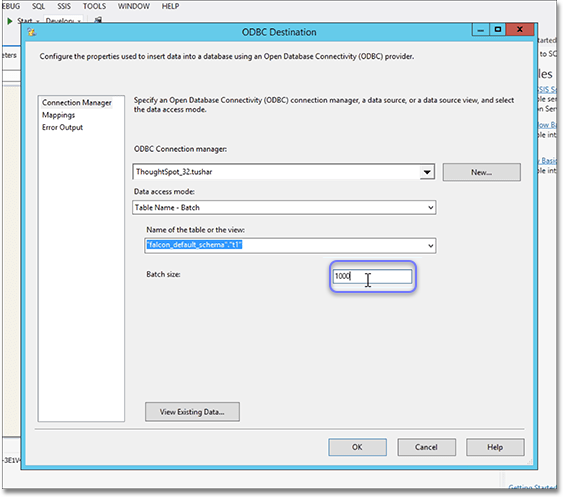
If the load fails, the entire batch will be lost, and you will have to start that load over again.
-
Set the Transaction Size to match the total number of rows that are expected to be loaded in the load cycle.
Your transaction size can be quite large—even spanning a million rows. However, too many small batches can lead to degraded performance. This is because each batch acts as a separate transaction and creates a separate commit. Too many of these will slow down our system since each transaction creates a new “data version”. In Pentaho, the transaction size setting is called Commit Size.
-
Set the Transaction Option attribute of the Data Flow Task to Supported.
-
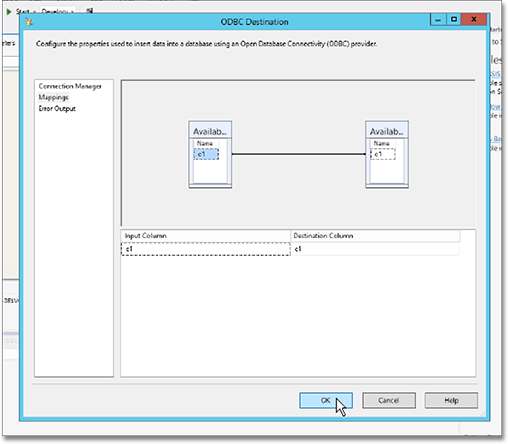
In the Mappings tab, validate the mapping or change it.
You can have different column names in each database if you map them. Of course, they must be of the same or compatible datatype.
-
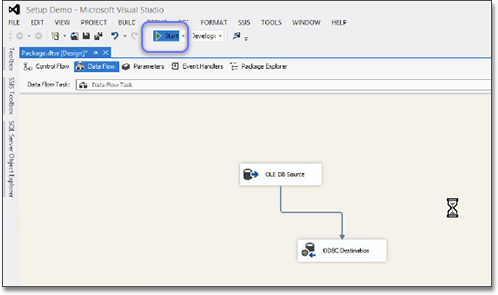
Start the import job by clicking the Start button.
You should see an animation indicating that the data is transferring over. When the import is complete, the number of successfully transferred rows is displayed.
You can validate the import using TQL or from the Data screen.


