Configure OAuth for a Redshift connection
ThoughtSpot supports OAuth for an Amazon Redshift connection. Redshift supports federated authentication, enabling users from an identity provider (IDP) like Okta to authenticate to the database.
You configure the OpenID Connect(OIDC) provider in AWS IAM. OIDC does not require user credentials to be stored or passed from the client application. Users attempting a connection to Redshift are redirected to the IDP login page to authenticate and obtain an access token. Redshift’s driver has options to pass an access token as a parameter in creating a connection.
Setting up OIDC for Redshift with Okta ldP
Setting up Redshift for OIDC authentication with Okta as IDP requires configuration on Okta and AWS. The high level steps are as follows.
-
Create an OIDC application in Okta with the details of the application that will request token - in this case TS.
-
Set up authorization server with audience as the OIDC application that will request access token.
-
Add Okta as identity provider in AWS by providing the details of the Okta authorization server.
-
Create a role with appropriate Redshift actions and add the Okta identity provider resource as a trusted entity to the role
Part 1: Create the OIDC application in Okta
To create the OIDC application, do the following:
-
Sign in to Okta.
-
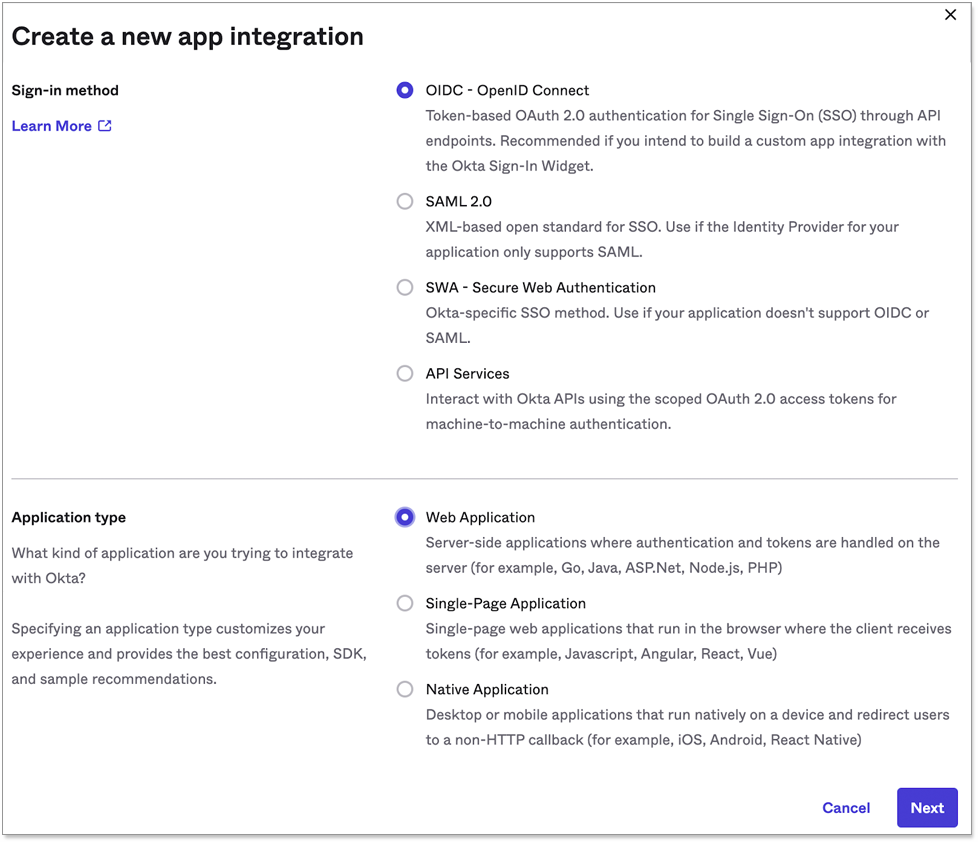
From the Okta dashboard, navigate to Applications and click Create App Integration.

-
For sign-in method, choose OIDC - OpenID Connect.
-
For application type, choose Web Application.
-
Click Next.
-
Complete the rest of the steps by following the on-screen instructions.
-
Grant type: Authorization code is the default. In addition, Refresh Token is required to request a new access token without interactive login to IDP when the token expires.
-
Sign-in redirect URIs: The endpoint in the TS application which will handle the OAuth authorization code flow.
-
-
Make a note of the Client ID and Client Secret of the OIDC application. These are required by the ThoughtSpot connection to perform the OAuth authorization code flow.
Part 2: Set up the authorization server in Okta
To set up the authorization server, do the following:
-
Sign in to Okta (if needed).
-
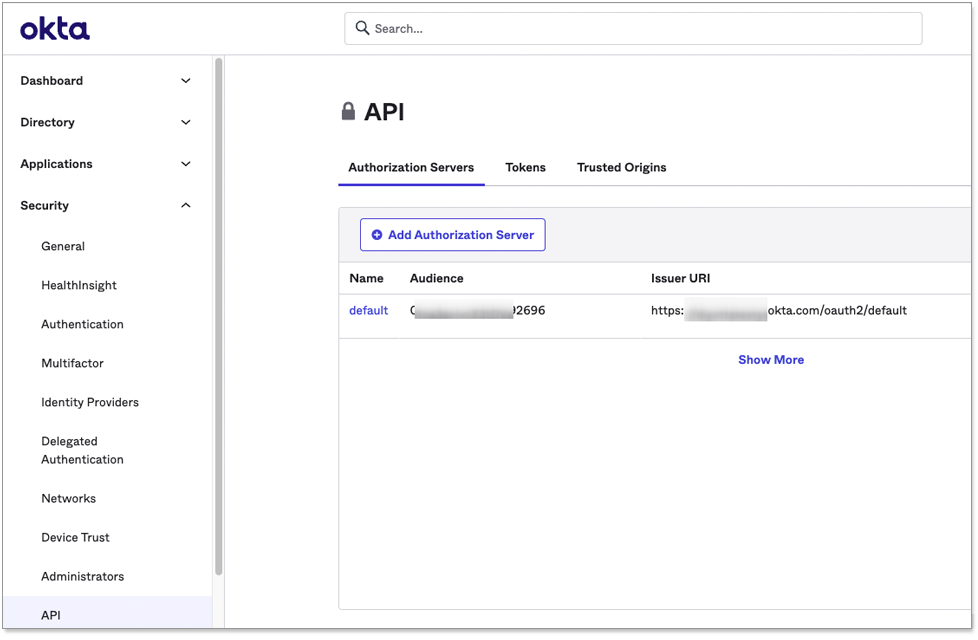
From the Okta dashboard, navigate to section.
-
If you already have an authorization server you want to use, you can edit it. Otherwise, add a new one by clicking Add Authorization Server.
-
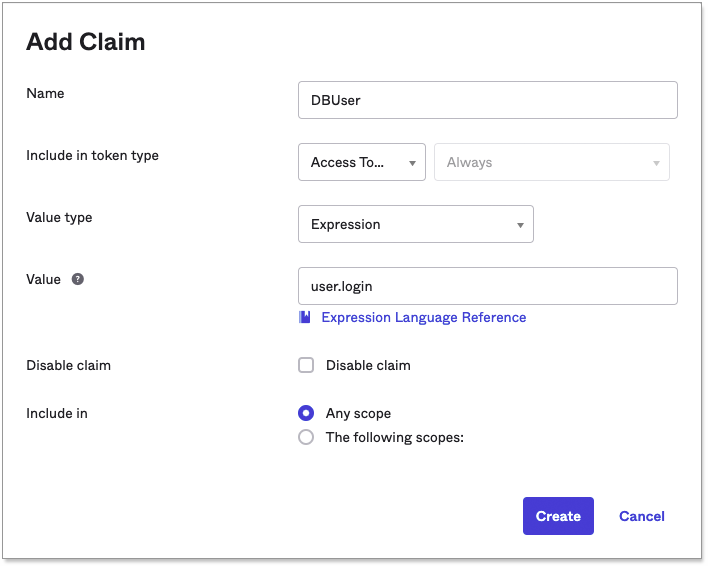
Add a custom claim with the Name DbUser and enter the Value user.login. The Redshift driver requires this claim in the JWT token presented to it.
Part 3: Add Okta as the IDP in AWS
To add Okta as the IDP, do the following:
-
Sign in to the AWS management console.
-
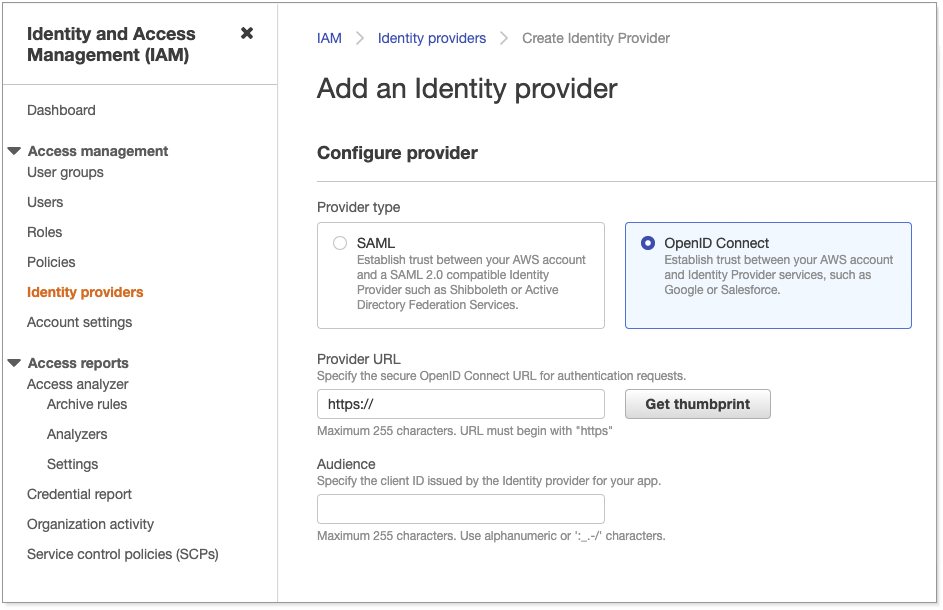
Go to .
-
For provider type, select OpenID Connect.
-
For Provider URL, enter the Issuer URI of the Okta authorization server.
-
For Audience, enter the Client ID of the OIDC application created in Okta.
Part 4: Create an IAM role with IDP trust
To create an IAM role with IDP trust, do the following:
-
Sign in to the AWS management console (if needed).
-
Create an IAM role attached with a policy that allows Redshift actions on the Redshift cluster, Database, User and Group.
Example policy:
{ "Version": "2012-10-17", "Statement": [ { "Effect": "Allow", "Action": [ "redshift:CreateClusterUser", "redshift:JoinGroup", "redshift:GetClusterCredentials", "redshift:ListSchemas", "redshift:ListTables", "redshift:ListDatabases", "redshift:ExecuteQuery", "redshift:FetchResults", "redshift:CancelQuery", "redshift:DescribeClusters", "redshift:DescribeQuery", "redshift:DescribeTable" ], "Resource": [ "arn:aws:redshift:us-east-1:111122223333:cluster:abcxyzredshift", "arn:aws:redshift:us-east-1:111122223333:dbuser:abcxyzredshift/${redshift:DBUser}", "arn:aws:redshift:us-east-1:111122223333:dbgroup:abcxyzredshift/developer", "arn:aws:redshift:us-east-1:111122223333:dbname:abcxyzredshift/${redshift:DBName}" ] } ] } -
Add the IDP resource as a trusted entity for assuming this role.
 {
 "Version": "2012-10-17",
 "Statement": [
   {
     "Effect": "Allow",
     "Principal": {
       "Federated": "arn:aws:iam::111111111111:oidc-provider/abcxyz.okta.com/oauth2/default"
     },
     "Action": "sts:AssumeRoleWithWebIdentity",
     "Condition": {
       "StringEquals": {
         "abcxyz.okta.com/oauth2/default:aud": "0123abc456xyz"
       }
     }
   }
 ]
  }
The role/policy requirement is same as that for SAML integration documented in Amazon’s Redshift documentation.
-
Obtain the following connection properties from above configurations:
-
Client ID: Client ID of the application registered with the OAuth provider (IDP). This is an alphanumeric string.
-
Client Secret: Client Secret of the application registered with the OAuth provider (IDP). An alphanumeric string that should be picked from the IDP console (e.g. Okta dashboard).
-
Role ARN: Amazon Resource Name (ARN) of the role. ARN of the role defined with a policy allowing the usage of token based authentication and permissions on Redshift. It is in the following format:
arn:aws:iam::<account_id>:role/<role_name>. -
Authorization Url: URL of the authorization server to where the authorization code request is sent by ThoughtSpot. It is usually available in the IDP’s console.
-
Access token Url: Endpoint provided by the authorization server to where the token request is sent by ThoughtSpot exchanging the authorization code obtained for the client. It is usually available in the IDP’s console.
-
DbGroups: A comma-separated list of existing database group names that user joins for the current session.
-
Related information


