Configure AWS Secrets Manager
With AWS Secrets Manager you can store your Redshift password in your own hosted AWS Secrets Manager, so ThoughtSpot can fetch it when needed. This eliminates the need for you to enter the password when you create a new Redshift connection.
Prerequisites
-
Hosted AWS Secrets Manager solution
-
ThoughtSpot cluster deployed on Amazon EC2 instance
-
AWS Secrets Manager feature enabled by contacting ThoughtSpot Support.
Configuring AWS Secrets Manager
Creating and storing the AWS KMS
-
Sign in to the AWS Management Console and open the AWS Key Management Service (AWS KMS) console.
-
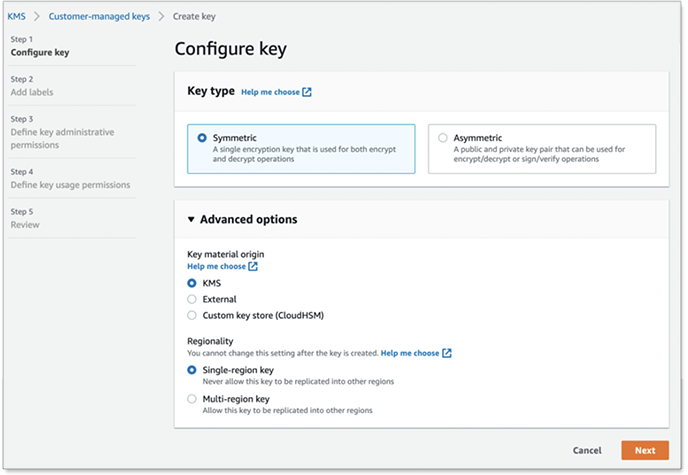
In the navigation pane, click Customer-managed keys, and then click Create key.

-
To create a symmetric KMS key, for Key type choose Symmetric, and then click Next.
-
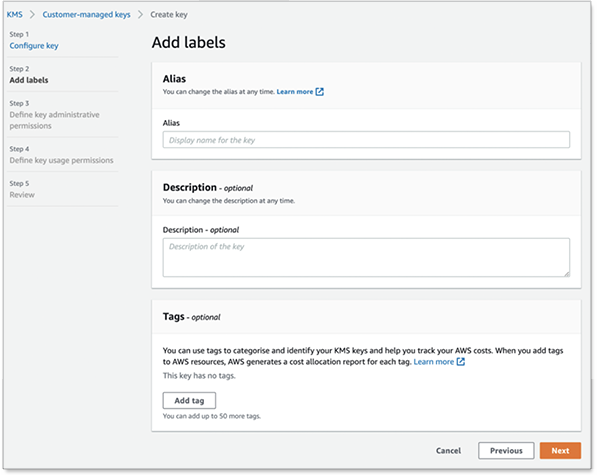
On the Add labels page, create an alias for the KMS key.
-
Click Next.
-
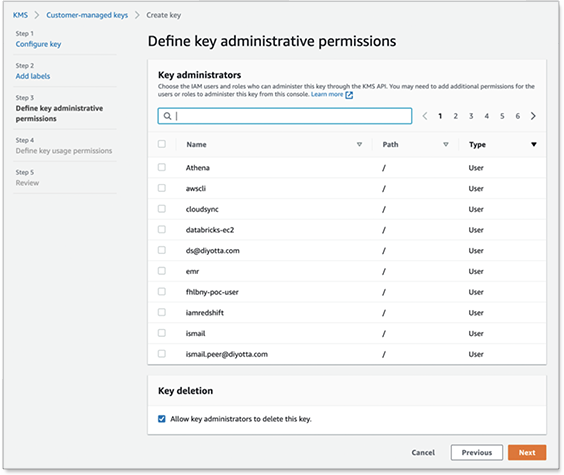
Select the IAM users and roles that can administer the KMS key.
-
Click Next.
-
Select the IAM users and roles that can use the KMS key for cryptographic operations.
-
Click Next.
-
Review the key settings that you chose. You can still go back and change all settings.
-
Click Finish to create the KMS key.
Creating and storing the secret
-
Sign in to the AWS Management Console.
-
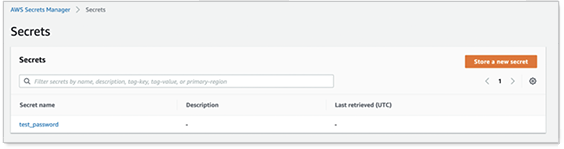
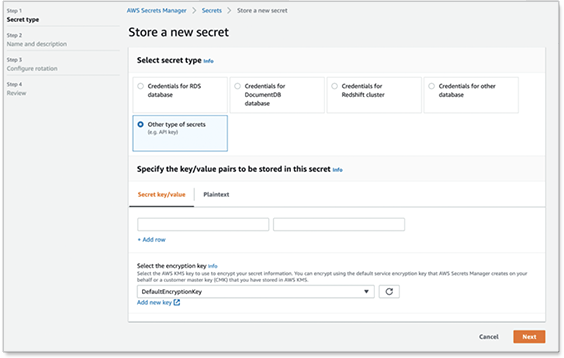
On the Secrets list page click Store a new secret.
-
On the Store a new secret page, select Other type of secrets. (This type allows you to store key value pairs or plain text.) You can then specify the secrets as key value pairs on this page.
-
For Select the encryption key, choose the AWS KMS key created above in the Creating and storing the AWS KMS section.
-
Click Next.
-
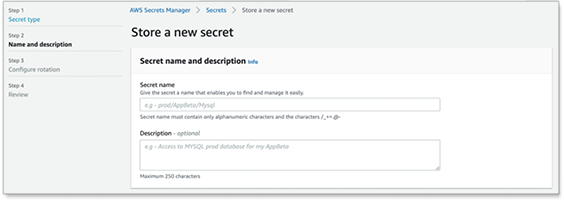
Under Secret name, type a name for the secret. It can be only alphanumeric and can include these characters:
/_+=.@-.
-
Click Next.
-
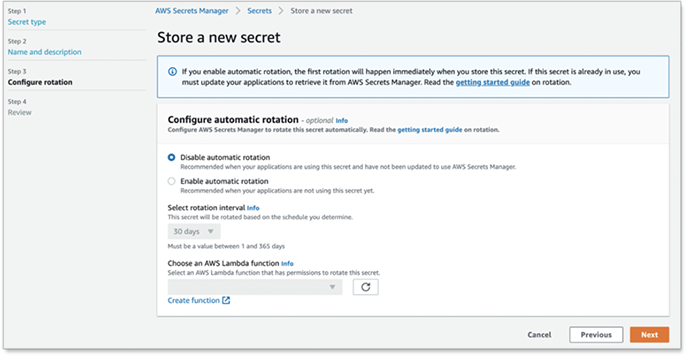
Under Configure automatic rotation, select a type which enables AWS Secrets Manager to rotate the secret automatically.
-
Click Next.
-
Review the final details, then click Store.
This creates a secret.
Creating and storing the IAM Policy
-
Sign in to the AWS Management Console and open the AWS IAM console.
-
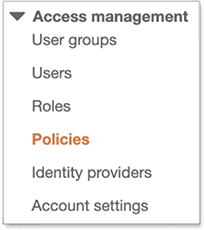
In the navigation column on the left, choose Policies.
-
At the top of the page, click Create Policy.

-
Click the JSON tab. Enter the JSON policy using the following format.
Example:
{
  "Version": "2012-10-17",
  "Statement": [
	{
  	"Effect": "Allow",
  	"Action": [
    	"secretsmanager:GetResourcePolicy",
    	"secretsmanager:GetSecretValue",
    	"secretsmanager:DescribeSecret",
    	"secretsmanager:ListSecretVersionIds"
  	],
  	"Resource": [
  "arn:aws:secretsmanager:us-west-2:111122223333:secret:aes128-1a2b3c"
  	]
	},
	{
  	"Effect": "Allow",
  	"Action": "secretsmanager:ListSecrets",
  	"Resource": "*"
	},
    	{
        	"Sid": "AllowKMS",
        	"Effect": "Allow",
        	"Action": [
            	"kms:Decrypt",
            	"kms:DescribeKey"
        	],
        	"Resource": [
            "arn:aws:kms:us-west-2:111122223333:key/mrk-5e2384a66c563d33b9a595de4702536"
        	]
    	}
  ]
}
The resource should have a Secret ARN for which the policy is defined, and the KMS used for it. -
Click Next: Tags, and then Next: Review.
-
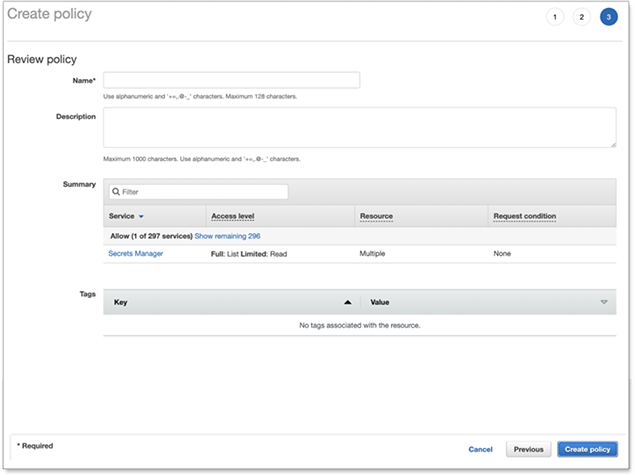
On the Review policy page, enter a Name and an optional Description for the policy that you are creating. Review the policy summary to see the permissions that are granted by your policy. Then click Create policy to save.
Creating and storing the IAM Role
-
Sign in to the AWS Management Console and open the AWS IAM console.
-
In the navigation column on the left, click Roles, and then Create role.

-
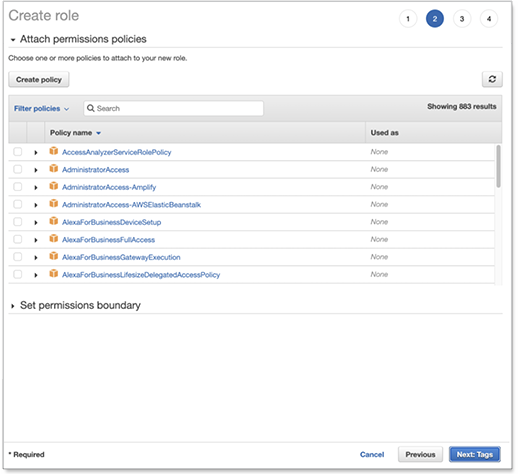
Choose the AWS service role type, and then choose the service that you want to allow to assume this role. For AWS secret manager choose EC2, then click Next: Permissions.

-
Select the policy created above in the Creating and storing the IAM policy section, and the click Next: Tags.
-
Click Next: Review.
-
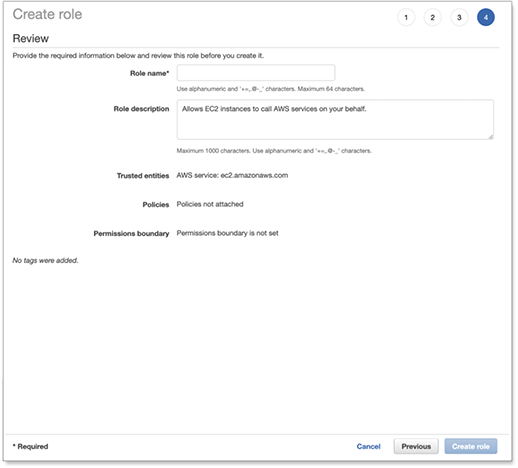
Enter a Name and an optional Description for the role that you are creating.
-
Review the role and then click Create role.
Attach an IAM role to an instance
-
Open the Amazon EC2 console.
-
In the navigation pane, select the instance, choose .

-
Select the IAM role to attach to your instance, and then click Save.
Access secrets across AWS accounts
This section details the configuration required to access secrets across AWS accounts.
In the following example, there are two different AWS accounts. The first is a PRODUCTION account (the account where you run applications) and the other is a CENTRAL_SECURITY account (the account where you manage secrets). In your configuration you would use your specific account, key, secret, and role names.
-
On the CENTRAL_SECURITY account:
-
Create an AWS key as described in the Creating and storing the AWS KMS section.
-
Create an AWS secret as mentioned in the Creating and storing the secret section.
-
Create an IAM role with a policy which allows permissions for secrets and a KMS decryption used for the secrets as described in the Creating and storing the IAM Policy and the Creating and storing the IAM Role sections.
-
Also under the trust relationships in IAM role, add the PRODUCTION account IAM role details to assume it.
Example:
{
  "Version": "2012-10-17",
  "Statement": [
	{
  	"Effect": "Allow",
  	"Principal": {
    	"Service": "ec2.amazonaws.com"
  	},
  	"Action": "sts:AssumeRole"
	},
	{
  	"Sid": "VisualEditor3",
  	"Effect": "Allow",
  	"Principal": {
    	"AWS": "arn:aws:iam::982380164364:role/production_role"
  	},
  	"Action": "sts:AssumeRole"
	}
  ]
}
-
-
On the PRODUCTION account, create an IAM role with a policy which assumes the CENTRAL_SECURITY account IAM role where secrets are defined.
Example:
{ "Version": "2012-10-17", "Statement": [ { "Sid": "VisualEditor0", "Effect": "Allow", "Action": "sts:AssumeRole", "Resource": [ "arn:aws:iam::111122223333:role/central_security_role" ] } ] } -
Attach the PRODUCTION account IAM role to EC2 instance, by following the steps in Attach an IAM role to an instance.
Related information
Amazon’s documentation on AWS Secrets Manager
Delete a table with dependencies from an Amazon Redshift connection


