Edit an Amazon Redshift connection
You can edit an Amazon Redshift connection to add tables and columns.
Follow these steps to edit an existing Amazon Redshift connection:
-
Click Data in the top navigation bar.
-
Click the Connections tab at the top of the page.
-
Find the name of the connection.
For your convenience,
-
Sort each column: Connection name, Modified (date), or Author.
-
Search on these categories.
-
-
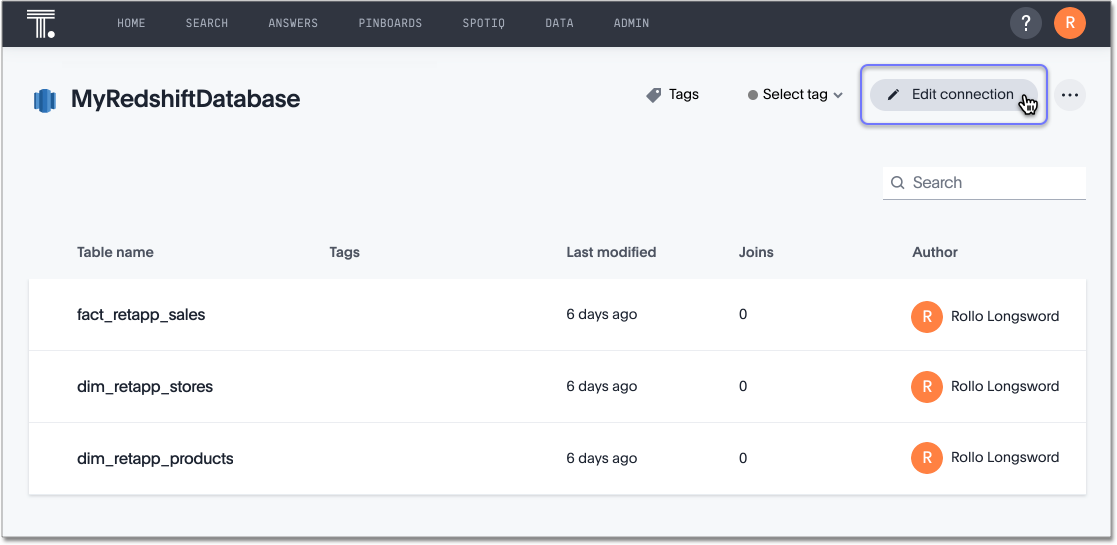
Click the name of the connection.
-
Click Edit connection at the upper-right-hand side of the page.

-
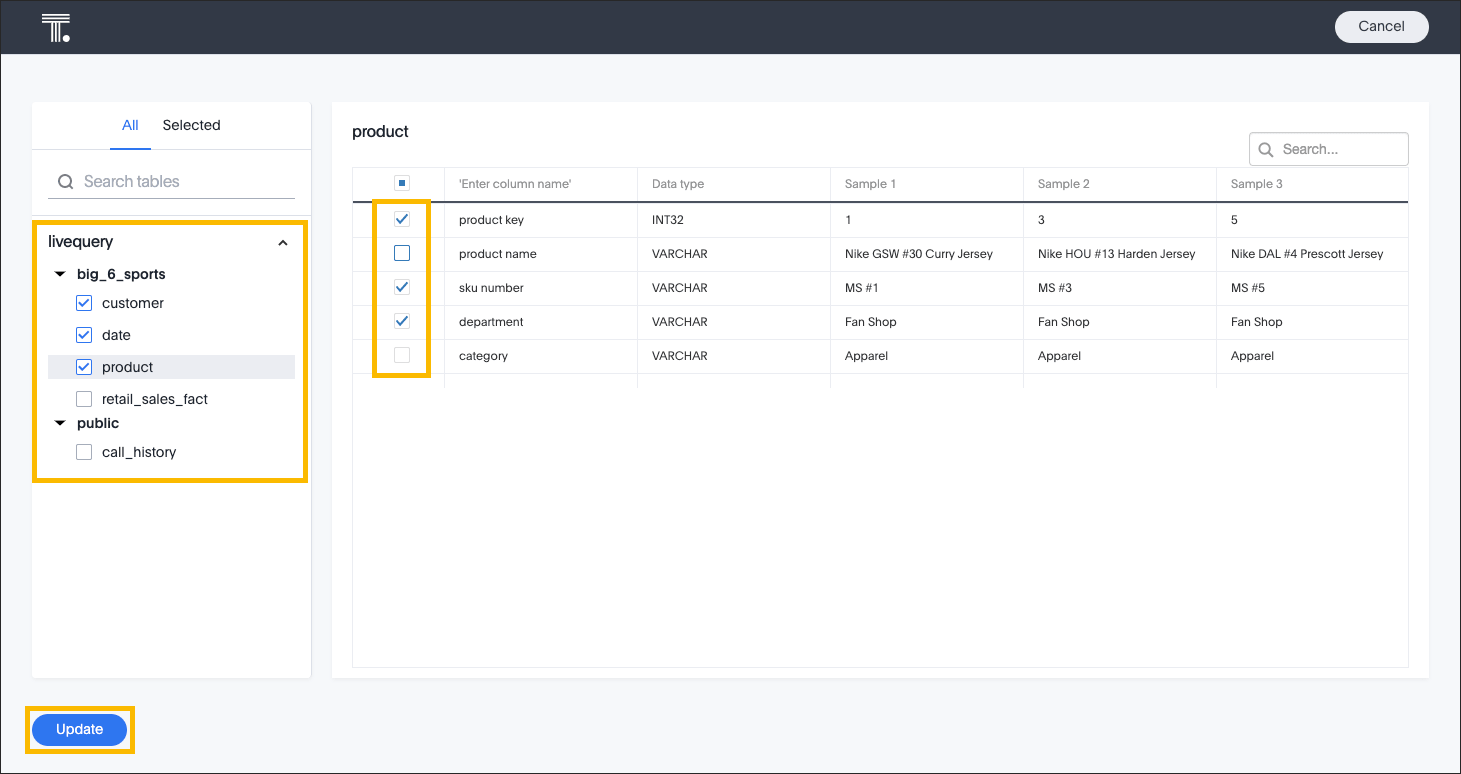
The Select tables interface appears.
This is our intentional default, making it easier for you make changes to the selection of tables and columns.
-
To change the connection name and description, click the Change connection name option at the tope of the screen.
-
To change the properties of the connection, such as authentication parameters, click the Update connection details option.
-
Click Continue to navigate through the editing workflow.

-
-
After making all the necessary changes, click Update.
-
Click Confirm to save the updated connection details.
Related information


