Share answers
When you view an Answer in ThoughtSpot, you can share it with others.
Whenever you view an Answer, you have the option of sharing it with others. The Answer appears in its most recent state when you share it. For example, if you add a filter after saving the Answer and then share it, the Answer you share has that filter.
You can share an Answer from the list of Answers on the main Answers page, or from the Answer itself.
Share from the Answers page
To share an Answer from the Answers page, follow these steps.
-
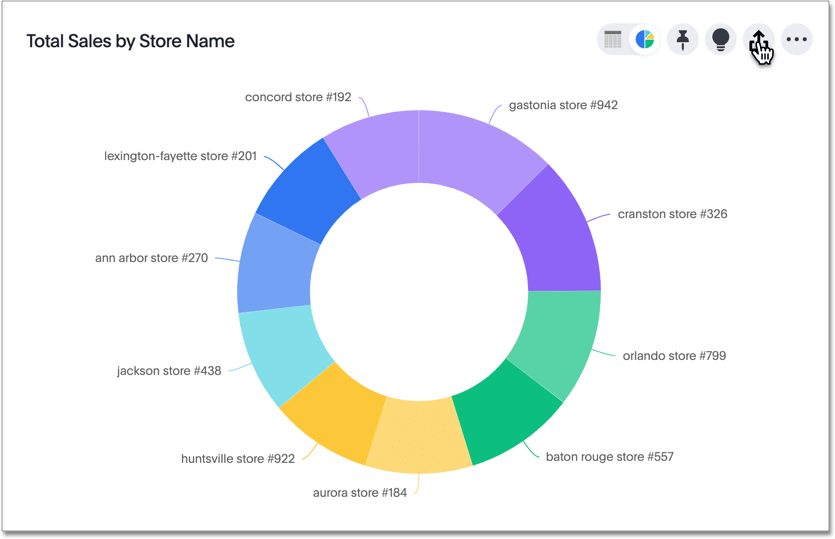
Configure the Answer to look as it must appear when you share it.
-
Save the Answer by clicking the More icon
 , and selecting Save.
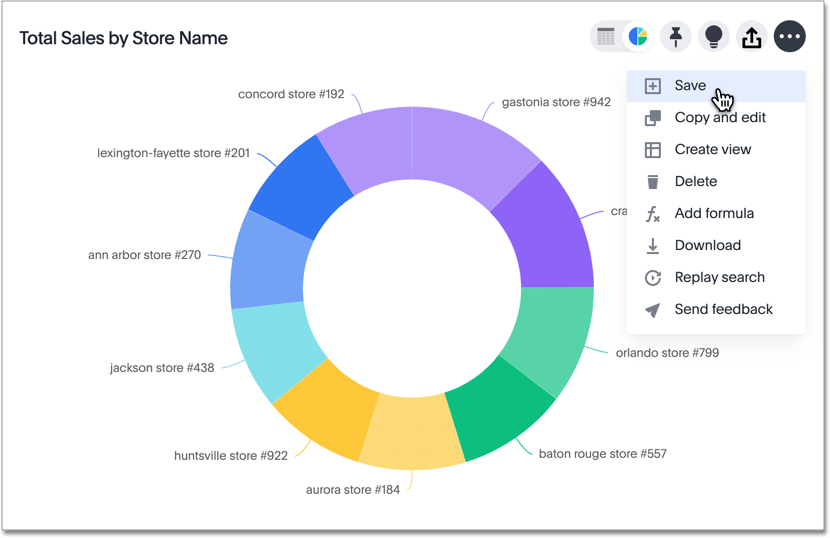
-
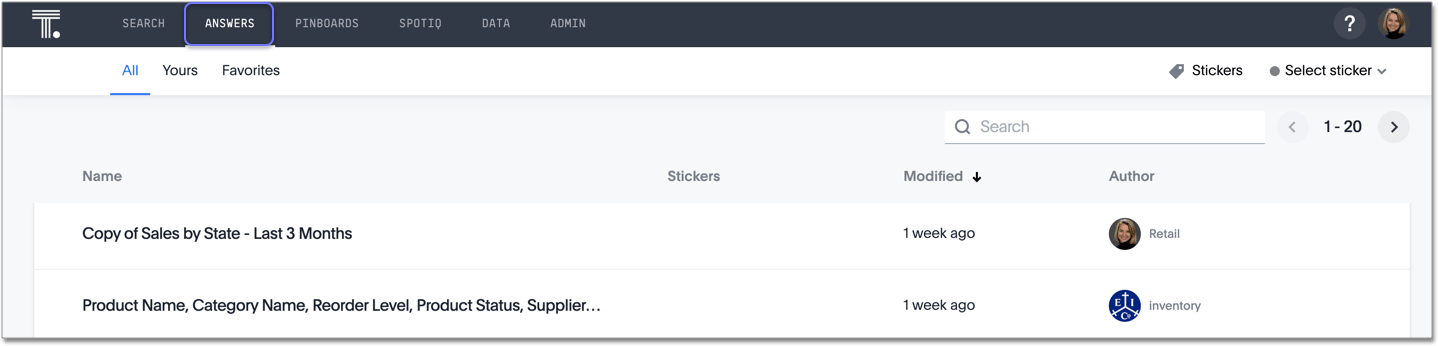
Click Answers on the bar at the top of your screen.
-
Select the Answer you want to share from the list of Answers by hovering over it and clicking the empty check box that appears.
-
Click Share.

Share from within the Answer
To share an Answer from within the Answer, follow these steps.
-
Configure the Answer to look exactly like it must appear when you share it.
-
Save the Answer by clicking the More icon
, and selecting Save.
-
Share the Answer by clicking the sharing icon
 .
.
-
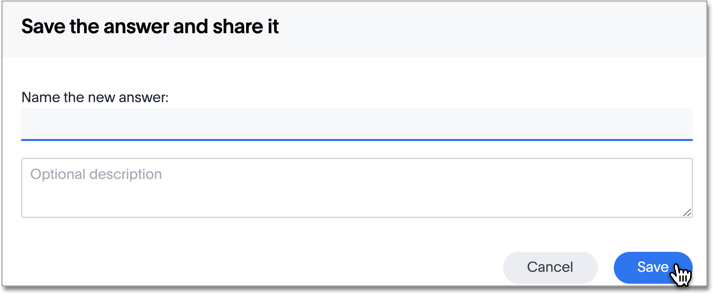
If you did not save the Answer, ThoughtSpot prompts you to name and save the Answer before sharing it.
Specify permissions
-
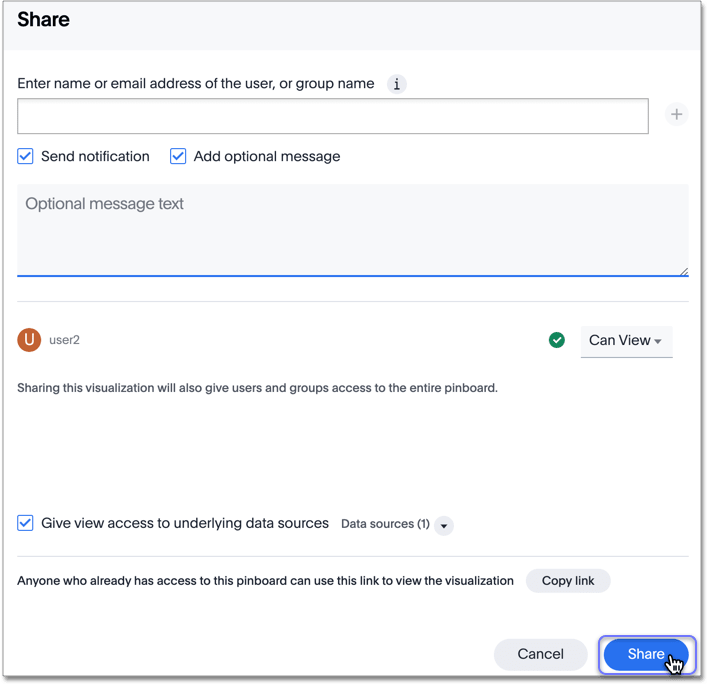
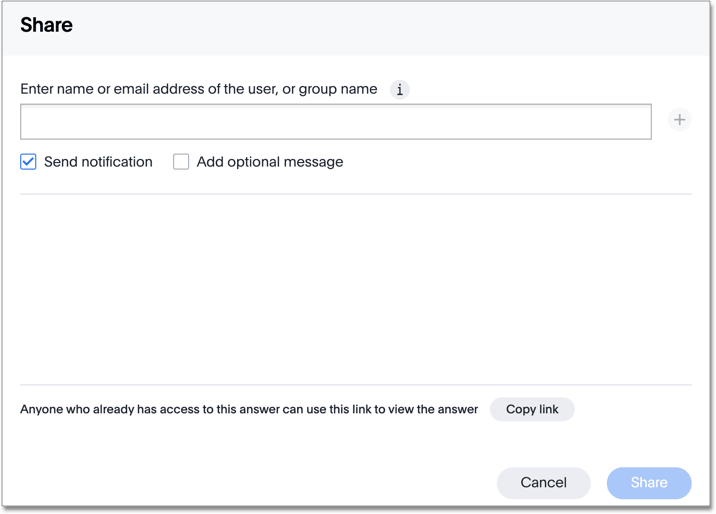
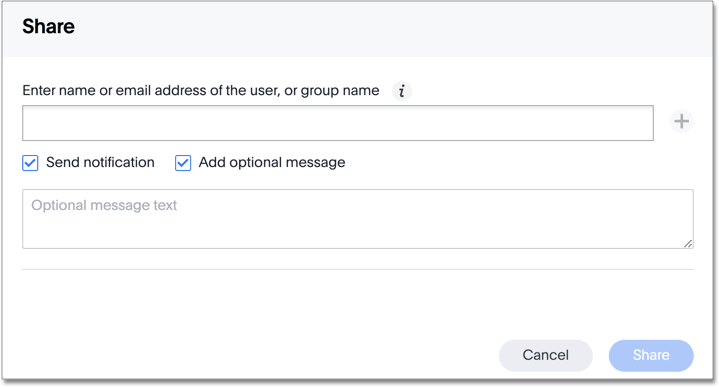
After you click the Share icon, the sharing dialog box appears.
-
Enter users or groups with whom you want to share this object in the text box.

Note that you can only enter email addresses whose domains are in your list of allowed domains. These email domains appear when you click on the info button
 .
.If you want to hide the allowed email domains for your company, or otherwise customize them, contact ThoughtSpot support. -
Configure the level of access by selecting from the drop-down list. You can select:
-
Can View to provide read-only access. If the user doesn’t have access to the underlying Worksheet, they can only view the shared object.
-
Can Edit to allow modification. Enables renaming or deleting the shared object. If a user with edit privileges modifies a shared object, the object saves their changes.
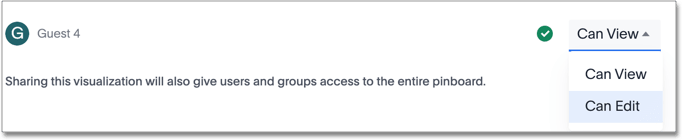
If the selected group or user does not have access to the underlying data, you must enable access to the Worksheet, View, or table. A yellow warning symbol
 appears.
If you click on it, it tells you to enable access:
appears.
If you click on it, it tells you to enable access:
If you own the underlying data source, refer to share uploaded data. If you do not own the data source, ThoughtSpot emails the owner of the data source or your ThoughtSpot administrator to ask them to share the data.
-
-
To stop sharing with a user or group, click the x icon
 .
.
-
You can send an email notification and an optional message:
-
Click Share.