Set up ThoughtSpot in GCP
Set up your GCP virtual machines.
After you determine your configuration options, set up your virtual machines (VMs). ThoughtSpot will share the ThoughtSpot base image for booting the VMs and some other aspects of system setup with you on the GCP platform.
About the ThoughtSpot and Google Cloud Platform
ThoughtSpot uses a custom image to populate VMs in GCP. To find the ThoughtSpot custom image, refer to step 13 under create an instance.
Ask your ThoughtSpot contact for access to this image. We need the Google account/email ID of the individual who will be signed into your organization’s GCP console. We will share ThoughtSpot’s GCP project with them so they can use the contained boot disk image to create ThoughtSpot VMs.
This guide explains how to deploy ThoughtSpot on GCP, using ThoughtSpot’s CentOS-based image. Starting with version 6.0.4, you can also deploy ThoughtSpot on GCP using Red Hat Enterprise Linux (RHEL), allowing you to run ThoughtSpot on an RHEL image that your organization manages internally. To install ThoughtSpot using RHEL, refer to the RHEL deployment guide.
Overview
Before you can create a ThoughtSpot cluster, you must set up your VMs. Use the Google Compute Engine (GCP) platform to create and run VMs.
The following topics walk you through this process.
Prerequisites
-
Ensure that your Network Service Tier on the Google Cloud Console is set to Premium for the best performance of all your VMs.
-
A ThoughtSpot cluster requires 10 Gb/s bandwidth (or better) between any two nodes. You must ensure this before creating a new cluster.
-
Download and fill out the ThoughtSpot site survey to have a quick reference for your networking information. Ask your network administrator if you need help filling out the site survey.
Setting up your Google Cloud Storage (GCS) bucket
If you are going to deploy your cluster using the GCS-storage option, you must set up that bucket before you set up your cluster. Contact ThoughtSpot Support to find out if your specific cluster size will benefit from the GCS storage option. If you are not using GCS, skip this step and create an instance.
-
Sign in to the Google Cloud Console.
-
Go to the Storage dashboard from the navigation bar on the side of your screen.
-
Click CREATE BUCKET on the top menu bar.
-
Enter a name for your bucket, and click CONTINUE.
-
For location type, select Region.
-
Use the Location drop-down menu to select the region where you are going to set up your instance.
-
Click CONTINUE.
-
For default storage class, select Standard.
-
Click CONTINUE.
-
Under Access Control, select Uniform to ensure uniform access to all objects in the storage bucket.
-
Click CONTINUE.
-
Do not edit the advanced settings.
Leave Encryption set to Google-managed key and do not set a retention policy.
-
Click CREATE.
When you create your instance, make sure you set Storage to Read Write access.
Create an instance
-
Sign in to the Google Cloud Console.
-
Click Select a Project from the top bar.

-
Under Select From, pick your company’s project.
-
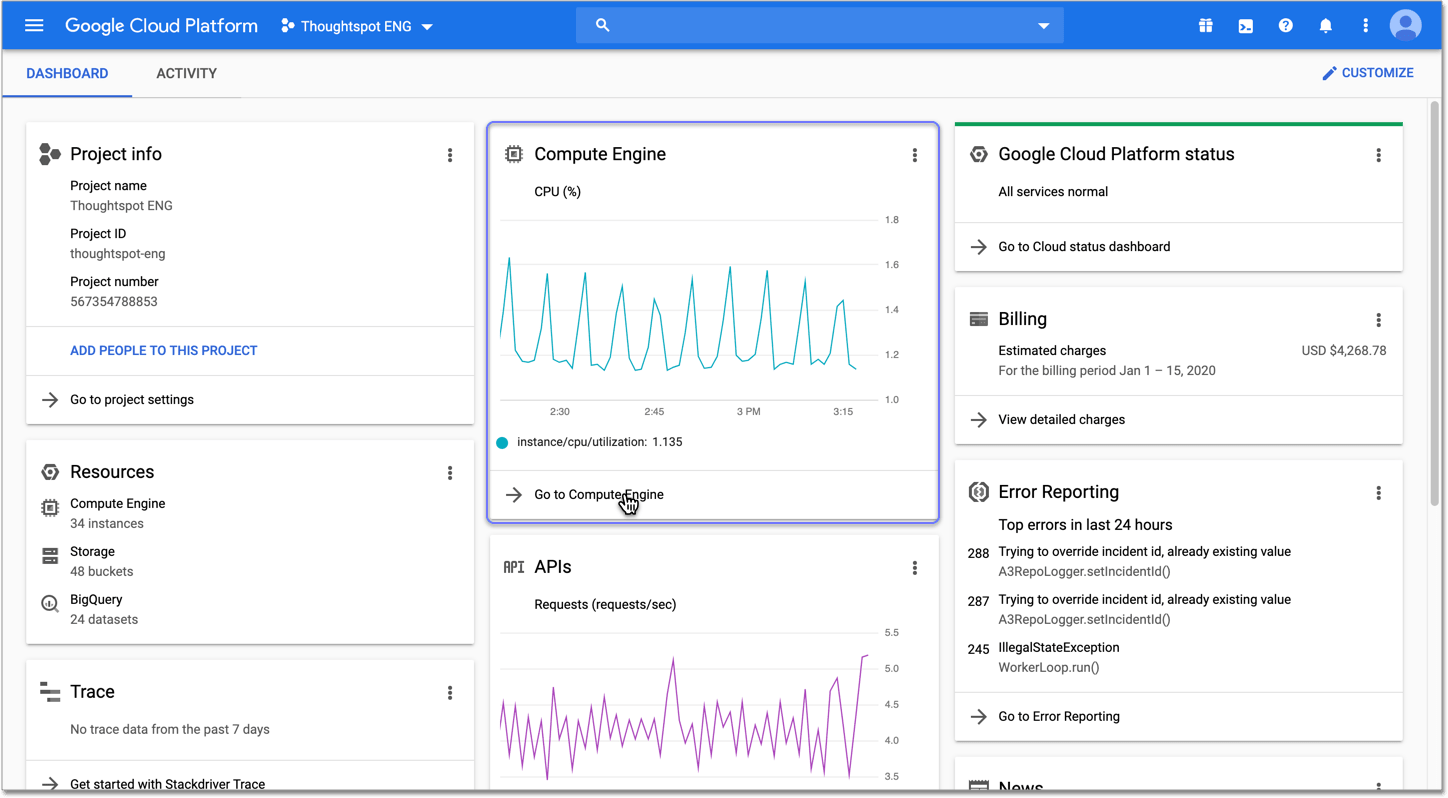
Go to the Compute Engine dashboard.
-
Select VM instances on the left panel.
-
Click the + icon from the top menu bar to create an instance.
-
Provide a name for the instance.
-
Select the region you are creating the instance in.
-
Select the zone you are creating your region in.
-
Under Machine type, select custom.
-
Select the number of vCPU cores you need.
Refer to ThoughtSpot GCP instance types to determine the number of vCPU cores your cluster needs.
-
Specify your memory requirements and CPU platform. Refer to ThoughtSpot GCP instance types to determine the memory your cluster needs.
Your configuration may look something like the following, but with your specific information.
Setting Value Cores
64 vCPUMemory
416 GBCPU platform
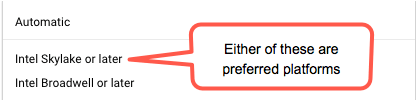
Automatic(or select either one of the preferred CPU platforms,Intel SkylakeorIntel Broadwell, if available.)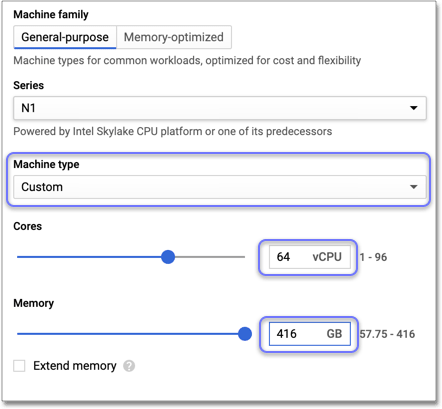
-
Configure the Boot disk.
a. Scroll down to the Boot disk section and click Change.
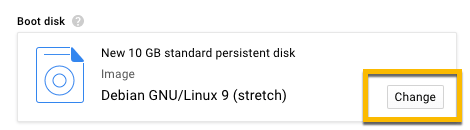
b. Click Custom Images from the options under Boot disk.
c. Select ThoughtSpot-images under Show images from.
d. Select one of the ThoughtSpot base images. Under the name of the image, you can see when it was created. ThoughtSpot should have directly sent you an image to use. If so, use that image.
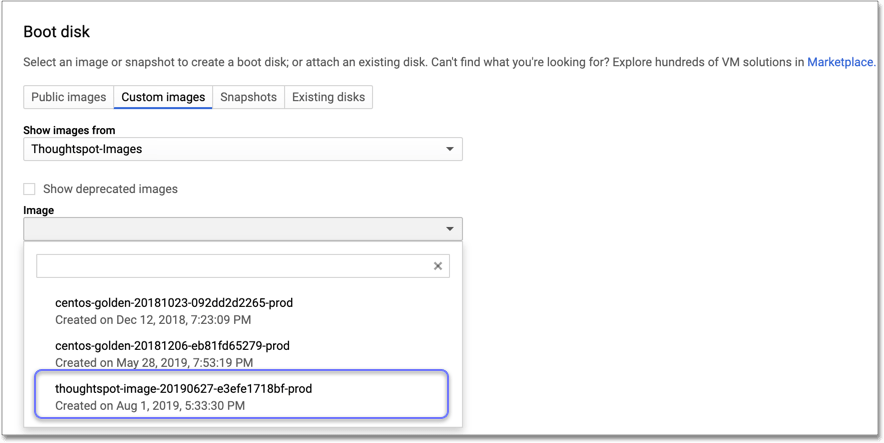
Refer to the chart below to find the image you should use, depending on your release number.
Release Number Image Name 6.0
thoughtspot-image-20191029-9ff82de0a41-prod
6.0.1
thoughtspot-image-20191029-9ff82de0a41-prod
6.0.2
thoughtspot-image-20191029-9ff82de0a41-prod
6.0.3
thoughtspot-image-20200307-812f10fafca-prod
6.0.4
thoughtspot-image-20200307-812f10fafca-prod
ThoughtSpot updates these base images with patches and enhancements. If more than one image is available, select the latest one by looking at the dates of creation. Each image will work, but we recommend using the latest image because it typically contains the latest security and maintenance patches. Contact ThoughtSpot Support if you are unsure which image to use. e. Configure the boot disk as follows:
Setting Value Image
ThoughtSpotBoot disk type
SSDSize (GB)
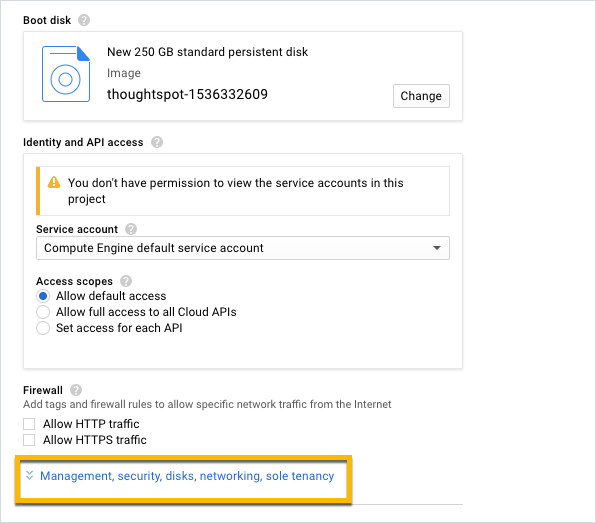
250f. Click Select to save the boot disk configuration.
-
Back on the main configuration page, click to expand the advanced configuration options (Management, security, disks, networking, sole tenancy).
-
Attach two 1 TB SSD drives for data storage. Refer to SSD-only persistent storage. If you are using GCS, attach only 1 SSD drive, with 500 GB instead of 1 TB. Refer to GCS and SSD persistent storage.
a. Click the Disks tab, and click Add new disk.
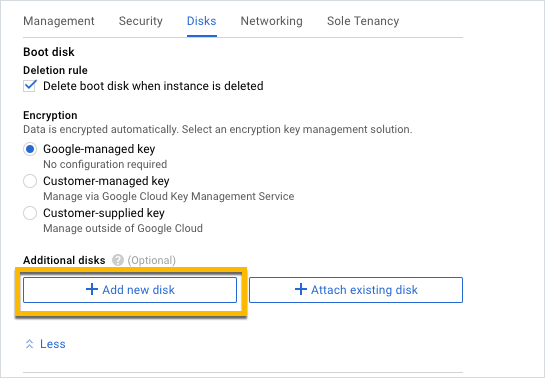
Unselect the Deletion rule, to prevent potential loss of data if your instance is deleted accidentally.
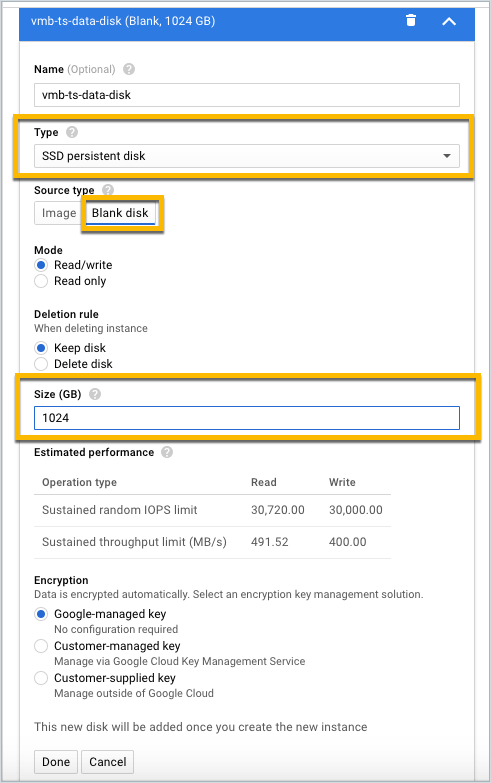
b. Configure the following settings for each disk. Refer to ThoughtSpot GCP instance types to determine the size in GB when you have GCS. Ensure the disks have read/write access.
Setting Value Type
SSD persistent diskSource type
Blank diskSize (GB)
1024Under Deletion rule, select keep disk, to prevent potential loss of data if your instance is deleted accidentally.
-
(For use with GCS only) In the Identity and API access section, make sure Service account is set to Compute Engine default service account. Under Access scopes, select Set access for each API.
-
(For use with GCS only) After you click Set access for each API, scroll down to the Storage dropdown menu in the Identity and API access section. Set it to one of the following options:
-
To use Google Cloud Storage (GCS) as persistent storage for your instance, select Read Write.
-
To only use GCS to load data into ThoughtSpot, select Read Only.
-
-
Under Networking, customize the network settings as needed. Use your default VPC settings, if you know them. Ask your network administrator if you do not know your default VPC settings.
Update the network interface with your specific information or create a new one.
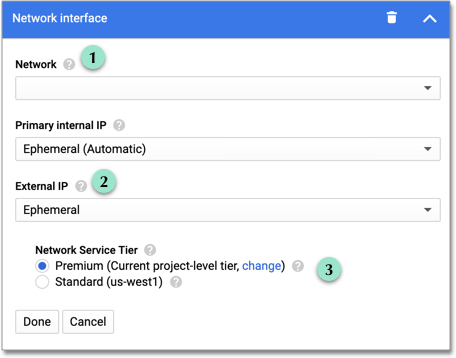
1
Add an existing VPC network, or create a new one by clicking VPC network from the main menu. Ensure that this network has a firewall rule attached, with the minimum ports required for ThoughtSpot operation open. Refer to the minimum port requirements. See Google’s using firewalls and using VPCs documentation for assistance creating a firewall rule and a VPC network.
2
Set the external IP as either ephemeral or static, depending on your preference.
3
Ensure that network service tier is set to premium.
-
Repeat these steps to create the necessary number of VMs for your cluster.
Minimum required ports
Open the following ports between the User/ETL server and ThoughtSpot nodes. This ensures that the ThoughtSpot processes do not get blocked. Refer to Network ports for more information on what ports to open for intracluster operation, so that your clusters can communicate.
The minimum ports needed are:
| Port | Protocol | Service |
|---|---|---|
22 |
SSH |
Secure Shell access |
443 |
HTTPS |
Secure Web access |
12345 |
TCP |
ODBC and JDBC drivers access |
Prepare the VMs
Before you can install your ThoughtSpot cluster, an administrator must log in to each VM through SSH as user "admin", and complete the following preparation steps:
-
Open a terminal application on your machine and ssh into one of your VMs.
ssh admin@<VM-IP>
-
Run
sudo /usr/local/scaligent/bin/prepare_disks.sh.$ sudo /usr/local/scaligent/bin/prepare_disks.sh
-
Configure the VM based on the site-survey.
-
Repeat this process for each of your VMs.
Install cluster
To install your ThoughtSpot cluster, complete the installation process outlined in Installing ThoughtSpot in GCP.
Additional resources
As you develop your expertise in GCP VM creation, we recommend the following ThoughtSpot U course:
See other training resources at ThoughtSpot U
Related information


