Join tables
Create joins between your tables to improve the accuracy of your Search.
With joins, you can make a single search retrieve rich data and dimensional information across multiple tables of your database.
If your database uses any table joins, they appear in ThoughtSpot.
Create a table join
-
Select Data in the top menu and choose Tables.
-
Find your table through browsing, Search, or selecting the appropriate Tag(s).
-
To select the table for adding joins, click its name in the list. You will see the Columns view of the table.
Generally, creating a many-to-one join from a fact table to a dimension table simplifies your search. -
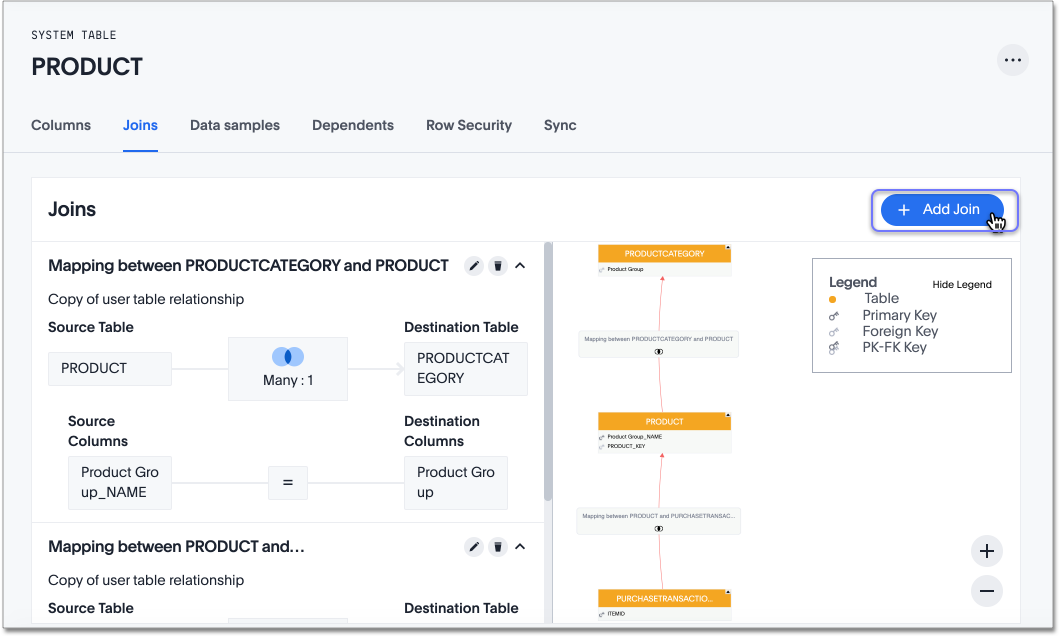
Select the Joins tab. The list of existing joins (if any) from the table appears.
-
Select + Add join.
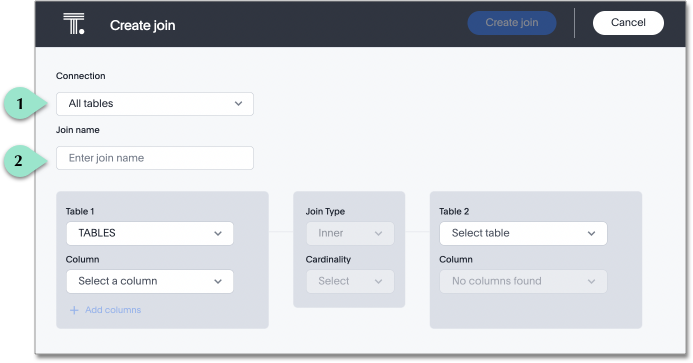
 The Create join page appears.
Legend Action 1.
Choose your connection from the dropdown Connection menu. You can only create joins between data sources uploaded through the same connection.
2.
[Optional] Select Enter join name to name your join. Note that ThoughtSpot automatically names joins using the following syntax: [OriginDataSourceName]_to_[DestinationDataSourceName]. You can always enter a more meaningful join name, either when creating, or when editing the join.
You cannot create range joins in the UI. You must use TML. -
Under Table 1, choose the table you want to create a join from (origin table).
-
Under Table 2, choose the destination table or View for the other end of the join. This is usually a dimension table.
-
Choose the matching columns under each table. These columns must use the same data type.
-
[Optional] You can select multiple columns for the same join. To add another pair of matching columns to the join definition, select +Add columns.
-
Specify the join type; see Join types.
-
Specify the join cardinality; see Cardinality.
-
Select Create join.
You can now see the updated view of the schema. You can also see the detailed information about all Joins. Note that after creating the join, you may change its name, type, or cardinality by selecting the edit icon. If you want to change the data source or column being joined, you must delete the join and create a new one.
Proceed to create all necessary table joins, to support your data requirements.
Congratulations! Your search can now pull data from all joined tables.
New join interface
You can try a new way of creating table joins which will become the default in a future release.
To create a join using the new join interface, do the following:
-
Select Data in the top menu and choose Tables.
-
Find your table through browsing, Search, or selecting the appropriate Tag(s).
-
To select the table for adding joins, click its name in the list. You will see the Columns view of the table.
Generally, creating a many-to-one join from a fact table to a dimension table simplifies your search. -
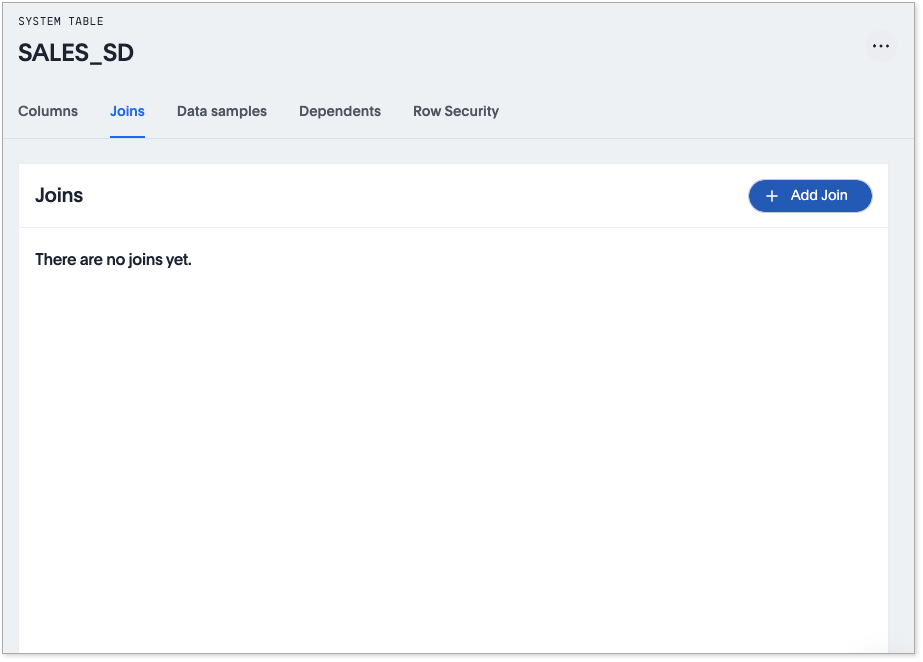
Select the Joins tab. The list of existing joins (if any) from the table appears.

-
Select + Add join.
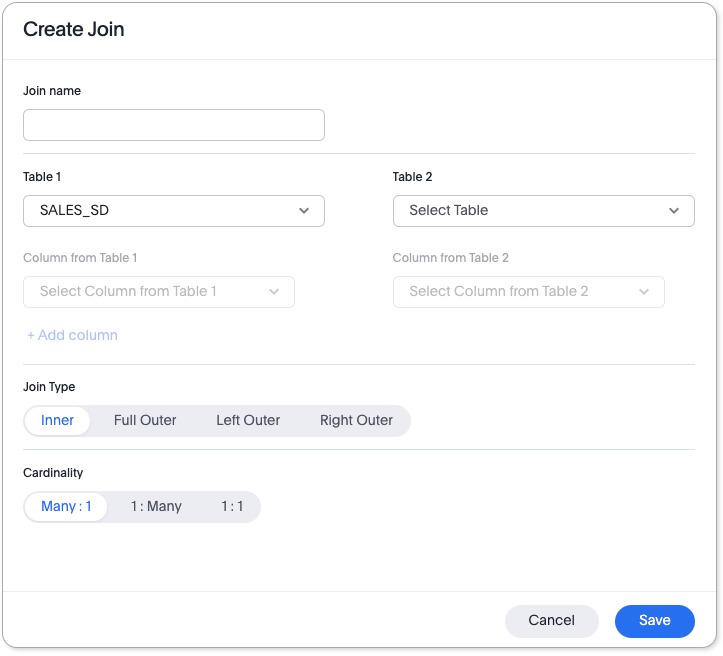
The Create Join page appears.

You cannot create range joins in the UI. You must use TML. -
In the Join name field, enter a name for your join.
-
Under Table 1, choose the table you want to create a join from (origin table).
-
Under Table 2, choose the destination table or View for the other end of the join. This is usually a dimension table.
-
Choose the matching columns under each table. These columns must use the same data type.
-
[Optional] You can select multiple columns for the same join. To add another pair of matching columns to the join definition, select +Add column.
-
Specify the join type; see Join types.
-
Specify the join cardinality; see Cardinality.
-
Select Save.
You can now see the updated view of the schema. You can also see the detailed information about all Joins. Note that after creating the join, you may change its name, type, or cardinality by selecting the edit icon. You can also change the location and size of tables and joins in the model. You can move or resize tables and joins to display the best visual representation of the model. If you want to change the data source or column being joined, you must delete the join and create a new one.
Proceed to create all necessary table joins, to support your data requirements.
Congratulations! Your search can now pull data from all joined tables.
Next steps
Next, create Worksheets.
Additional resources
As you develop your expertise with joins and schema, we recommend the following ThoughtSpot U course:
See other training resources at ThoughtSpot U.


Show content