Import and export TML files
Use ThoughtSpot Modeling Language (TML) to export and import Worksheets, views, tables, Liveboards, Monitor alerts, and Answers in a human-readable format.
ThoughtSpot developed its own scriptable approach for exporting, enhancing, and migrating Worksheets, views, tables, Liveboards, Monitor alerts, and Answers.
You can model your data and build out sophisticated dashboards in your test environment, before deploying to all users.
ThoughtSpot Modeling Language supports several scenarios that you may encounter:
-
Migrating from a development environment to a production environment by downloading files from the development cluster and uploading the same files into the production cluster
-
Implementing metadata changes outside the ThoughtSpot UI, such as replacing the underlying tables for an object, or replacing a single column from one table with a column in another table
-
Making bulk changes, such as mass renaming of objects defined by Worksheets, and managing duplicates
-
Reusing existing objects to build new objects, such as building two very similar objects based on a similar, pre-existing object.
How to use TML files
Depending on how you want to migrate or change your files, there are several workflows you can follow:
-
Edit and update an existing object in the same cluster: You can either
-
export the object(s), edit the object(s) by modifying its ThoughtSpot Modeling Language (
TML) representation, and import the updated file(s) to modify the existing object or -
edit the object(s) using the in-app
TMLeditor and publish the updated file(s).
-
-
Migrate an existing object from one cluster to a new cluster: export the object(s) and import the updated file(s) to the new cluster.
-
Edit and migrate an existing object from one cluster to a new cluster: You can either
-
export the object(s), edit the object(s) by modifying its ThoughtSpot Modeling Language (
TML) representation, and import the updated file(s) to the new cluster or -
edit the object(s) using the in-app
TMLeditor, publish the updated file(s), export the object(s), and import the updated file(s) to the new cluster. Note that this workflow changes the object(s) in both clusters.
-
Prerequisites
You may notice that you don’t see options to Import, Export, or Edit TML for certain objects. If you don’t have the required permissions to import, export, or edit the TML for an object, you won’t see TML options for that object.
Refer to the following tables for required permissions for importing, editing, and exporting the TML for Liveboards, Answers, Worksheets, tables, and views.
Import
| Import and create a new object without importing its dependents | Import and create a new object and its dependents | Import and update an existing object without dependents | Import and update an existing object with dependents |
|---|---|---|---|
The dependents must already exist in the cluster. You must have view permissions for the first-level dependent. For example, if you import a Liveboard that is built on a Worksheet that is built on a table, you must have view permission for the Worksheet. When importing a new Worksheet or view, you must have the can manage data permission. |
Can manage data, if the object or any of its dependents is a Worksheet or view. |
Edit permission on the existing object. The dependents must already exist in the cluster. You must have view permissions for the first-level dependent. When importing a Worksheet or view, you must have the can manage data permission. |
Edit permission on the existing object(s). Can manage data, if the object or any of its dependents is a Worksheet or view. |
Export
| Export with dependents | Export without dependents |
|---|---|
View permission on the object and all dependents. |
View permission on the object and its first-level dependents. |
|
If you have a permissions issue with a particular object when you export multiple objects, or an object and its dependents, the complete export does not fail. The individual object does not export, and you receive an error message about this failure in the |
Edit
Export an object
You can export one object at a time or export more than one object as a zip file.
The zip file contains a document called the Manifest file, which defines the objects you exported, and their underlying data sources.
The zip file also contains the Alerts.tml file, which only appears when you export an Answer or Liveboard and its associated objects. The Alerts.tml file defines the KPI Monitor alerts associated with the object. If you have administrator privileges, you see every alert for the object. Otherwise, you see only the alerts you created.
To export custom collections of related TML files, refer to Migrate multiple TML files.
How to export objects
To export objects, follow these steps. To export custom collections of related TML files, refer to Migrate multiple TML files.
-
Navigate to the Data page from the top navigation bar.

-
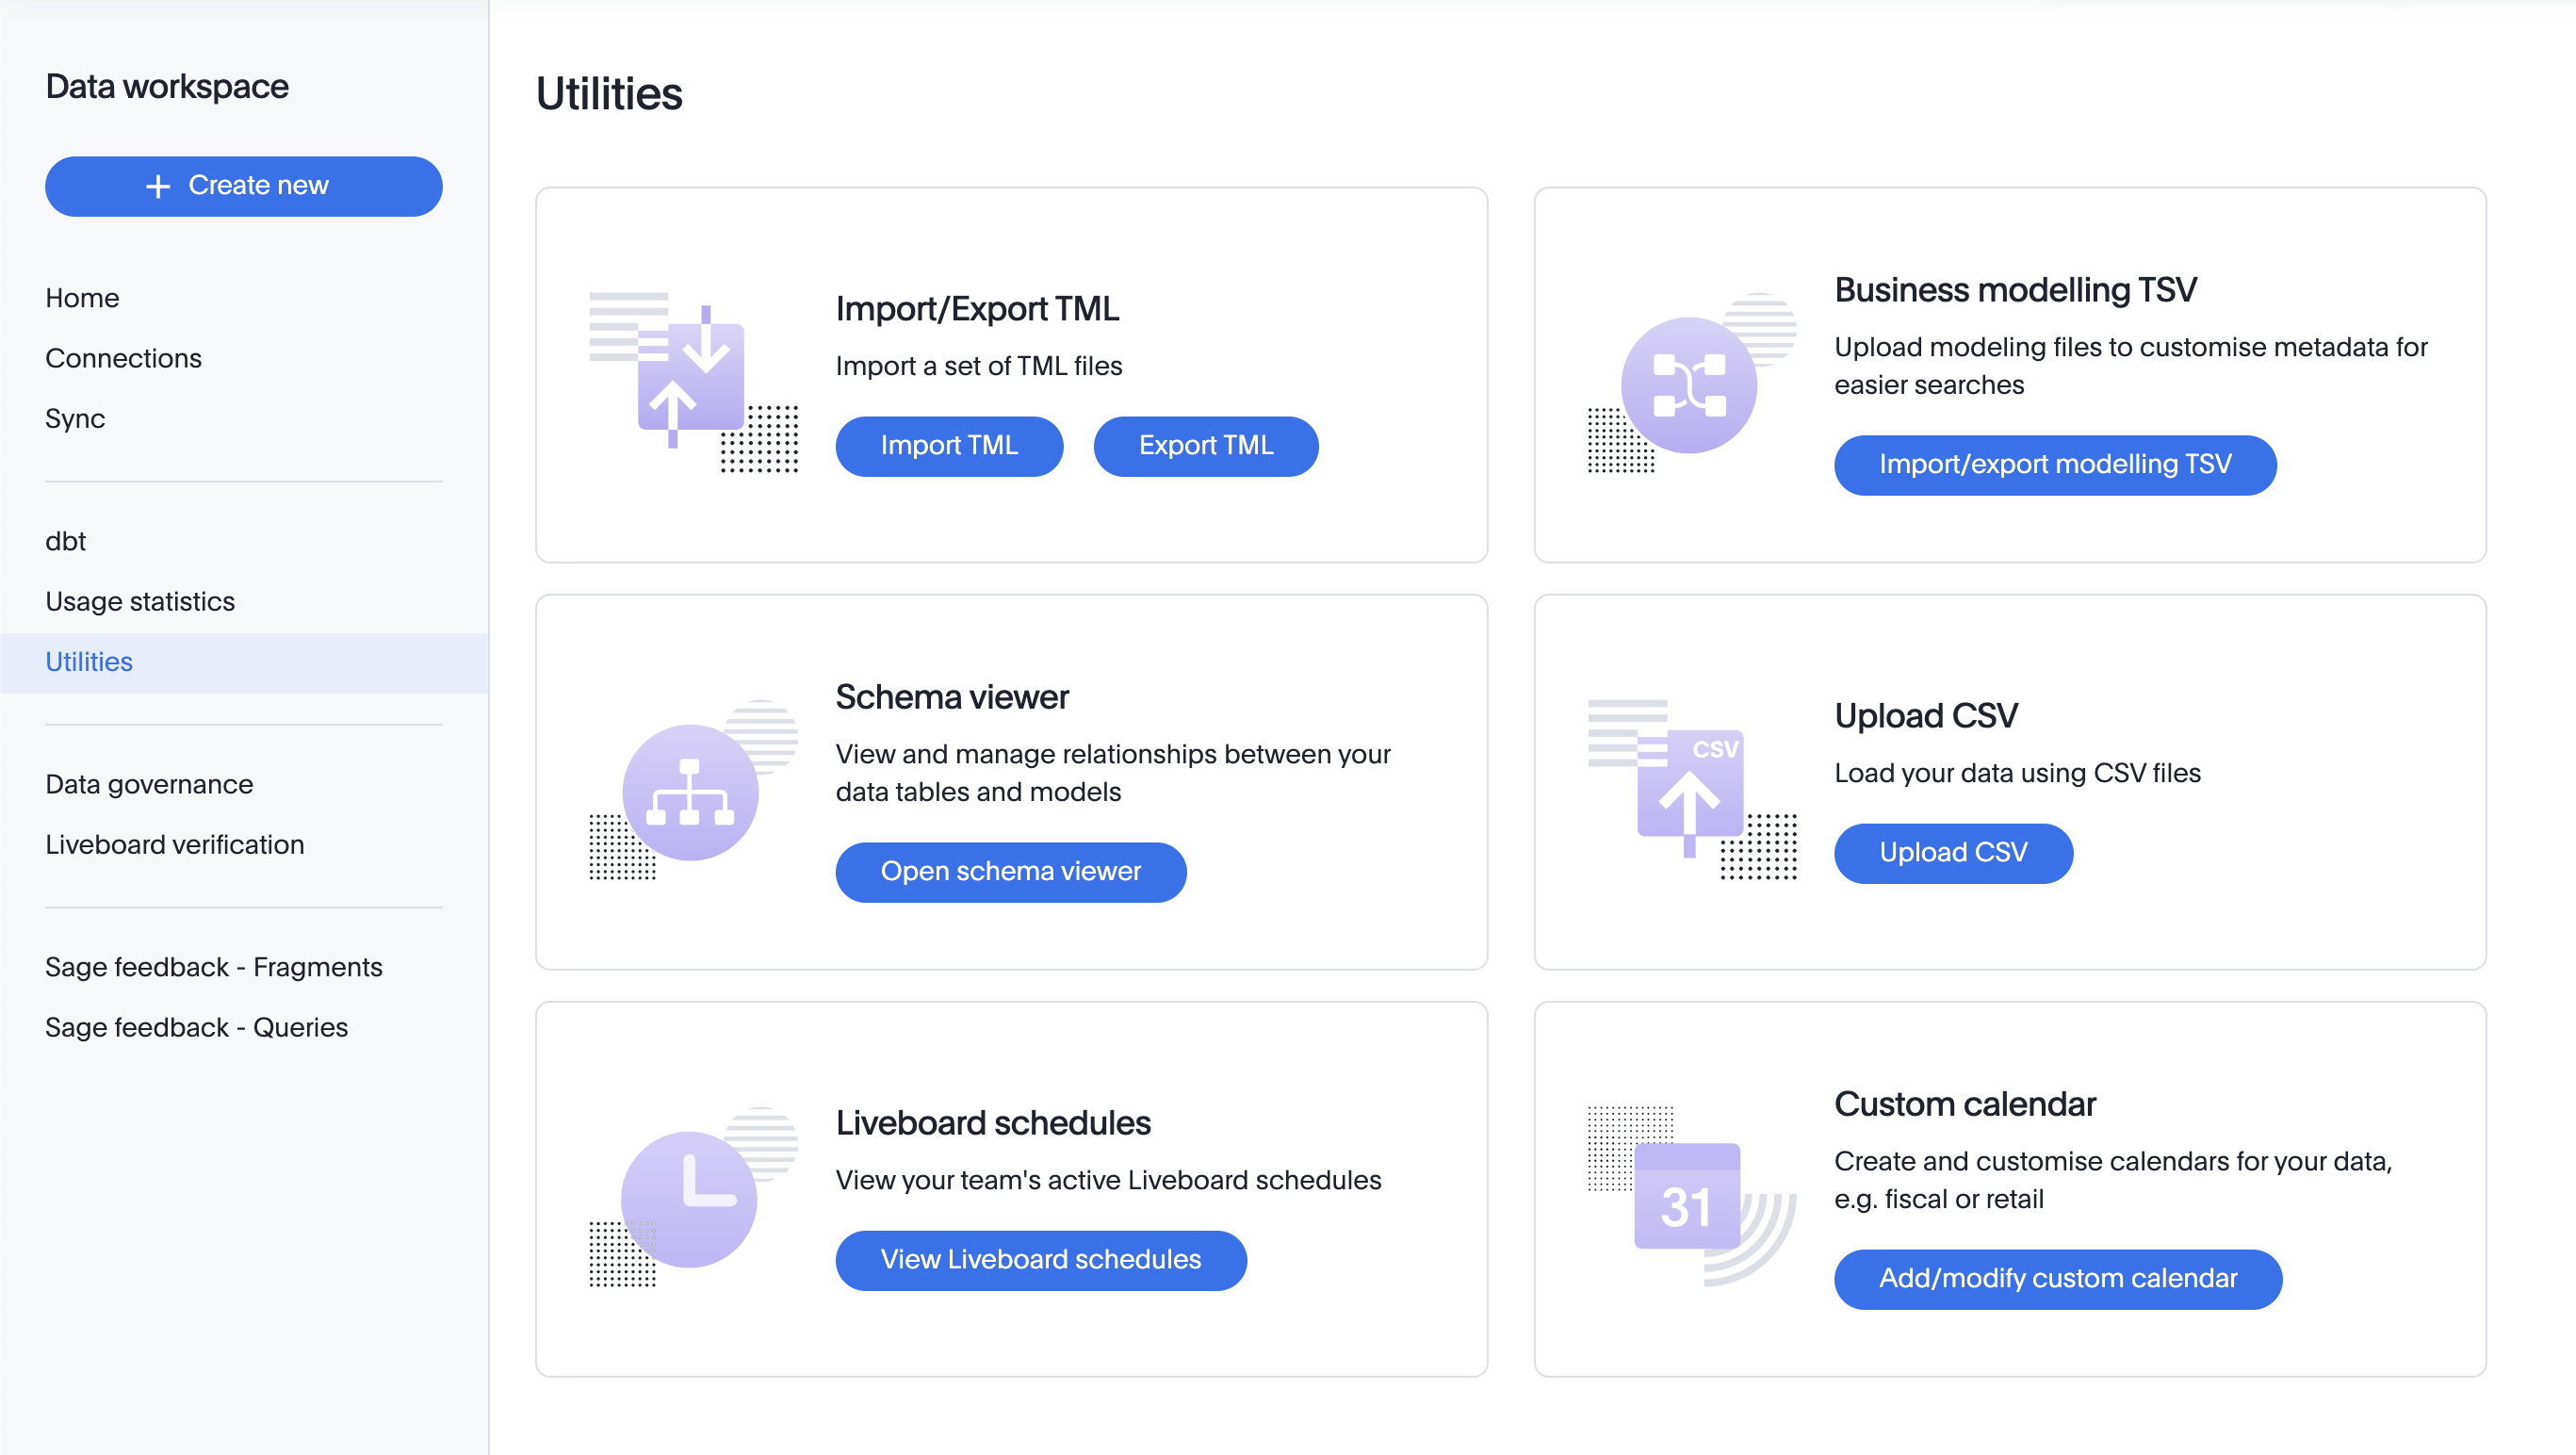
Go to Utilities, and click the Export TML button.
-
Select the object(s) you want to export - Worksheet, Answer, Liveboard, View, or a Table. Hover over the object(s) you want to export, and select the empty checkboxes that appear.
-
Select the Export n objects button.

-
Choose whether to export only the objects, or the objects and their underlying data sources (worksheets, tables, and views). To download any KPI Monitor alerts for the object, you must export the associated objects. The
Alerts.tmlfile in the zip file that downloads defines any KPI Monitor alerts associated with the objects. If you have administrator privileges, you see every alert for the objects. Otherwise, you see only the alerts you created. Choose whether to export the table and connection FQNs. If you select this option, the TML file contains FQNs for the underlying tables and connections. If you export a table, you do not see the Choose what to export modal, since tables do not have any dependents.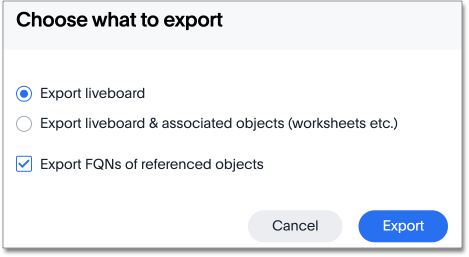
-
Select Export.
-
Open the downloaded
TMLzip file. The zip file contains a document called theManifestfile, which defines the objects you exported, their underlying data sources, and any export errors. If an individual export fails, you can find an error message in theManifestfile. The zip file still exports, even if an individual object’s export fails.
Edit the TML file
You can edit the TML file in one of two ways.
You can export the object(s) and edit the file(s) in any text editor, before you import it.
Or, you can use the in-app TML editor to edit, validate, and publish the object(s).
Refer to ThoughtSpot Modeling Language for information on syntax in the TML files.
Edit, validate, and publish objects using the TML editor
You can access the TML editor from the object page itself. It also appears when there is an error when you import TML objects, if you select Edit.
To use the TML editor, follow these steps:
- For Answers and Liveboards
-
-
Navigate to the Answers, or Liveboards page, depending on the object you want to update.
-
Select the object for which you want to the edit the TML.
-
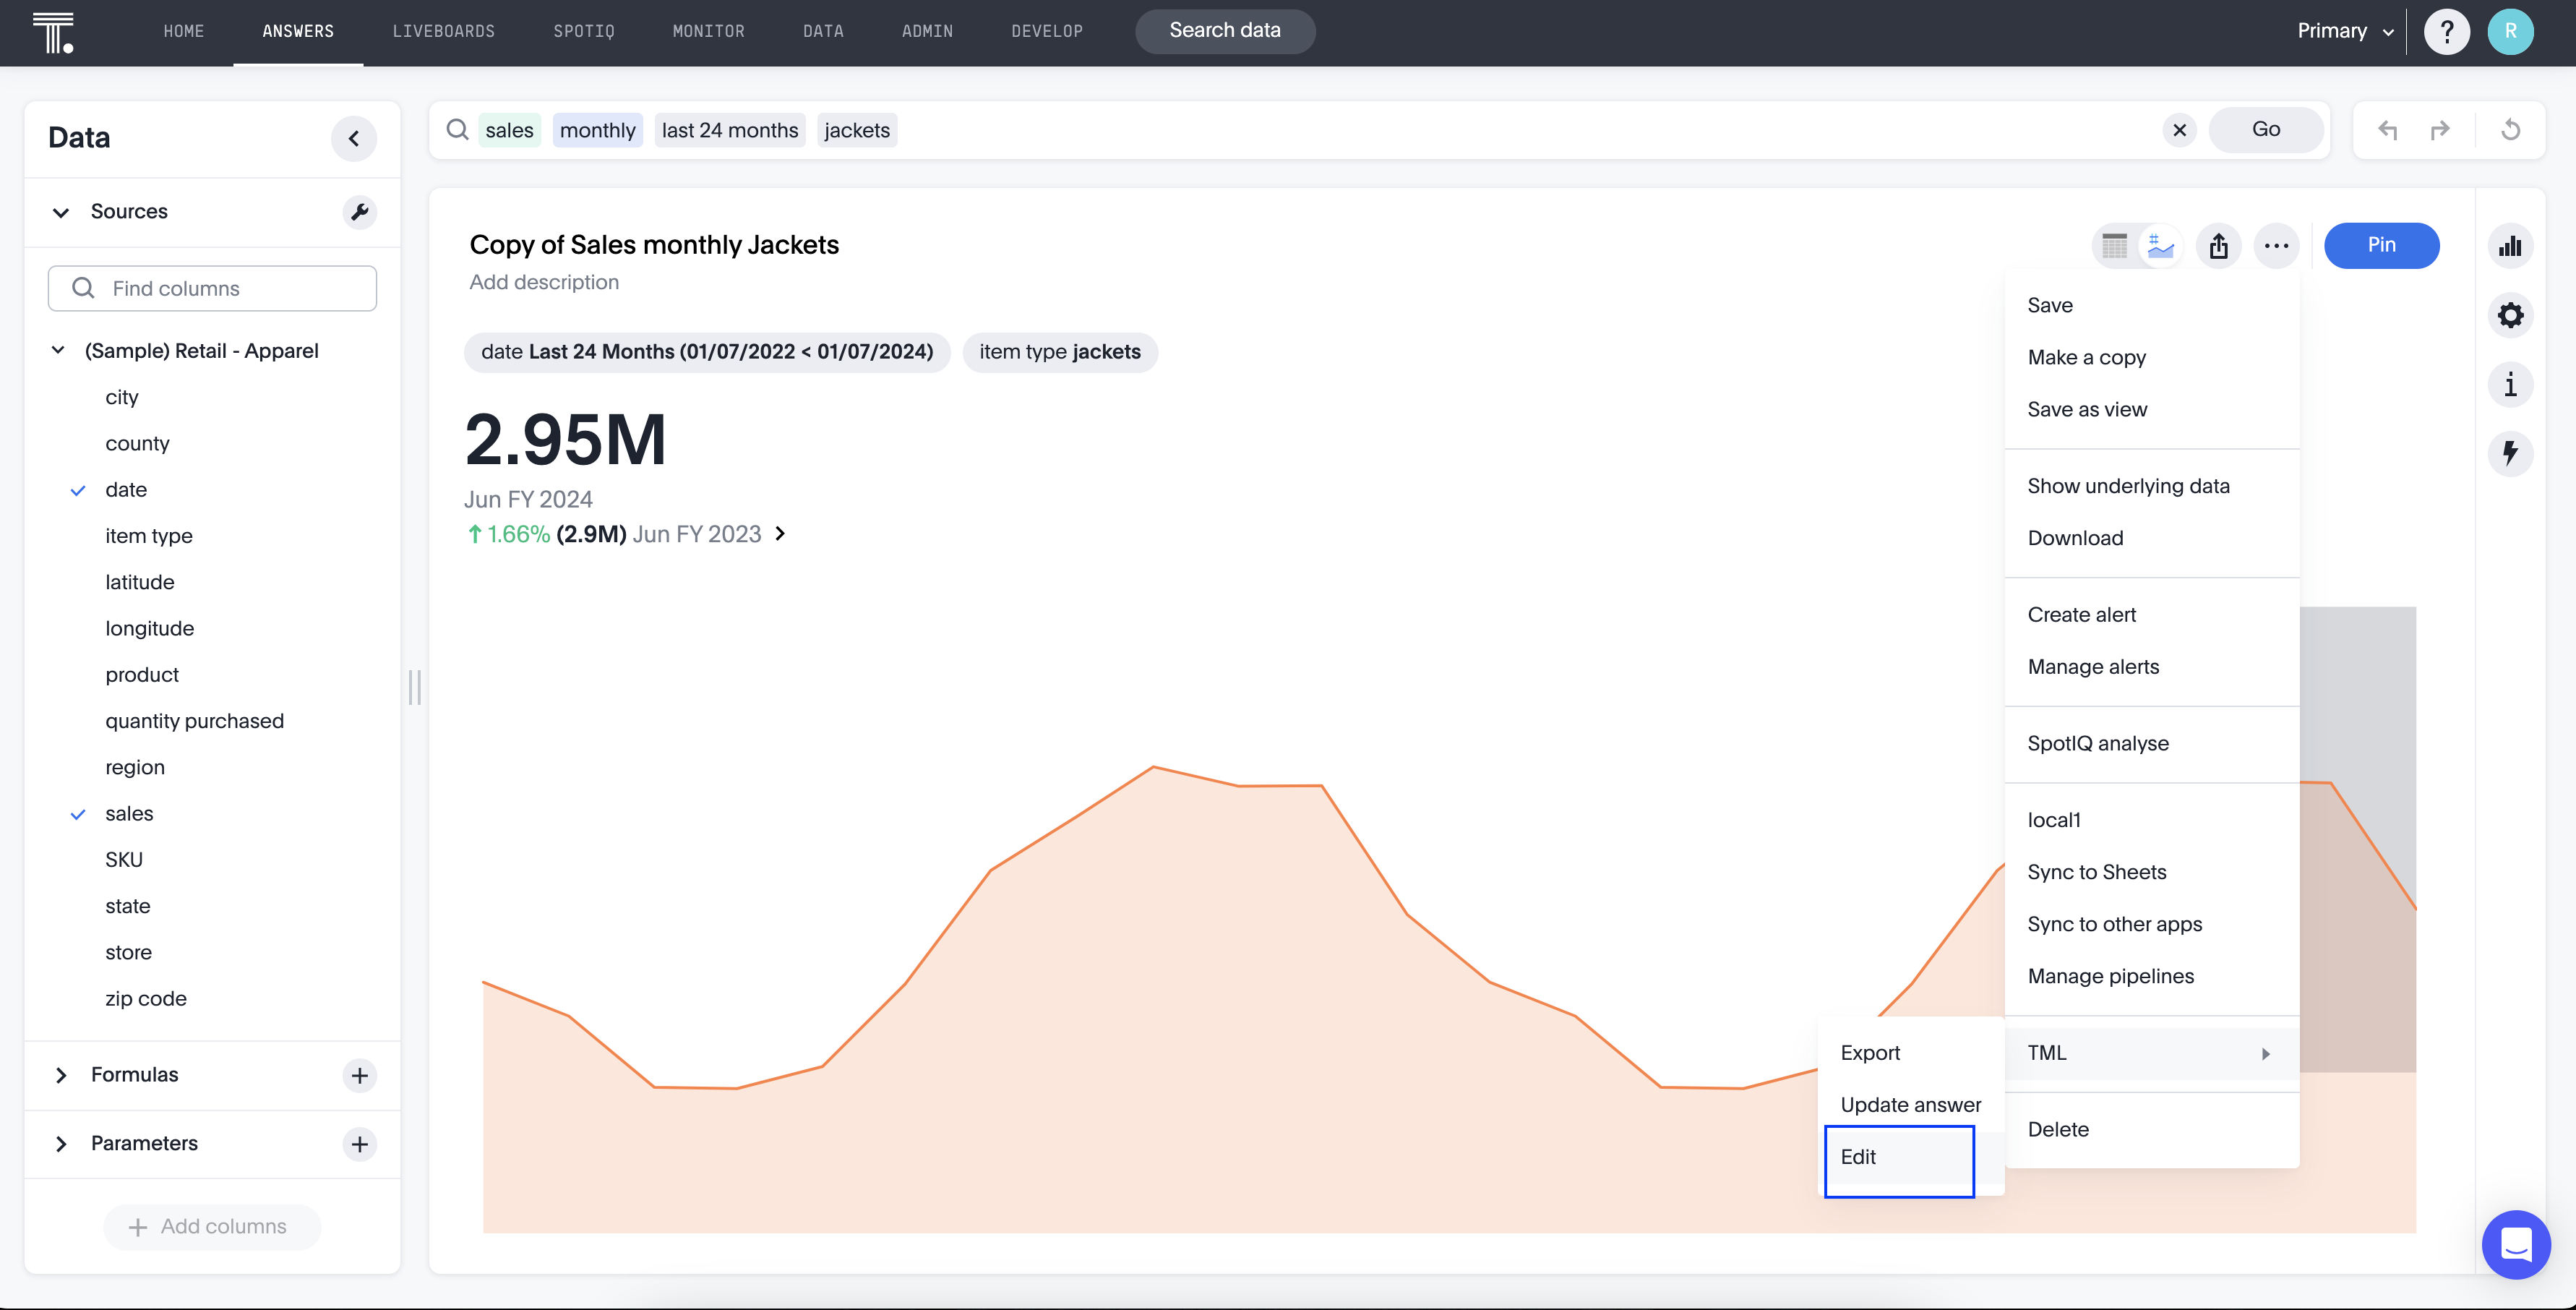
From the (…) menu, select the TML > Edit button.
-
- For Worksheets, Tables and Views
-
-
Navigate to the Data page > Home.
-
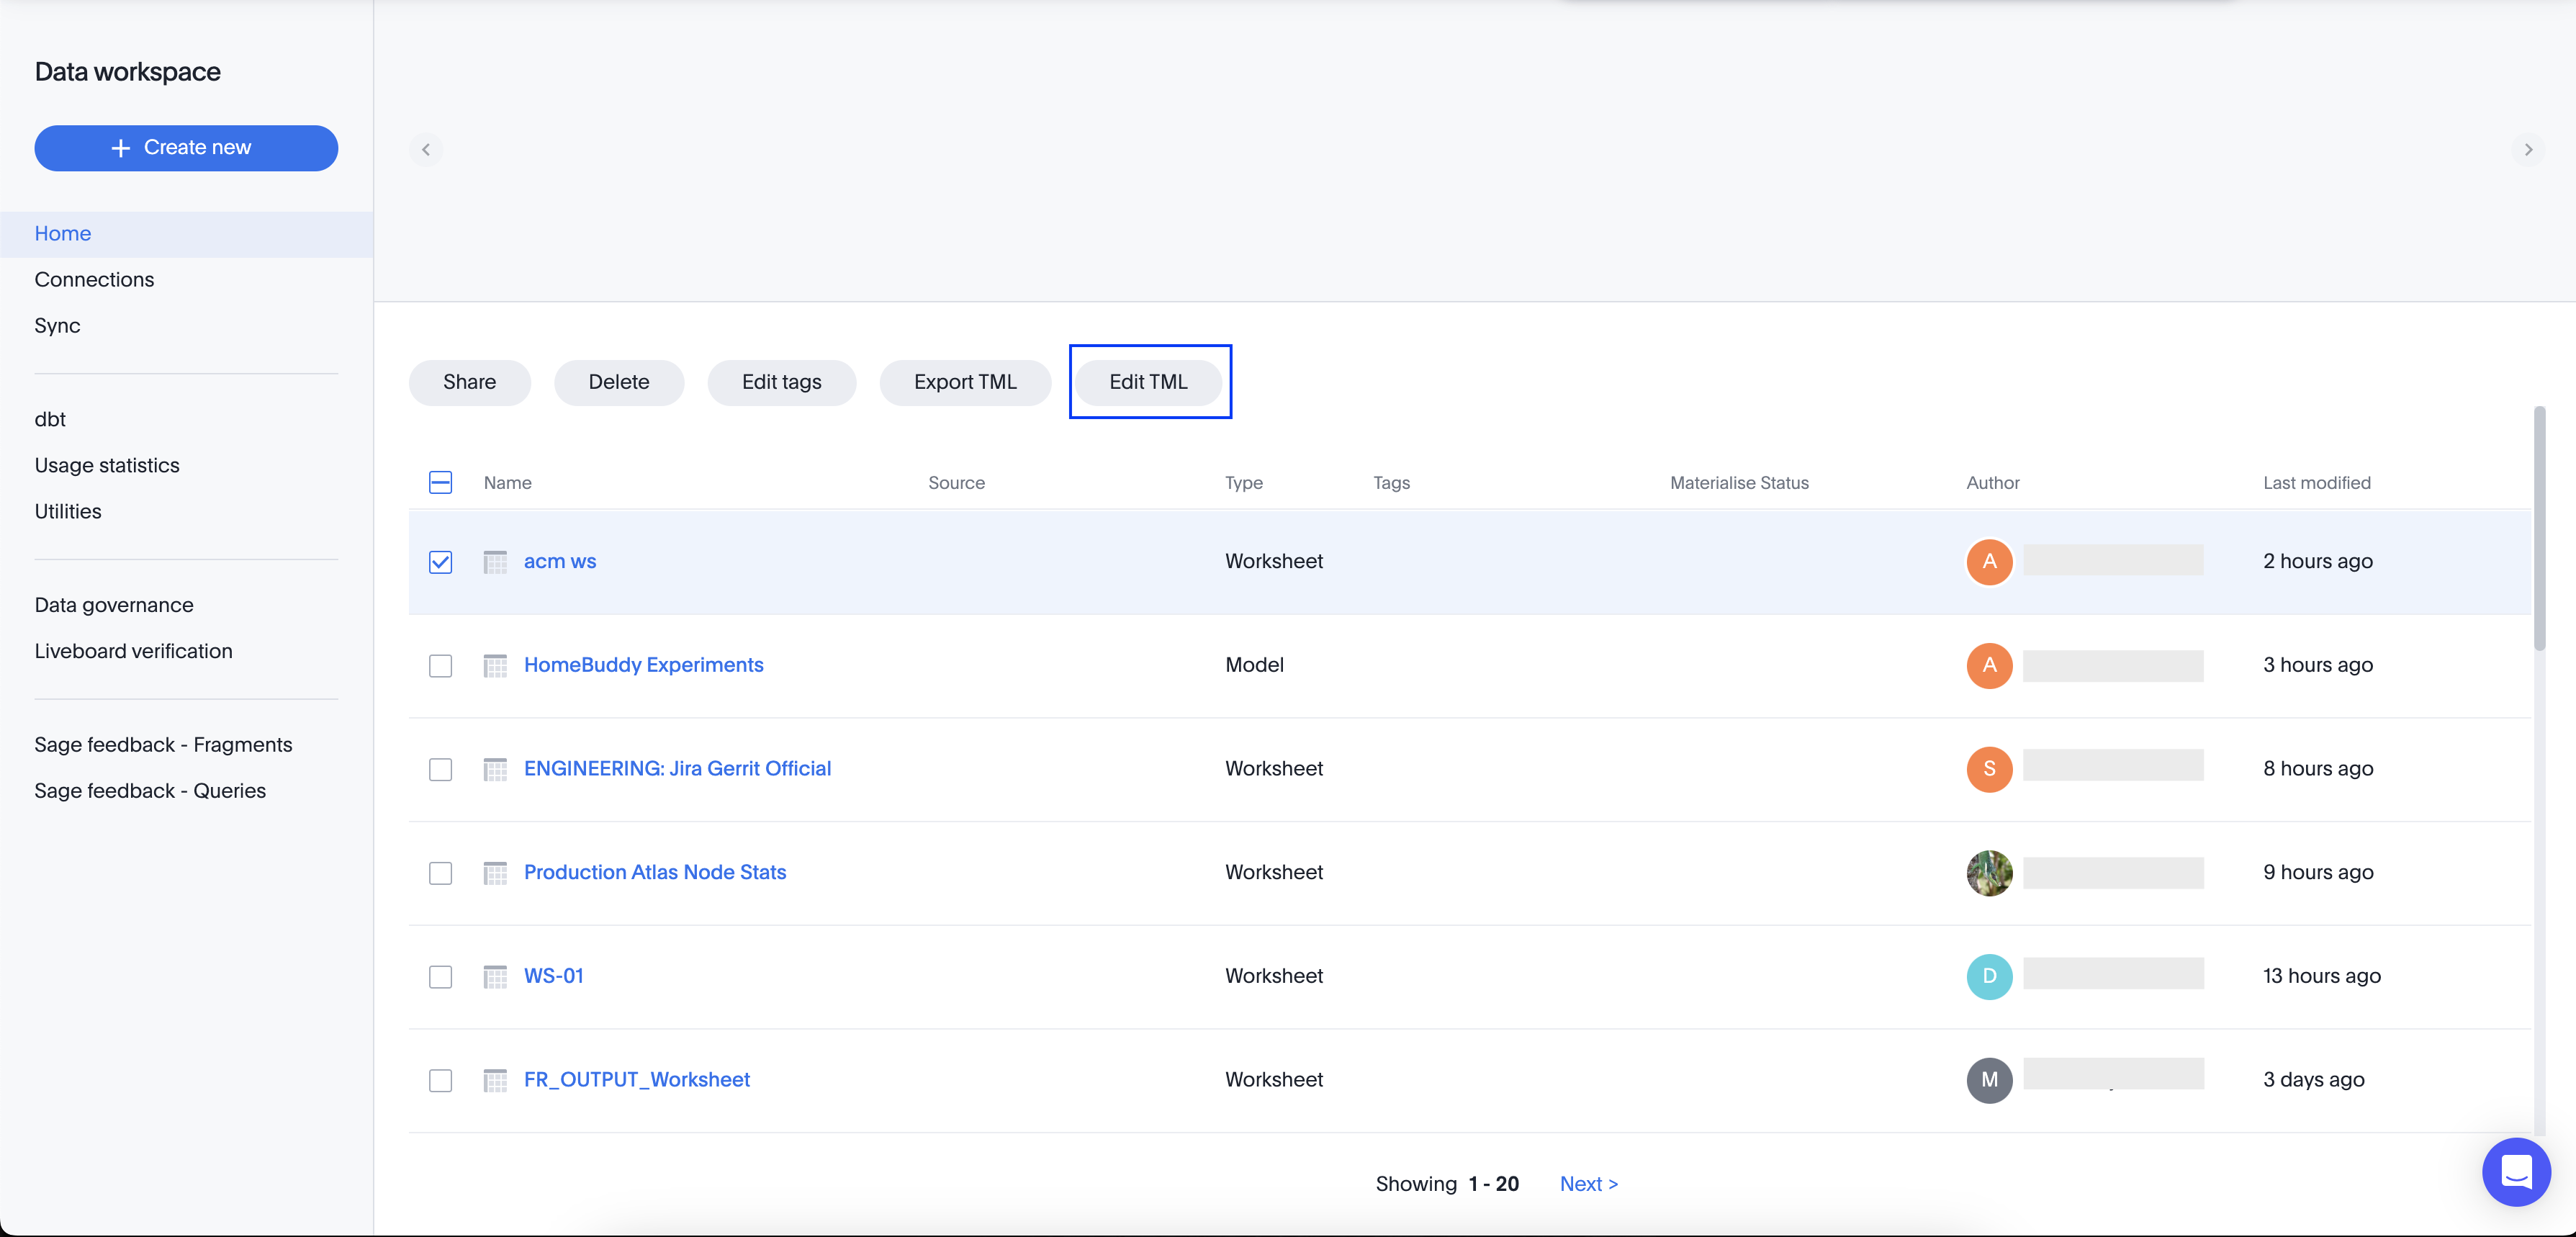
Select the object for which you want to the edit the TML, and select the empty checkboxes that appear.
-
Select the Edit TML button.
-
The TML editor opens. Edit the TML file(s), using the syntax specified in ThoughtSpot Modeling Language.
The TML editor has the following functions in the top menu:
-
File: Validate, Publish, and Exit editor. You can also validate and publish using the validate and publish buttons at the upper right of the editor. You can also exit the editor using the X button at the upper-right corner. The system warns you if you try to exit with unsaved changes.
-
Edit: Undo, Redo, Cut, Copy, Select all, Fold, Fold all, Unfold, Unfold all, and Go to line. The Fold option compresses the lines in the file so you only see the first line of a section. Go to line opens a dialog, where you can type in the number of the line you would like to go to. This is useful for long TML files.
-
Find: Find and Find and replace. This functionality allows you to easily find words or parameters in the TML file. You can also select a word or parameter in the TML editor, and the editor highlights all instances of that word.
-
View: Show/Hide errors, Show line numbers, and Hide line numbers. Show/Hide errors toggles the Errors sidebar on and off. The Errors sidebar does not appear until after you Validate a file, if there are errors in it.
-
Help: Documentation. This links to the ThoughtSpot Modeling Language documentation.
-
Show FQNs of referenced objects: This toggle appears to the left of the Validate and Publish buttons. If you enable it, the TML editor includes the fully qualified names (FQNs) for the objects' underlying tables and connections. Use this option to reduce ambiguity and identify a specific table or connection when editing or migrating files. For more information about FQNs in TML, see ThoughtSpot Modeling Language.
-
-
When you finish editing the TML file(s), select Validate in the upper-right corner. You must validate each file individually. A blue dot appears next to any file that contains changes.
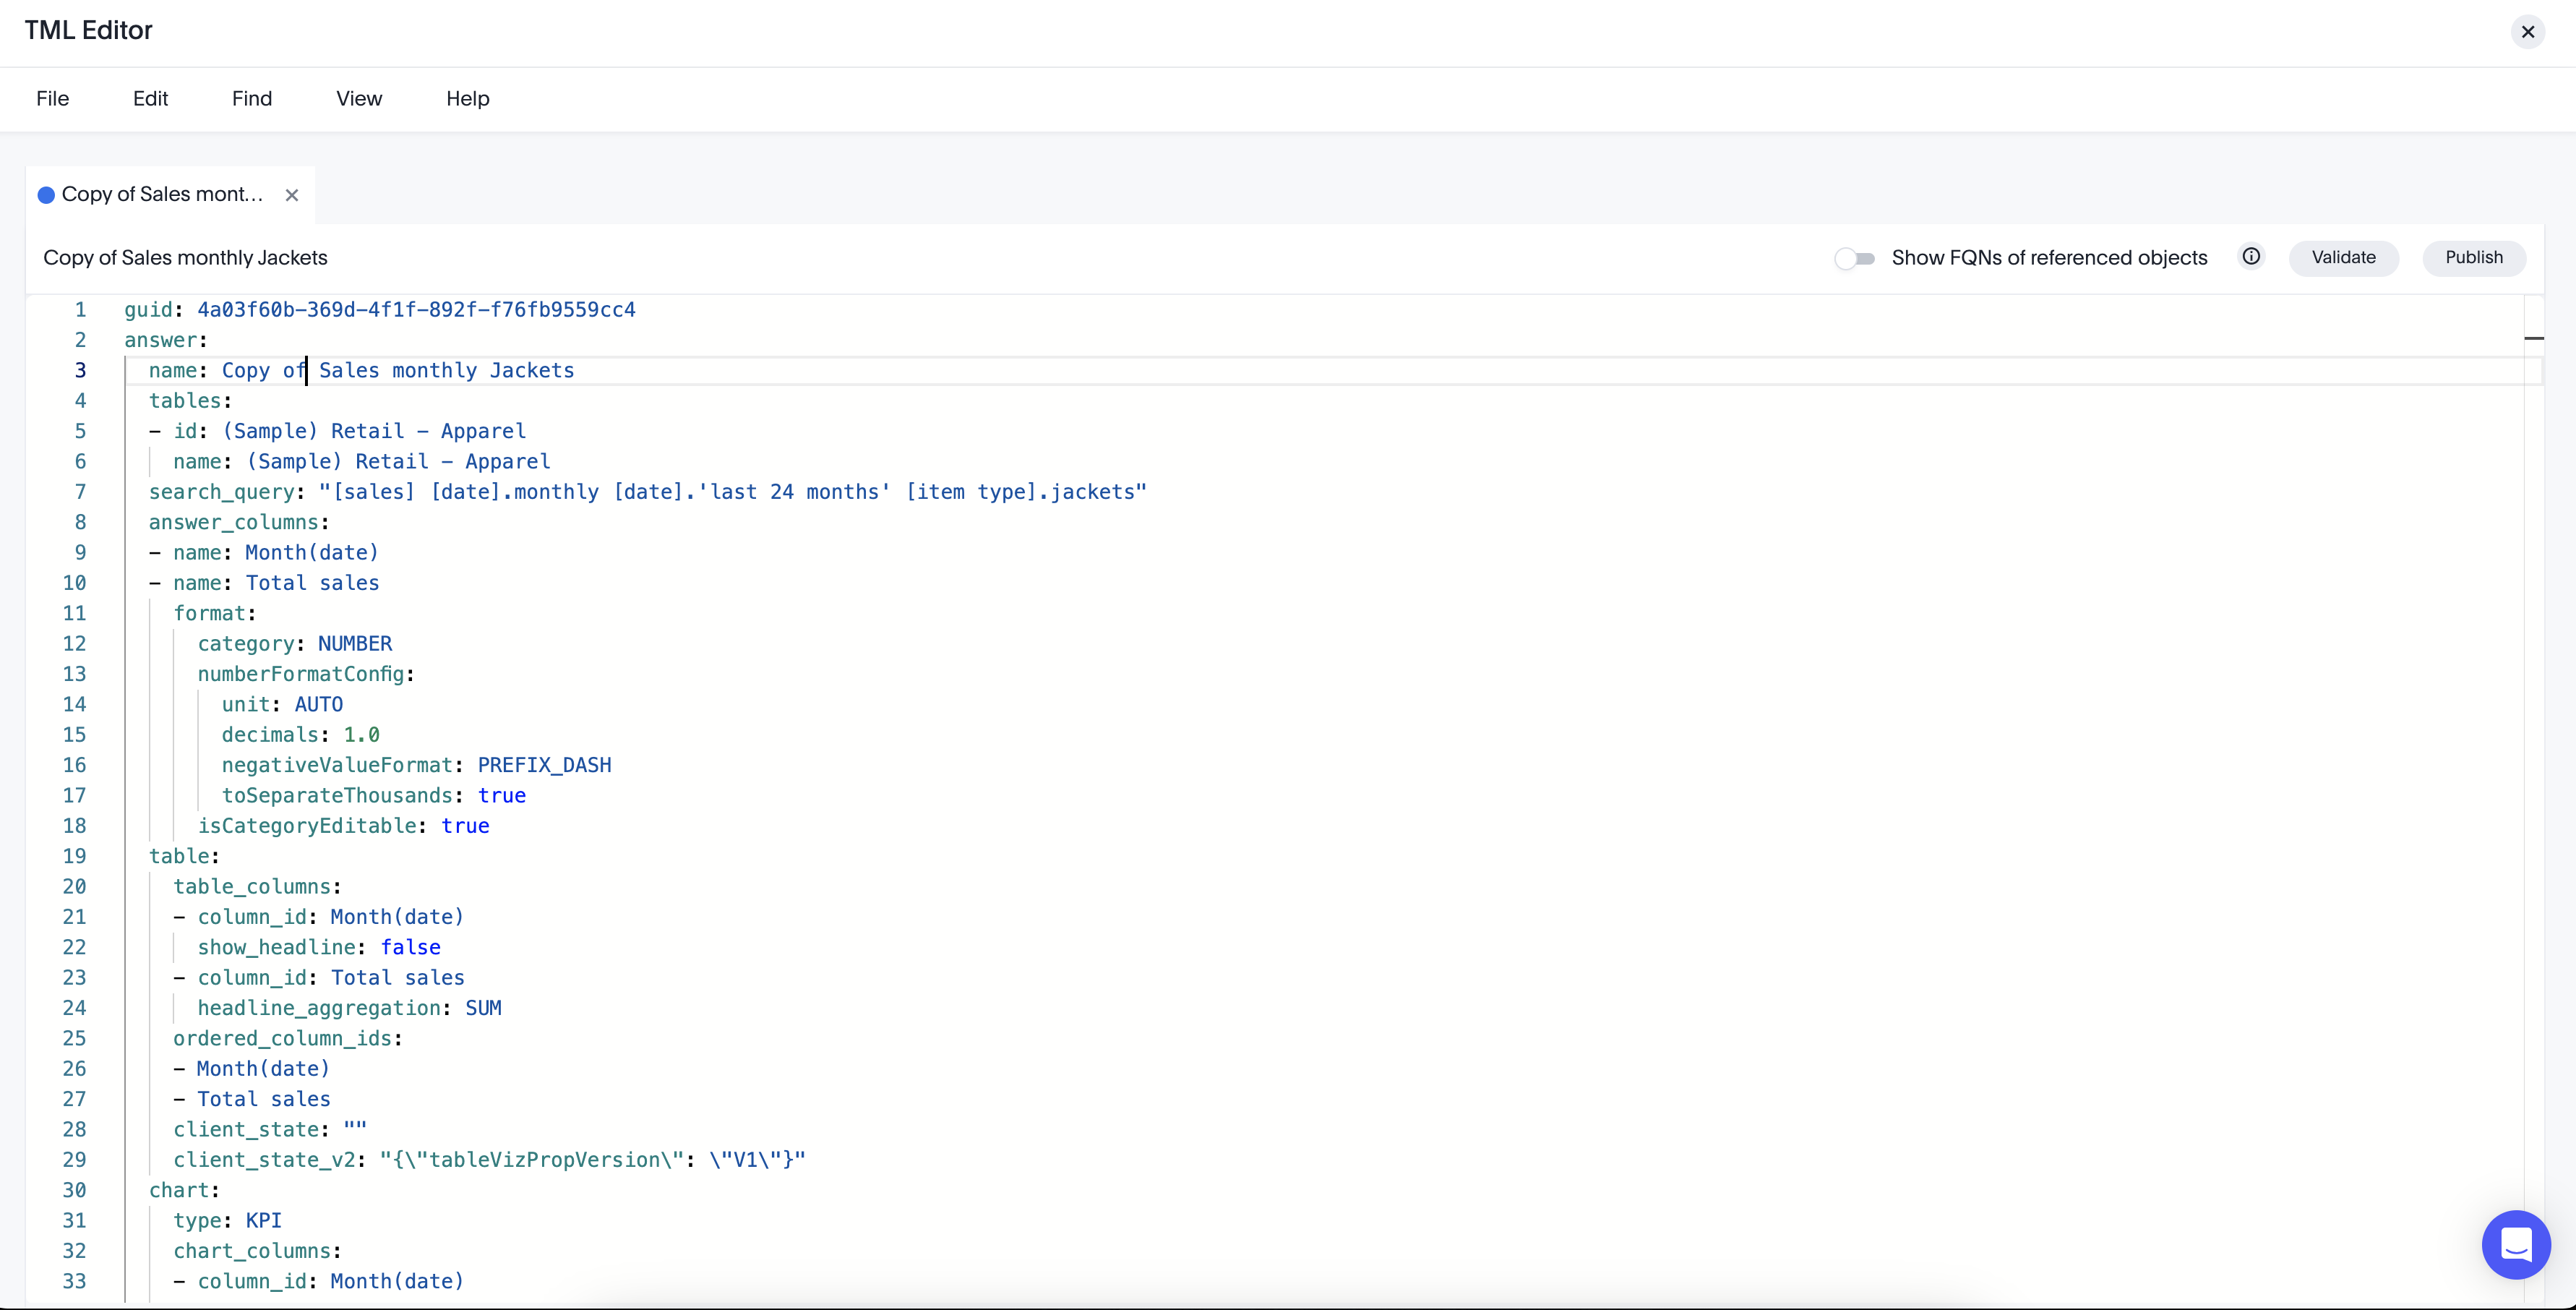
-
If you constructed the file(s) correctly, a green check mark appears next to the name of the file. If you did not construct the file correctly, a red bar appears near the top of the screen, telling you that ThoughtSpot found errors in one or more files. Select Show errors to see the errors listed in the Errors sidebar.
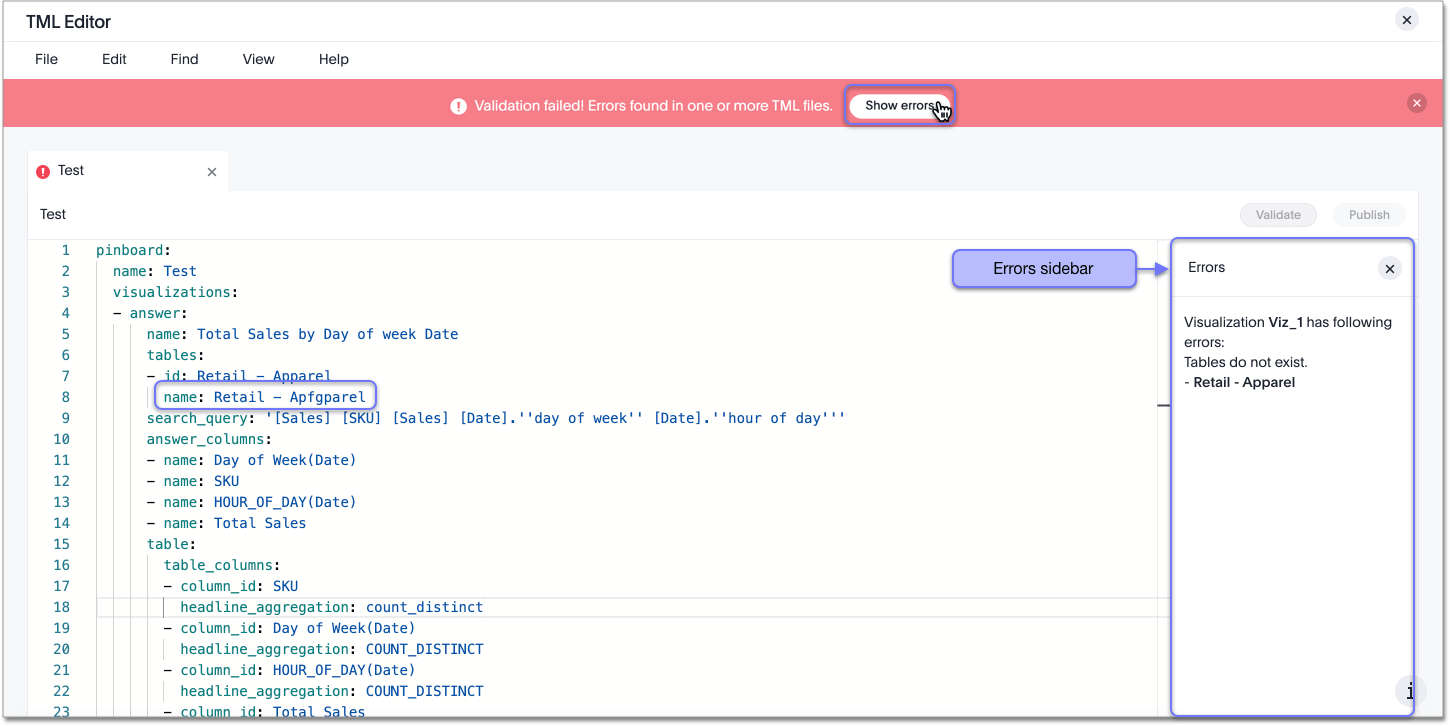
-
After validating, select Publish in the upper-right corner, next to Validate. You must publish each file individually.
-
The system displays a Publish status dialog box. You can select Open [object] to open the object you just published in a new tab, or select Close to return to the TML editor.
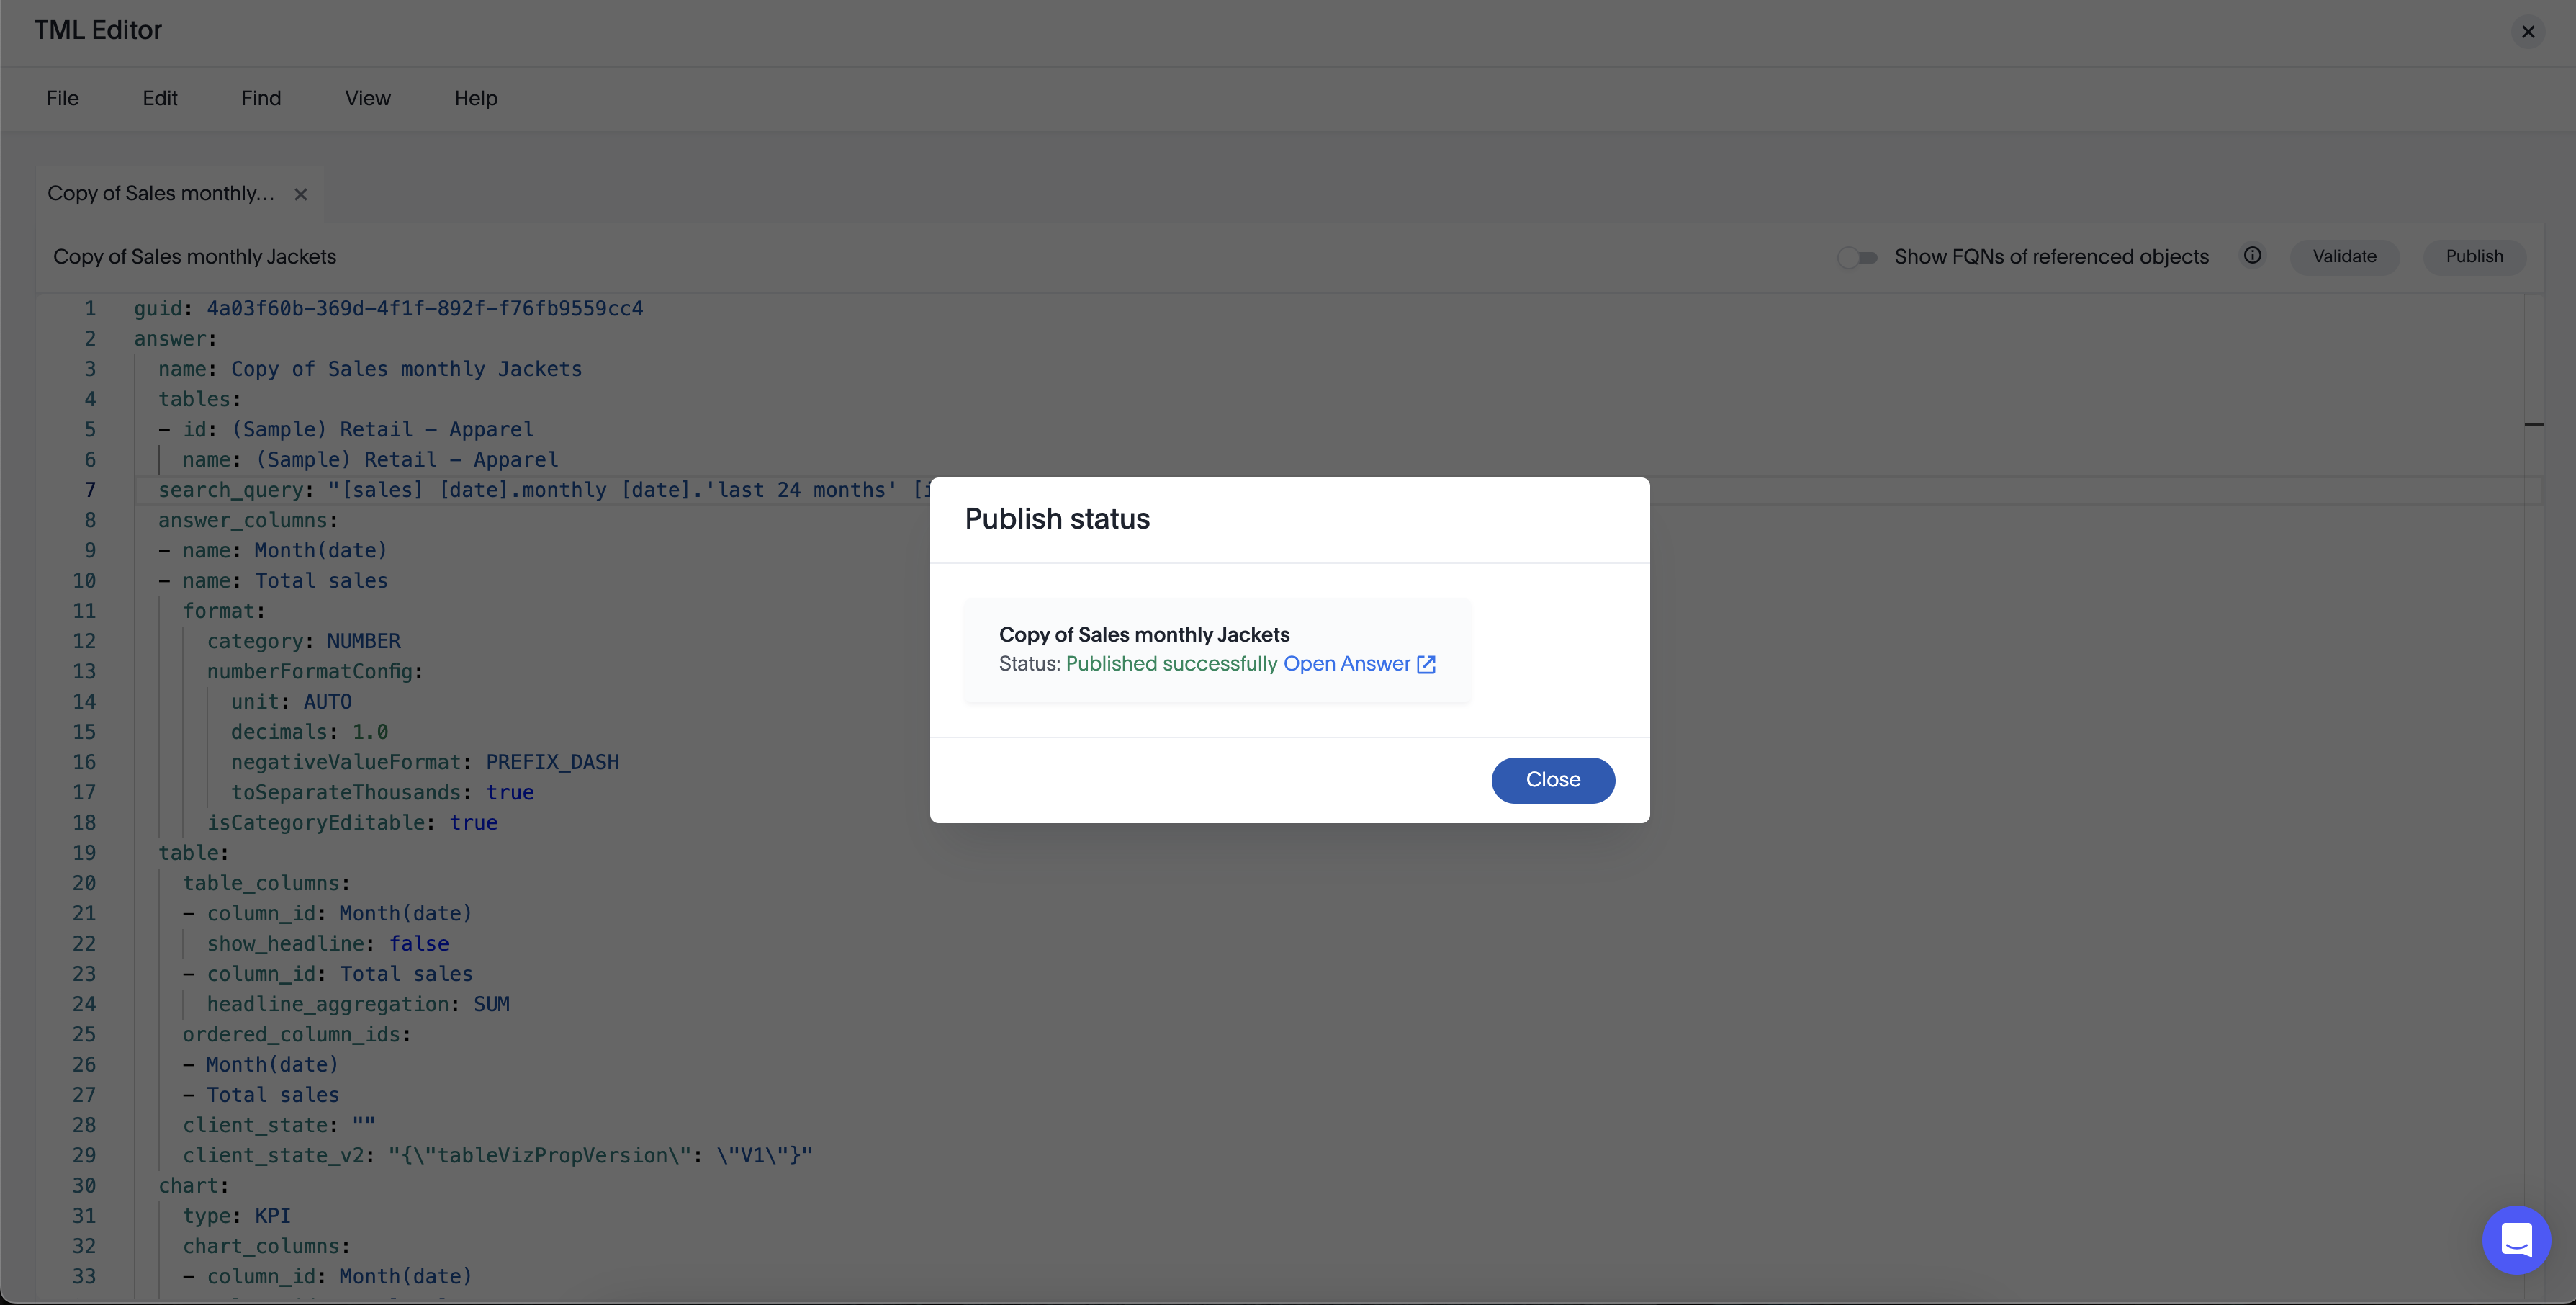
-
Update an object
You can overwrite an existing Worksheet, view, table, Answer, or Liveboard, by downloading the TML file, making any necessary changes, and then re-uploading the TML file.
To update collections of objects packaged together as a zip file, refer to Migrate multiple TML files.
You can also update an object using the TML editor.
To update an existing object by downloading the TML file and modifying it, follow these steps. In this case, we are updating a single Worksheet. You can update multiple objects at once by uploading them in .zip file format.
-
Export the object you want to update, as in steps 1 to 5 of the Export an Object section.
-
Edit the file in a text editor.
-
Navigate to the Data > Utilities page.
-
Select Import TML.
-
In the Import interface, click Select .tml or .zip files to upload.
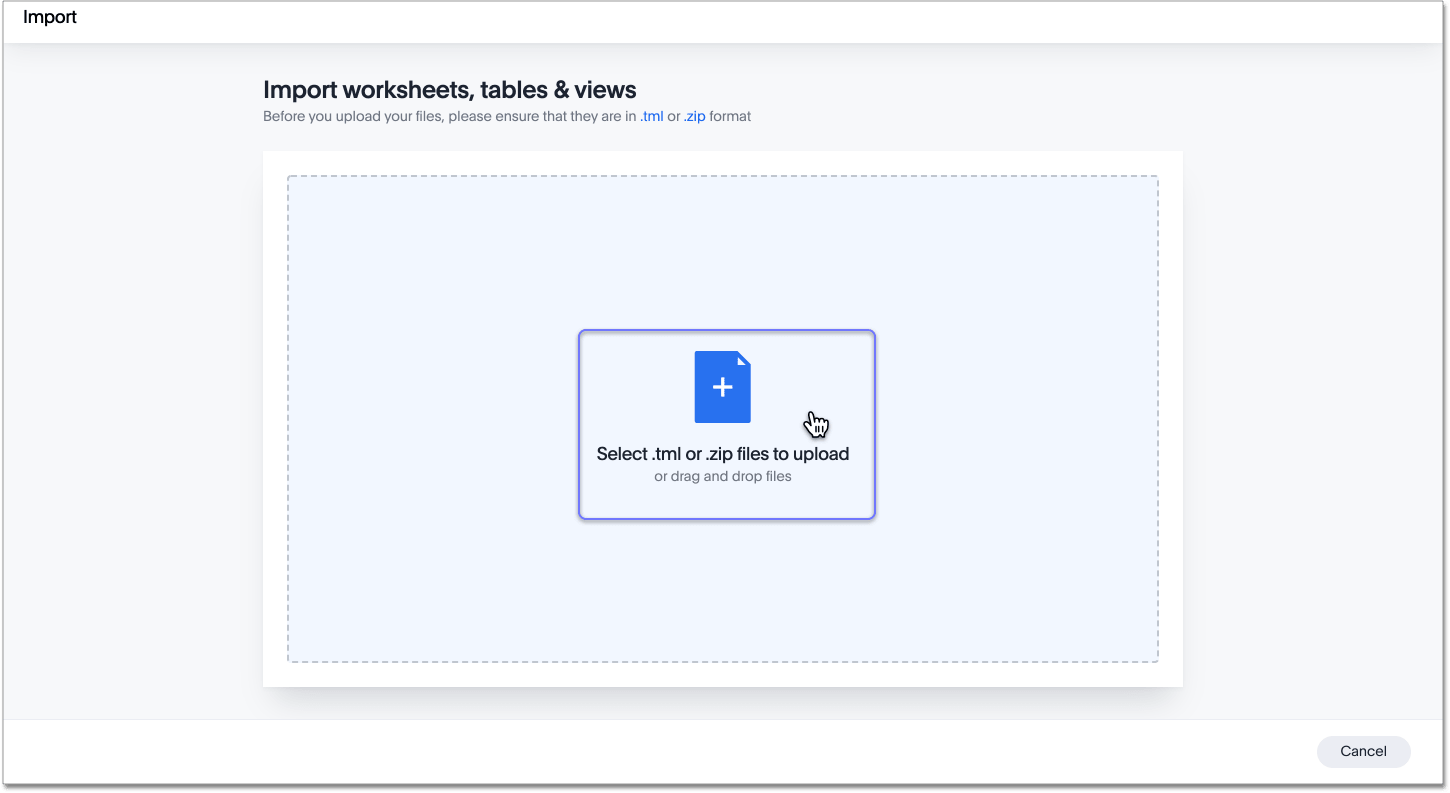
-
In your file system, find and select the
TMLfile you edited. -
If you uploaded a
.zipfile with multiple objects, you can deselect any files in the.zipfile you don’t want to upload. -
The Import interface recognizes that an object with this GUID already exists in the system, and asks if you would like to create a new object, or update the existing one. Select Update existing [object].
-
If there are errors in any of the objects you are importing, the Status column for the object is one of two states:
-
Ready for import and View Warnings, with a yellow exclamation mark: The object contains errors, but you can still import it. Either some visualizations or filters in the Liveboard have errors, or the destination tables for some joins in the table don’t exist. If you import the object without fixing the errors, the object removes the Liveboard visualizations or filters or table joins that contain errors. To view the errors, select View Warnings.
-
Cannot import and View Errors, with a red exclamation mark: The object contains errors, and you cannot import it. You must fix the errors. To view the errors and a suggested resolution, select View Errors.
-
-
Resolve any errors by selecting the Edit button for the object with errors. This opens the TML editor. Within the editor, resolve the errors using the method suggested under View Errors in the Import workflow.
-
After you resolve the errors, select Validate, and then Save. Exit the TML editor.
-
Select the objects you want to import. ThoughtSpot automatically selects objects with no errors, but does not select objects with errors, even after you resolve them. You must select the objects yourself.
-
Select Import selected.
-
The Import Status screen displays the status of the objects you imported. You can open the object(s) that you imported, or select Exit to return to the main object page.
Migrate an object
To migrate an Answer, Liveboard, view, or Worksheet from one cluster to another, follow these steps. To migrate collections of objects packaged together as a zip file, refer to Migrate multiple TML files. Note that you cannot create a new table using TML. You can only update existing tables.
-
Export the object you want to move, as in steps 1 to 5 of the Export an Object section.
The object remains on the original cluster as well, unless you delete it.
-
Go to the cluster you want to add the object to.
-
Navigate to the Data > Utilities page, and click the Import TML button.
-
In the Import interface, click Select .tml or .zip files to upload.
-
In your file system, find and select the
TMLfile. The file uploads automatically. -
If you constructed the file correctly, the Import interface displays a Validation successful message. You can now import the file.
-
If you uploaded a
.zipfile with multiple objects, you can deselect any files in the.zipfile you don’t want to upload. -
If there are errors in any of the objects you are importing, the Status column for the object is one of two states:
-
Ready for import and View Warnings, with a yellow exclamation mark: The object contains errors, but you can still import it. Either some visualizations in the Liveboard have errors, or the destination tables for some joins in the table don’t exist. If you import the object without fixing the errors, the object removes the Liveboard visualizations or table joins that contain errors. To view the errors, select View Warnings.
-
Cannot import and View Errors, with a red exclamation mark: The object contains errors, and you cannot import it. You must fix the errors. To view the errors and a suggested resolution, select View Errors.
-
-
Resolve any errors by selecting the Edit button for the object with errors. This opens the TML editor. Within the editor, resolve the errors using the method suggested under View Errors in the Import workflow.
-
After you resolve the errors, select Validate, and then Save. Exit the TML editor.
-
Select the objects you want to import. ThoughtSpot automatically selects objects with no errors, but does not select objects with errors, even after you resolve them. You must select the objects yourself.
-
Select Import selected.
-
The Import Status screen displays the status of the objects you imported. You can open the object(s) that you imported, or select Exit to return to the main object page.
Deleting columns, joins, and RLS rules
You can delete joins at the table level, table RLS rules, and table, Worksheet, View, and SQL View columns. However, keep in mind the following behaviors:
-
To delete a column or join, you must first remove its dependents. If you are deleting a column, you can delete it and remove that column’s dependencies in the same zip file import.
-
If the deletion of a column fails, the whole import, including any other objects in a zip file, will fail.
-
Joins only appear in the table TML file of the source table in a join, or the table on the Many side of a Many-to-One join. You can only add and edit table joins from the TML file of the table on the Many side of the join. You can’t view or modify table-level joins from the destination table’s TML file.
-
You can’t modify joins at the table level from the Worksheet, view, or Answer TML file. You can only override the joins for that specific Worksheet, view, or Answer. To modify table-level joins, you must edit the source table’s TML file.
Limitations of working with TML files
There are certain limitations to the changes you can apply by editing a Worksheet, Answer, table, view, or Liveboard through TML.
-
Formulas and columns can either have a new name, or a new expression. You can’t change both, unless migrating or updating the Worksheet two times.
-
It isn’t possible to reverse the join direction in the TML script.
-
You can only change logical tables using TML files. You can’t change the physical version of the table that exists in a database. When you change the
column_name, for example, the name changes in the application, but not in the physical table in the database. -
You can’t create or export TML files for R- or Python-powered visualizations.
-
Joins only appear in the table TML file of the source table in a join, or the table on the Many side of a Many-to-One join. You can only add and edit table joins from the TML file of the table on the Many side of the join. You can’t view or modify table-level joins from the destination table’s TML file.
-
You can’t modify joins at the table level from the Worksheet, view, or Answer TML file. You can only override the joins for that specific Worksheet, view, or Answer. To modify table-level joins, you must edit the source table’s TML file.
-
You can’t remove tables from a connection. You can only add them.
-
You can only delete table columns that have no dependents. If the table column has any dependents, ThoughtSpot returns an error when you try to import or validate the TML file. To delete a table column, you must first delete the dependents.
-
When deleting columns, you only delete ThoughtSpot’s record of the column. You don’t delete the column in your external database.
-
If there is an error in any row-level security (RLS) rule when importing a table, all RLS rules for the table are removed. ThoughtSpot warns you about this on import, and highlights the rule that is in an error state, so you can fix it or remove it.
-
Changing the filter order for Answers in the UI doesn’t change the filter order in the TML file.
-
Import of TML does not support worksheets that have the same name for parameters as for column names. This will result in a timeout during the TML validation process.


Show content