Configure OAuth with Service Principal for a Databricks connection
ThoughtSpot supports OAuth with Service Principal for a Databricks connection. This page describes the setup and configuration required.
|
OAuth requires users to log in and authorize. The frequency of login will depend on the token expiry. ThoughtSpot supports Authorization Code grant flow in OAuth authentication. |
ThoughtSpot initiates the authorization request to Databricks for OAuth. Databricks acts as the auth token-issuing authority. The IDP (for example, Okta) is only involved in the authentication between Databricks and the IDP. That is, the IDP is responsible for signing in to Databricks. Once you are logged in to Databricks, ThoughtSpot just needs the Service Principal UUID and Service Principal OAuth Secret that you will generate from your Databricks Dashboard.
| For OAuth, we recommend checking the Databricks documentation to confirm any IDP support and their details. |
Step 1: Create service principal UUID and secret
You create a service principal UUID and secret in Databricks as either an account admin or a workspace admin.
To create a service principal UUID and secret as an account admin, follow these steps:
-
Log in to the account console.
-
In the sidebar, click User management.
-
On the Service principals tab, click Add service principal.
-
Enter a name for the service principal. Click Add.
-
On the service principal’s details page, click the Secrets tab.
-
Under OAuth secrets, click Generate secret.
-
Set the secret’s lifetime in days. The maximum lifetime is 730 days.
-
Copy the displayed Secret and Client ID and click *Done.
The Client ID is also known as the application ID, or UUID.
To create a service principal UUID and secret as a workspace admin, follow these steps:
-
Log in to the Databricks workspace.
-
Click your username in the top bar and select Settings.
-
Click on the Identity and access tab.
-
Next to Service principals, click Manage.
-
Click Add service principal.
-
Click Add new.
-
Enter a name for the service principal and click Add.
-
On the service principal’s details page, click the Secrets tab.
-
Under OAuth secrets, click Generate secret.
-
Set the secret’s lifetime in days. The maximum lifetime is 730 days.
-
Copy the displayed Secret and Client ID and click *Done.
The Client ID is also known as the application ID, or UUID.
Step 2: Configure the ThoughtSpot Connection form
To create a connection to Databricks, follow these steps:
-
Navigate to the Connection creation page and enter the connection name and description. Select Databricks as the connection type and click Continue.
-
Select the Authentication type as OAuth with Service Principal.
-
Enter the following fields:
-
Host
-
HTTP Path
-
Service Principal UUID (also known as Application ID)
-
Service Principal OAuth Secret
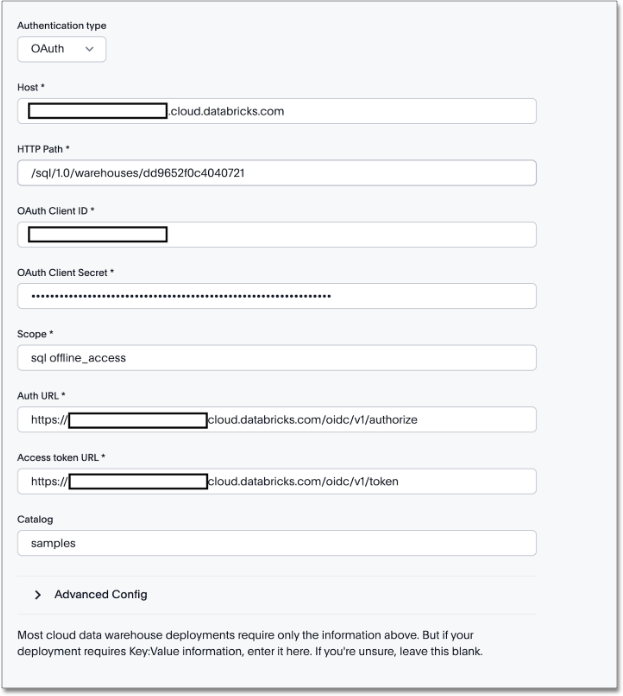
-
(Optional) Provide additional key-value pairs that you need to set up your connection to Databricks or customize additional JDBC parameters supported by Databricks, by doing the following:
-
Select the Advanced Config menu to reveal the Key and Value fields. Refer to the installation and configuration guide that comes with the Databricks JDBC driver for information on Databricks’s supported keys and values.
-
Enter your key and value information.
-
To add more keys and values, select the plus sign (+), and enter them.
Any key-value pairs that you enter must be defined in your Databricks data source. Key-value pairs are case-sensitive.
-
-
-
Select Continue.
-
Select tables (on the left) and the columns from each table (on the right), and then choose Create connection.
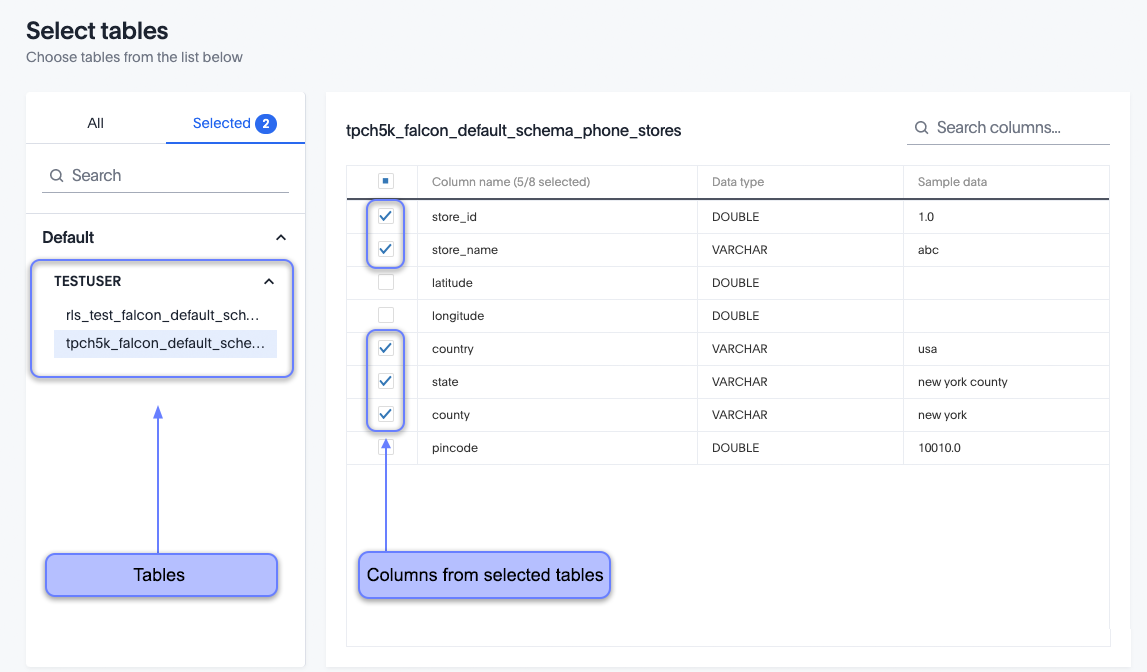
A message appears indicating the number of tables and columns that will be added to your connection.
-
Select Confirm.
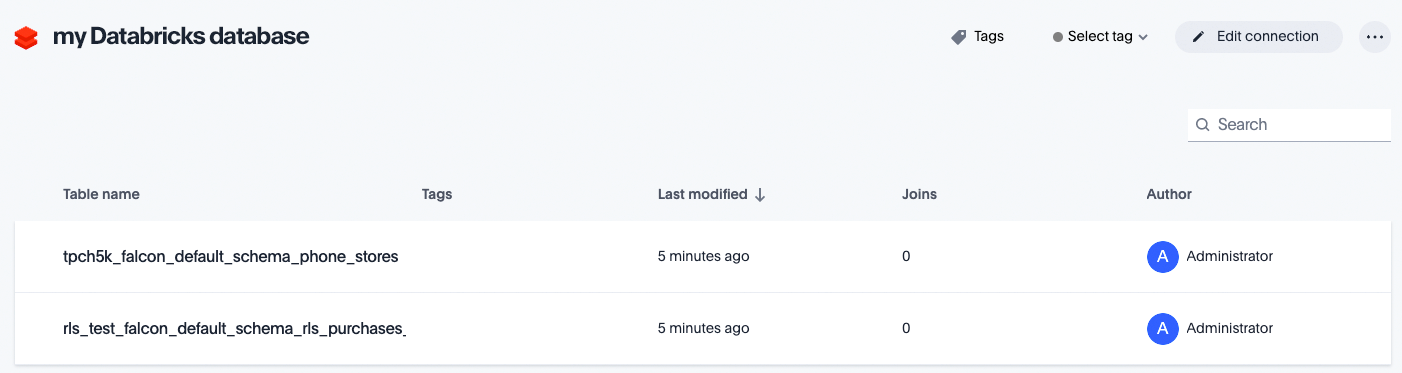
After you add the connection, you can search your Databricks database.