Join tables
When you create a Model, you create joins between the tables in your Model. These joins help to improve the accuracy of your search.
With joins, a single search can retrieve rich data and dimensional information across multiple tables in your database.
If your database contains existing table joins, they appear in ThoughtSpot.
Creating joins
To create a join, do the following:
-
Go to the Data workspace tab and click Data objects.
-
Select Tables.
-
Find your table through browsing, Search, or selecting the appropriate Tag(s).
-
To select the table for adding joins, click its name in the list. You will see the Columns view of the table.
Generally, creating a many-to-one join from a fact table to a dimension table simplifies your search. -
Select the Joins tab. The list of existing joins (if any) from the table appears.
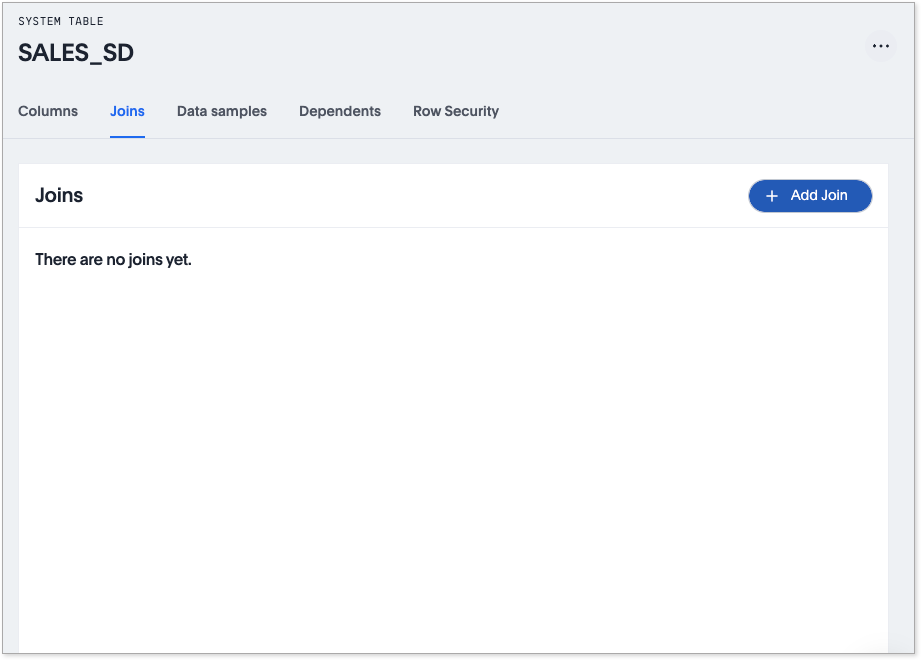
-
Select + Add join.
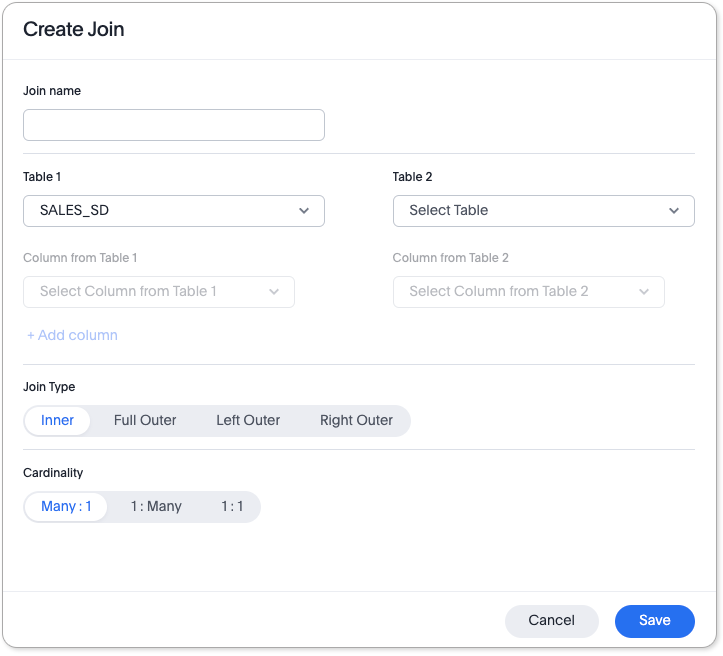
The Create Join page appears.
You cannot create range joins in the UI. You must use TML. -
In the Join name field, enter a name for your join.
-
Under Table 1, choose the table you want to create a join from (origin table).
-
Under Table 2, choose the destination table or View for the other end of the join. This is usually a dimension table.
-
If you see the Conditions section, the non-equi joins feature is enabled. To continue creating your join, go to Using non-equi joins to finish completing your join.
-
Choose the matching columns under each table. You can now create joins between columns with the same data type or with compatible data types.
-
[Optional] You can select multiple columns for the same join. To add another pair of matching columns to the join definition, select +Add column.
-
Specify the join type; see Join types.
-
Specify the join cardinality; see Cardinality.
-
Select Save.
You can use non-equi joins to reduce your modeling time. For more information, see Using non-equi joins.
You can now see the updated view of the schema. You can also see the detailed information about all Joins. Note that after creating the join, you may change its name, type, or cardinality by selecting the edit icon. You can also change the location and size of tables and joins in the model. You can move or resize tables and joins to display the best visual representation of the model. If you want to change the data source or column being joined, you must delete the join and create a new one.
Proceed to create all necessary table joins, to support your data requirements.
Congratulations! Your search can now pull data from all joined tables.
Creating non-equi joins Beta
You can create and manage non-equi joins in the ThoughtSpot UI. This streamlines modeling because you don’t have to use TML or technical workarounds to do it. You can also specify one or more conditions to use for creating the join. With conditions, the join will only be created if the conditions are met. To enable this feature, contact ThoughtSpot Support.
Support for existing conditions
-
Any complex condition which has already been created in TML is supported.
-
For any condition not supported by the UI, the join condition TML is displayed directly in the Create Join window, so you can see the join condition whether it was created in the UI or in TML.
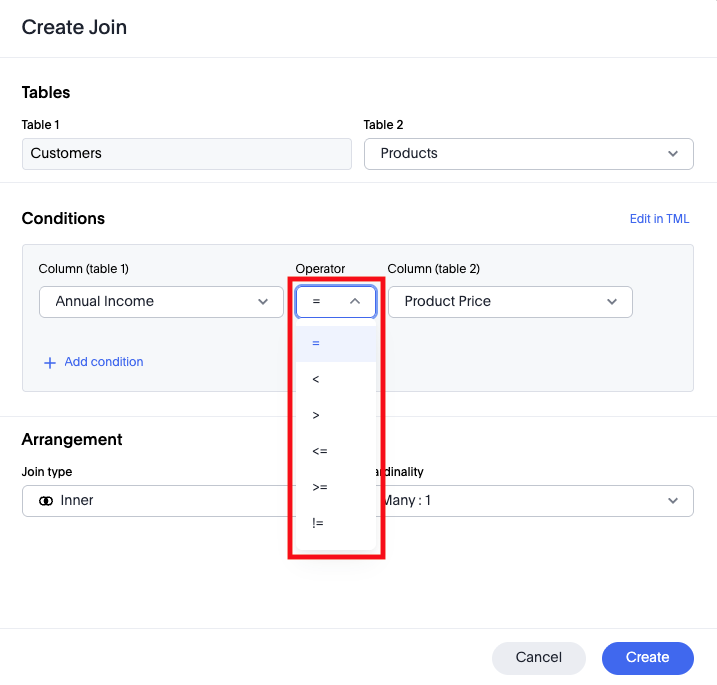
Supported operators
You can use the following operators to create non-equi joins in ThoughtSpot:
-
< -
> -
<= -
>= -
!=
| You can create non-equi joins from either the Model editor or the Model details page. |
To create a non-equi join, do the following:
-
In the Create Join window, select the table you want to join.
-
In the Conditions section, choose a column for table 1 and table 2.
-
Using the Operator menu, choose the operator to use for creating the join.
-
(Optional) If you want to add another condition to evaluate when creating the join, go to the next step. If not, go to step 7 to select the join type and cardinality.
-
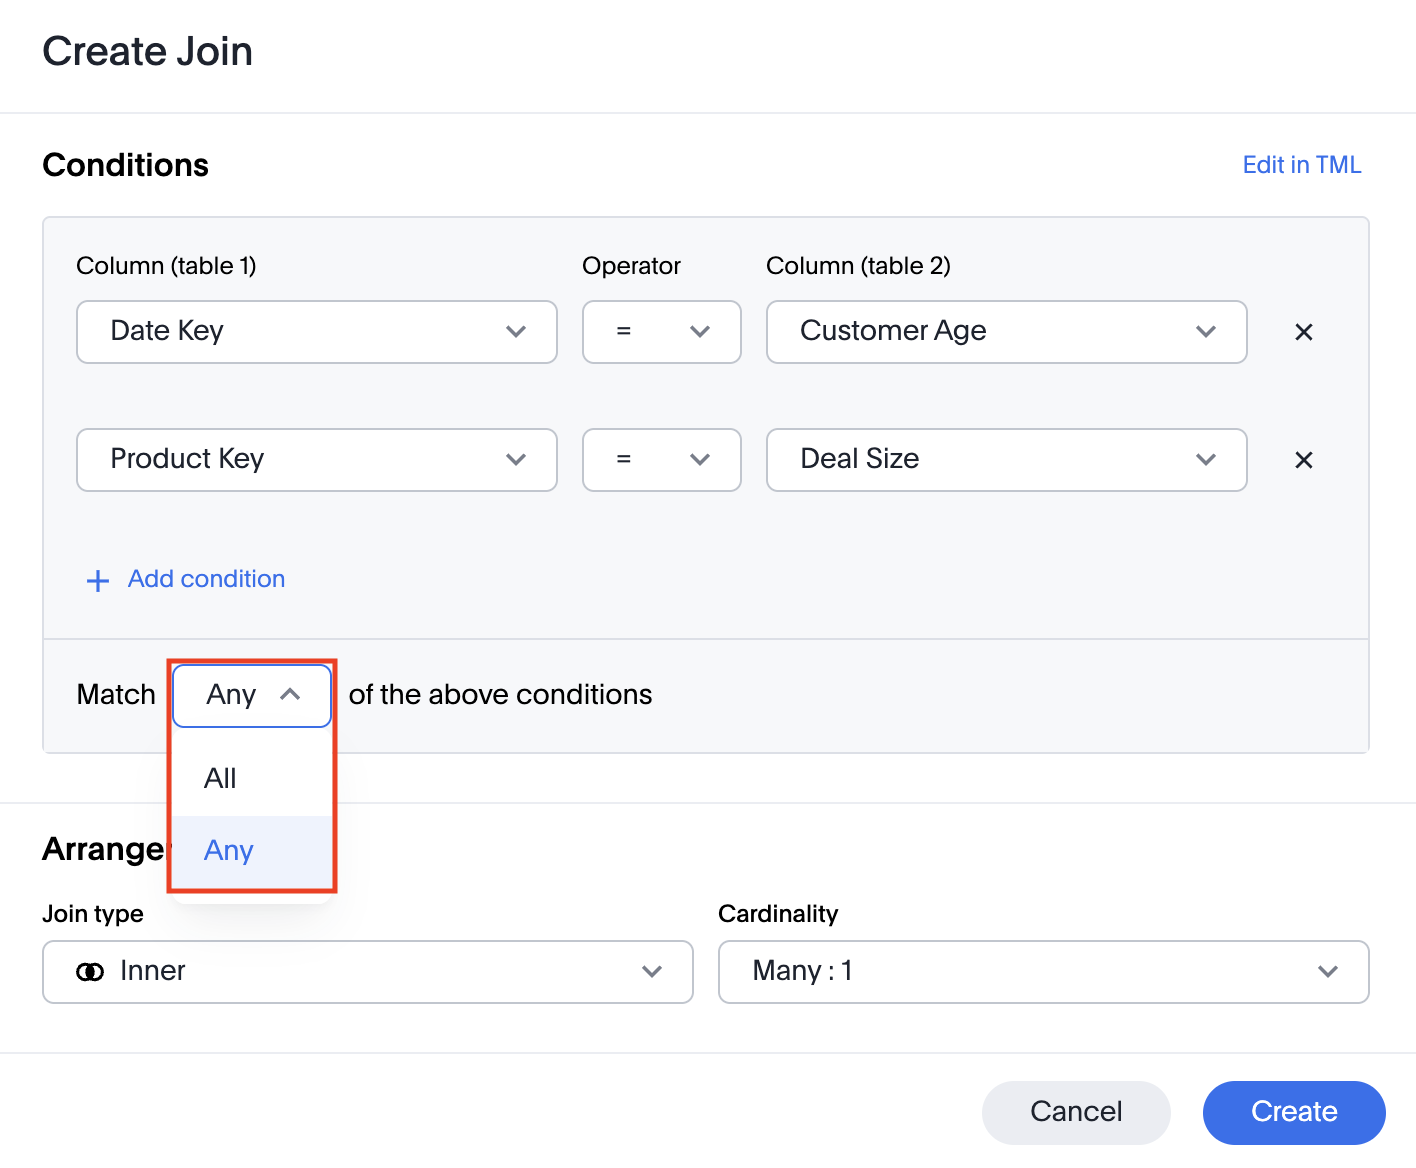
(Optional) If you want to add another condition to evaluate when creating your join, click + Add condition. With multiple conditions, the join is created based on how the conditions are met.
-
(Optional) To choose how the join is created when you have multiple conditions, choose either of the following from the Match menu:
-
All (default): The join will be created only if all of the conditions are met.
-
Any: The join will be created if any of the conditions are met.
-
-
In the Arrange section, select the Join Type and Cardinality for your join.
-
Click Create.
Edit in TML for more complex conditions
If the join condition is more complex than the UI supports, you don’t have to use the TML editor. Instead, you can edit the TML in the Create Join window.
To edit in TML from the Create Join window, do the following:
-
Click Edit in TML.
The Conditions area now shows the TML for your join.
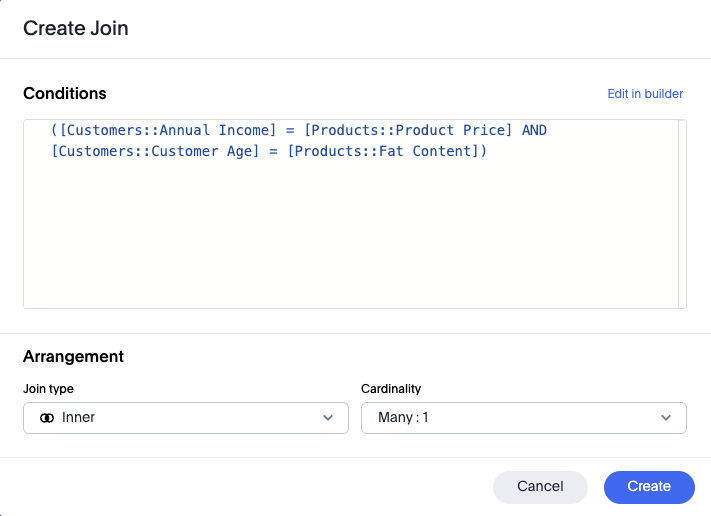
-
Enter your condition(s) in TML format in the Conditions area.
-
When you are finished adding your TML, do either of the following:
-
If you want to go back to the original view to make additional changes, click Edit in builder, and go to step 4.
-
If you have completed setting up your join, click Create.
-
-
Make any final changes to your join, then click Create.
Additional resources
As you develop your expertise with joins and schema, we recommend the following ThoughtSpot U course:
See other training resources at ThoughtSpot University.