Getting started with AgentSpot
Welcome to AgentSpot! This guide walks you through your first steps, from signing in and exploring existing agents to setting up connectors and building your own agents.
If you are an administrator responsible for setting up AgentSpot for your company, see AgentSpot administration.
Overview
AgentSpot is an AI agent platform integrated with your ThoughtSpot ecosystem. It allows you to use pre-built agents created by your organization, or create your own agents that can read data from and take actions within your business applications.
AgentSpot has three core building blocks:
| Feature | Interaction model | Description |
|---|---|---|
Agents |
Conversational |
Agents respond in real time through conversation. If you have used AI chat tools before, agents will feel familiar. Use agents for active, back-and-forth tasks where you need immediate results. |
Workflows |
Asynchronous |
Workflows are built through conversation but run independently once created. They are deterministic — they behave the same way every time — and can be scheduled to run in the background without manual oversight. Use workflows for repeatable, time-consuming tasks you want to automate. |
Apps |
Build once, share with anyone |
Apps are interactive analytical applications you build through conversation and publish as a shareable, versioned snapshot. Each App bundles live data queries with a generated interface, so viewers always see results drawn from current data when they open it. Use Apps when you want to turn an analysis or workflow output into something others can open and run on their own, without needing to recreate it. |
Before you begin
Make sure you have the necessary permissions to access AgentSpot. To confirm, contact your ThoughtSpot administrator.
To sign in, your user account must have one of the following privileges:
| Privilege | Access level |
|---|---|
Can use AgentSpot |
Standard access — browse and use agents shared by your organization. |
Can manage AgentSpot |
Administrator access — includes all standard access plus the ability to manage connectors, org memory, and organization-wide settings. |
If you are unsure which privilege you have, contact your ThoughtSpot administrator.
Signing in to AgentSpot
-
Sign in to your Org in your ThoughtSpot instance.
-
Go to the Insights tab and click AgentSpot in the left-hand navigation (just below Home and Spotter).
-
Sign in with the same credentials you use for your ThoughtSpot instance.
When you sign in for the first time, you see the onboarding page. As a new user, select Start with agents created by your org to browse and try out existing agents before building your own. You can create your own agent at any time from the AgentSpot home page.
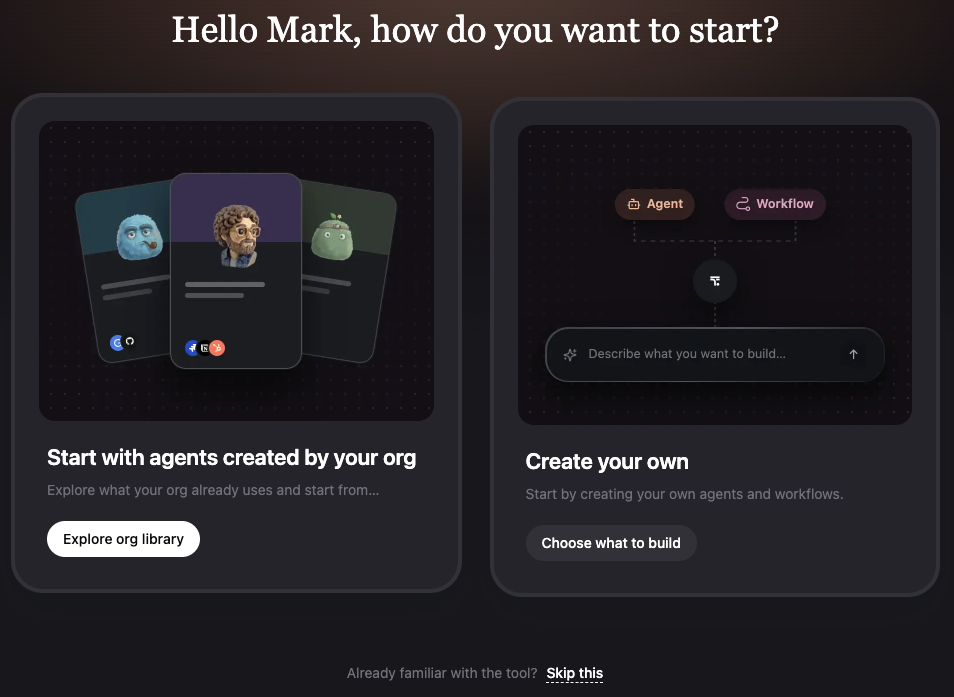
The onboarding journey
From the onboarding page, you can choose one of two paths:
-
Start with agents created by your org: Browse and try out agents already configured for your organization.
-
Create your own: Build a new agent or workflow from scratch.
Start with agents created by your org (recommended)
The agents page shows agents and workflows pre-configured by your peers.
The recommended first step is browsing existing agents. These agents are already configured for your organization’s data and use cases, giving you a useful starting point before building your own.
Browse the library of Agents and select one to start a conversation.
For details, see Using an agent in AgentSpot.
Create your own
If you have a use case that is not covered by your organization’s existing agents, you can create your own agent or workflow from scratch.
For details, see Creating an agent in AgentSpot.
AgentSpot home page
The next time you sign in to AgentSpot after onboarding, you see the AgentSpot home page.
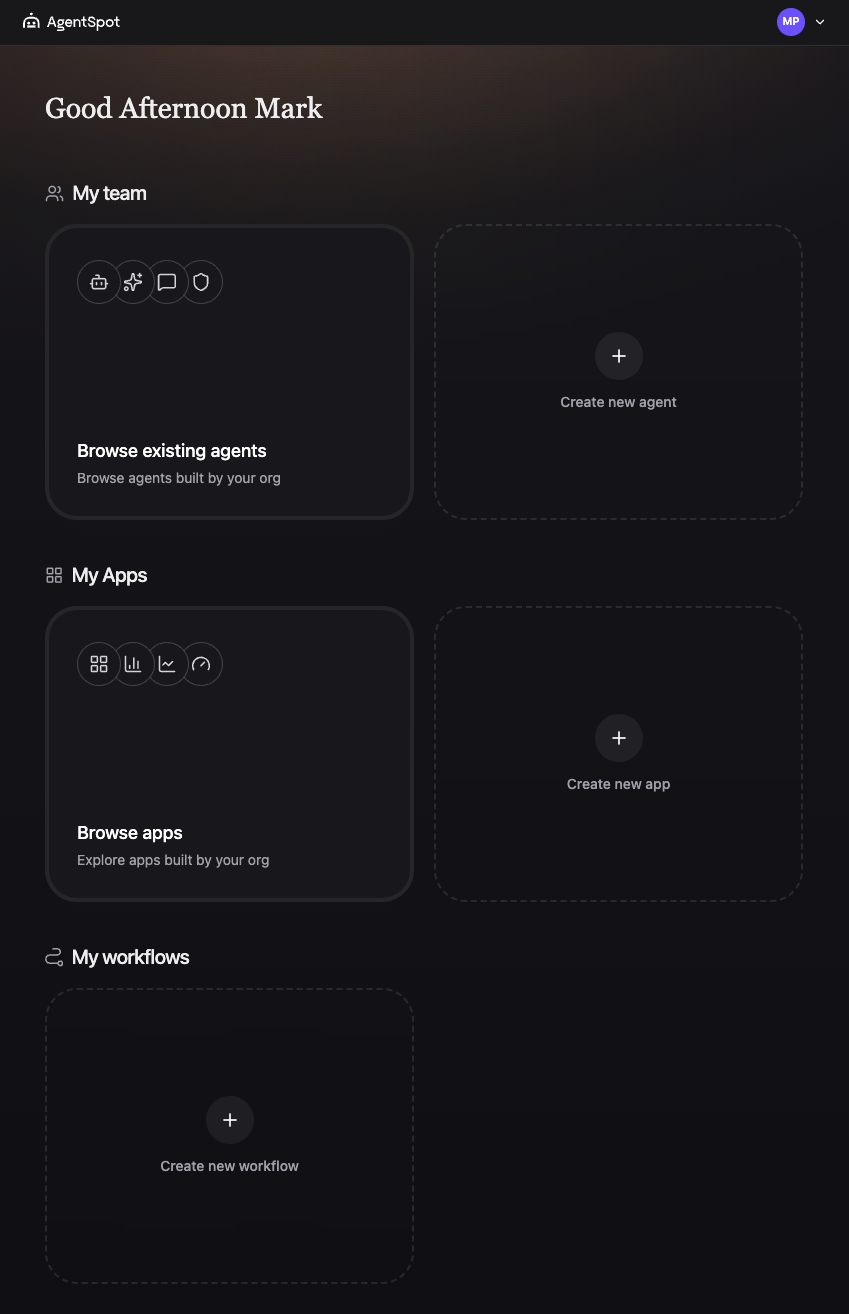
On the home page, you can:
-
Browse and use agents and apps available in your organization
-
Create a new agent
-
Create a new app
-
Access workflows you have created
-
Create a new workflow
In the upper-right corner, your user menu provides access to the following:
-
Connectors: where you can manage connection to external services your agents can access
-
Skills: where you can create, share, and manage reusable skills for your agents
-
Personal memory: where you can view and edit the context your agents remember about you across all of your conversations
-
Switch to light/dark mode: where you can select different display modes for AgentSpot
-
Revisit onboarding: where you can go back to the initial onboarding page
-
Logout: where you can sign out of AgentSpot
If you are an administrator, you will also see the Admin Settings button next to your user menu.
Setting up your connectors
After exploring the home page, set up your personal connectors. Connectors link AgentSpot to external services such as Slack or Google Workspace, giving your agents additional context and enabling them to take actions on your behalf — such as sending messages or creating tickets.
To set up a connector, do the following:
-
In the upper-right corner, click your user menu and select Connectors.
-
Browse the list of connectors available in your organization.
-
On the connector you want to add, click Connect.
-
Sign in to your account for that application.
-
Review the requested permissions and click Authorize.
The connector is now active and available to your agents.
| The connectors available to you are determined by your administrator. If a connector you need is not listed, contact your ThoughtSpot administrator. |
If you can’t sign in or don’t see any agents, contact your AgentSpot administrator.
Where to go next
-
To learn how to use an agent, see Using an agent in AgentSpot.
-
To learn how to create an agent, see Creating an agent in AgentSpot.
-
To learn how to create a workflow, see Creating and managing a workflow in AgentSpot.
-
To learn about apps and how to use them, see Using an App in AgentSpot
-
To learn how to create an app, see Creating an App in AgentSpot