Create Models
| Worksheets are now referred to as Models. |
Creating a Model
To create a new Model, follow these steps:
-
Select Data, on the top navigation bar.
-
Select the + Create new button in the side navigation bar.
-
Select Model.
Add sources and columns to a Model
After creating a Model, you need to add the sources that contain the data. A source is another name for a table. The sources you choose are typically related to one another by foreign keys.
To add sources to your Model, follow these steps. The Model creation UI also guides you through the process.
-
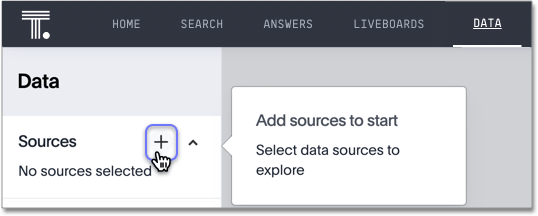
Select the + icon next to Sources.
-
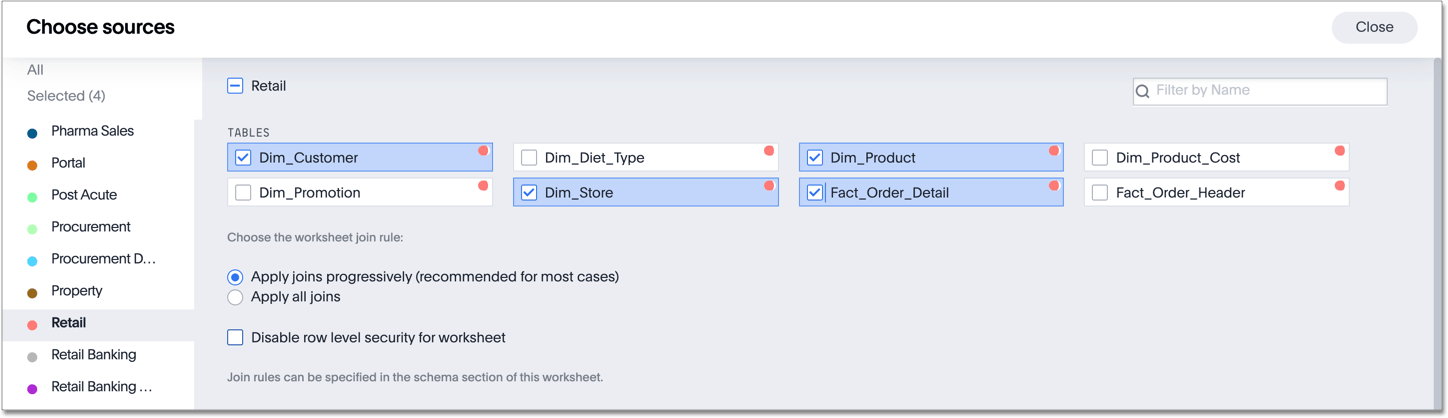
Check the box next to each of the sources you want to include in the Model. You can search for specific Views, imported data, or tables. You can also select every data source that has a specific tag, like Retail.
Note that the list of sources only shows the data sources on which you have view or edit privileges.
-
Choose the Model join rule. Either apply joins progressively or apply all joins. Applying joins progressively speeds up performance.
-
If you want to disable row-level security for this Model, check the checkbox to disable it.
-
Select CLOSE to save your changes.
-
Expand the table names under Sources and select the columns to add to the Model, by doing any of the following:
-
To add all of the columns from a table, click the table name and select + Add Columns.
-
To add a single column, double-click its name.
-
To add multiple columns, control-click each column you want to add and select + Add Columns.
Note that after you add a column, non-related tables (those without a primary/foreign key relationship) become hidden. If you are working with two tables that should be related, but are not, you can add a relationship between them.
ThoughtSpot supports role-playing dimensions, or multiple join paths, for Models. For example, you may have a fact table joined to a dimension table more than once. When adding attribute columns from that dimension table to your Model, ThoughtSpot prompts you to choose which join path you would like to use for that column. To use role-playing dimensions, select that attribute again, modify the name, and choose the other join path when ThoughtSpot prompts you to select one. For more information, see Model role playing dimensions. -
-
(Optional) Modify the join types within the Model.
-
(Optional) Create a formula in a Model.
-
(Optional) Create Model filters.
-
Click the More menu icon
 , and select Save.
-
In the Save Model window, enter a name and description for your Model and select SAVE.
-
(Optional) Select each column name and enter a more user-friendly name for searching. You can tab through the list of columns to rename them quickly. ThoughtSpot automatically optimizes column names to make searching easier. When you add a column to a Model, ThoughtSpot automatically converts it to title case, and replaces any underscores with spaces. For example,
customer_ageautomatically becomesCustomer Age. -
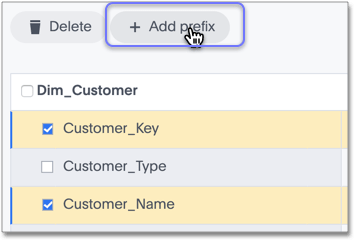
(Optional) If you want to add a prefix to the name of several columns, select them, select the Add prefix button, and type in the prefix.
-
Click the More menu icon
, and select Save. -
The Model details page appears. Review your Model, and make any additional changes you would like. Note that if any of your columns contain aggregate formulas, or if your Model contains a chasm or fan trap, ThoughtSpot does not show data samples.
-
Share your Model, if you want other people to be able to use it.
Where to go next
-
How the Model join rule works
Use the Model join rule to specify when to apply joins when a search is done on a Model. You can either apply joins progressively, as each search term is added (recommended), or apply all joins to every search.