Admin portal enhancements
Overview
The Admin portal has been completely redesigned, to be a more intuitive, and highly organized administrative experience tailored for modern ThoughtSpot administrators. It consolidates governance and provides administrators with unprecedented control and visibility, serving as the foundation for the next generation of enterprise scale.
The redesigned portal solves the problem of a cluttered and fragmented administrative interface by introducing a unified Information Architecture (IA) that brings closely related items together to create a streamlined, logical workflow.
| The redesigned Admin settings portal is rolling out in phases. Your cluster will be upgraded during the 26.8.0.cl release, with some customers receiving access earlier than others to facilitate real-world testing. |
What’s New?
The new Admin settings portal include the following key changes:
-
A new information architecture. The new architecture consists of four primary sections:
-
Home
-
Management
-
Configuration
-
Monitor
-
-
A new interface for Application Settings and Search & SpotIQ
-
An improved workflow to Create, Read, Update, and Delete (CRUD) Orgs
-
An improved interface and workflow to Create, Read, Update, and Delete (CRUD) Users
These are all accessible from a streamlined navigation sidebar.
Access the Admin settings
To access Admin settings:
-
Log in to your ThoughtSpot instance.
-
Select the Admin settings tab from the left navigation.
The Admin settings portal opens.
If you are an Org administrator, by default it opens to User management.
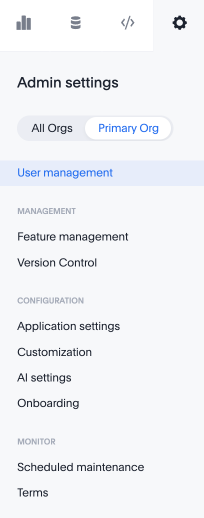
If you are an cluster administrator, by default it opens to Org management.
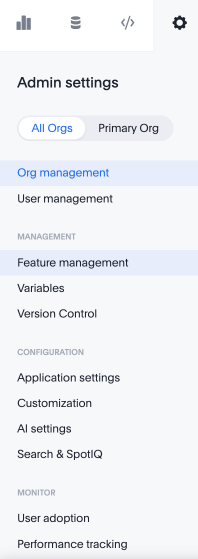
The organization of this navigation menu will help you determine if you are using the old Admin settings interface, or the enhanced version. The information architecture sorts the navigation into four categories, Home, Management, Configuration, and Monitor if you are using the enhanced version.
Information Architecture
The enhanced Admin settings portal reorganizes the administrative interface into four primary sections:
| Section | Purpose |
|---|---|
Home |
The foundational landing page for creating Orgs and Users, kept outside of general management. Houses the most frequently used administrative functionalities. |
Management |
Contains overarching settings and feature management that apply across the entire cluster or organization. |
Configuration |
Houses specific feature settings for a given organization, organized via clean sub-tabs and accordions. Includes Application Settings, Search & SpotIQ, and Customisation tabs. |
Monitor |
A dedicated space for tracking system health, operational status, and granular object and usage adoption details. |
Home tab
The Home tab is the primary entry point for the most common administrative tasks:
-
Create new organizations
-
Create new users
Management tab
The Management tab contains settings and controls that span the entire cluster or organization:
-
Feature Management UI for managing feature flags and allocations
-
Overarching cluster-level configuration
Configuration tab
The Configuration tab houses Org-specific settings organized into sub-tabs and accordions:
| Sub-tab | Description |
|---|---|
Application Settings |
General application configuration using the new sub-tab and accordion UI structure. |
Search & SpotIQ |
Search and SpotIQ settings utilizing the new accordion UI structure. |
Customisation |
A single consolidated tab for all style and branding settings, including logo, colors, fonts, and footer text. Previously scattered settings are now unified in one location. |
| The manual Save button has been removed from Application Settings and Search & SpotIQ. All changes auto-save instantly, providing a faster and more seamless experience. |
Org management
Enhanced Admin settings introduce a streamlined Org management experience with three core workflows:
-
Create an Org
-
Edit an Org
-
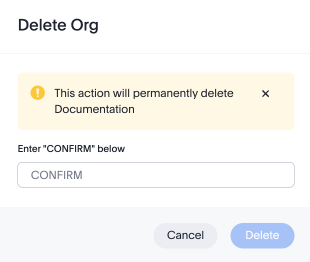
Delete Org
Create an Org
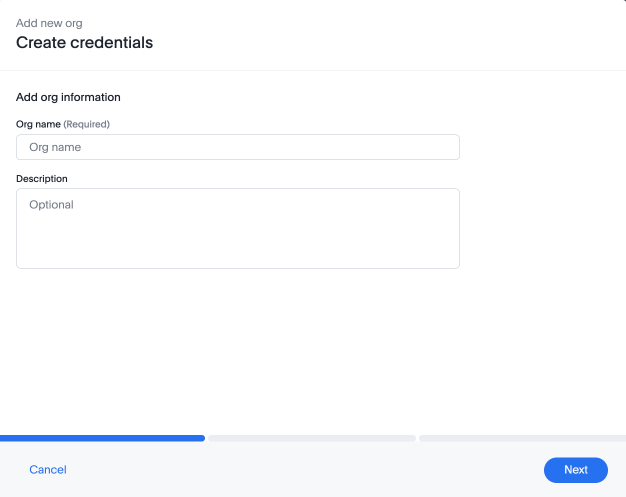
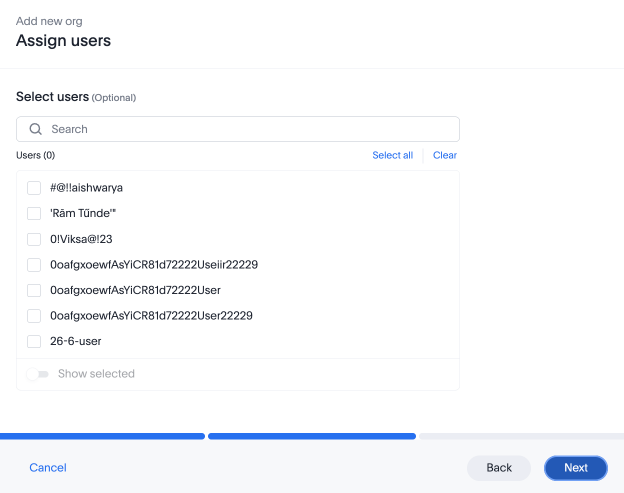
The streamlined creation flow allows you to:
-
Input the org name.
-
Instantly add existing users.
-
Allocate access features.
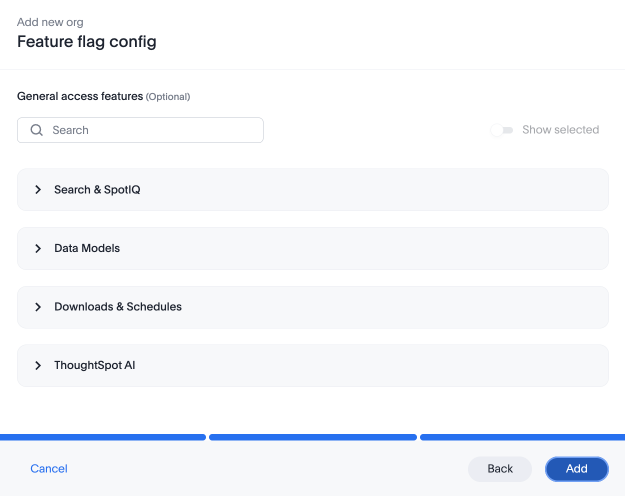
All three steps occur within a single, unified workflow — there is no need to navigate between multiple pages or modals.
You can also view the Org Details Card, which provides a quick visual summary including:
-
Creation date
-
Creator
-
Active groups
-
Users
-
Allocated features
User management for cluster administrators
Users
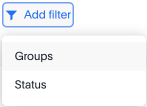
You can add new users manually or import users from this page. You can also filter users by Orgs or Status.

Authentication
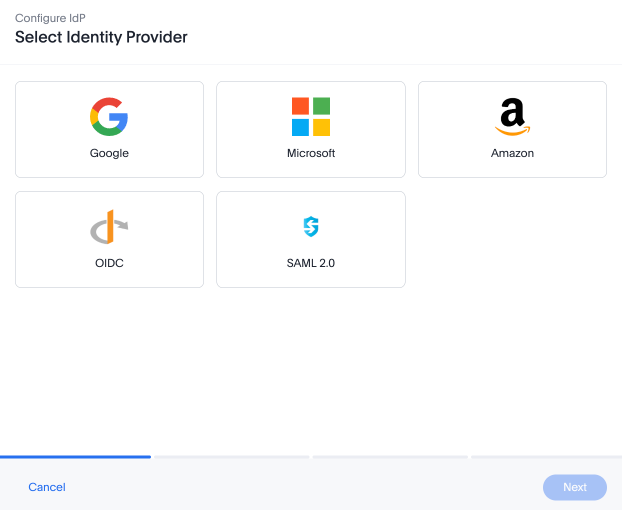
Enhanced Admin settings brings end-to-end IdP setup natively within the Authentication tab. You can configure and IdP, view settings, or filter on Status or IdP type from this page.
User management for Org administrators
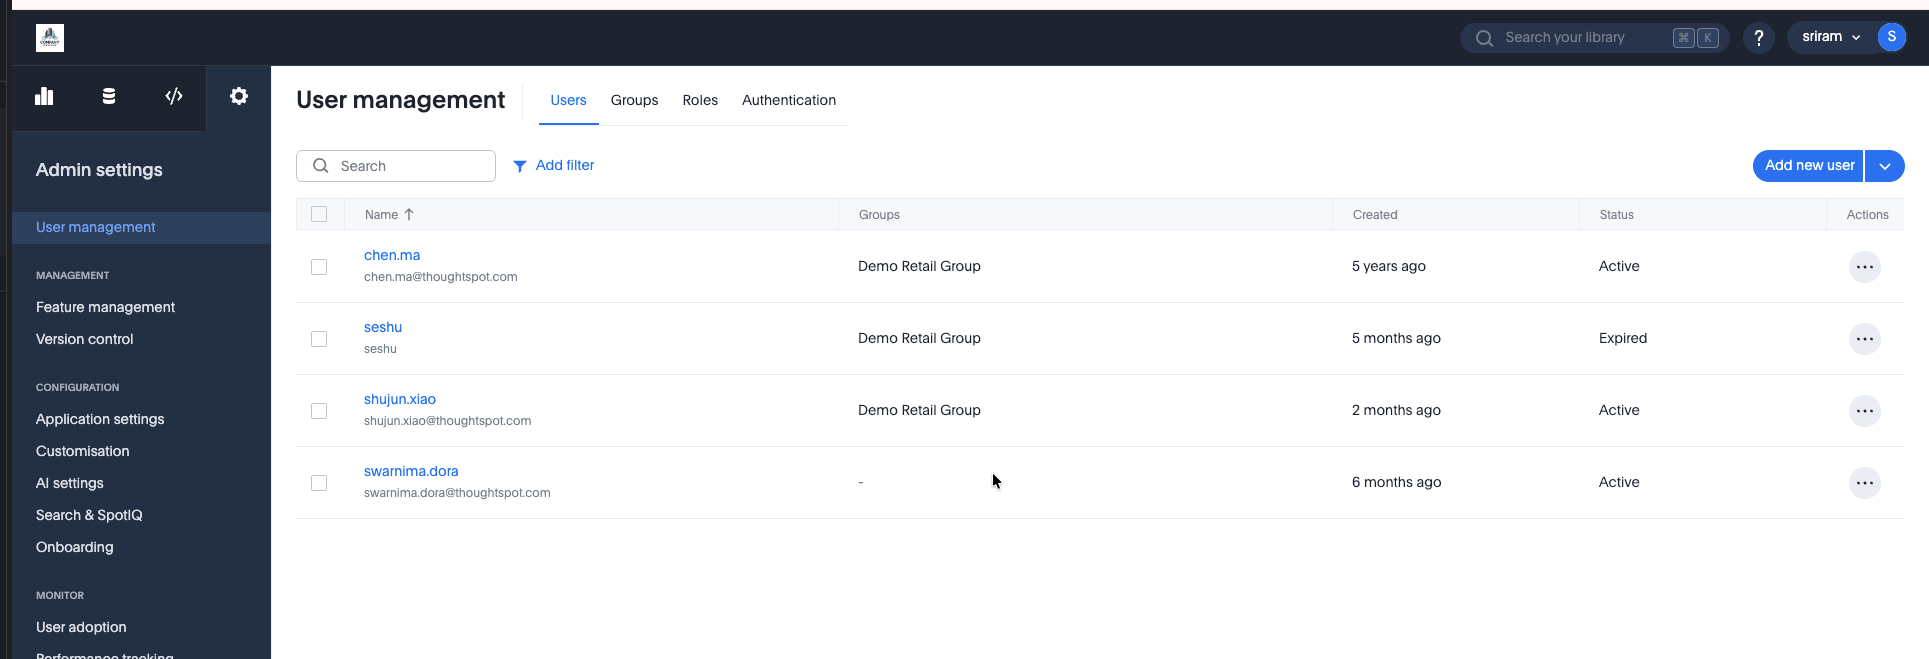
Enhanced Admin settings simplify user management with direct creation and instant actions.
Create a user
You can directly create users by providing:
-
Email address
-
Username
-
Display name
During creation, you can seamlessly assign the user to a target Org.
Users, Roles, Groups and Authentication are now all found on one page to streamline user management.
You can also view the User Details Card, which provides a quick visual summary including:
-
Creation date
-
Creator
-
Active groups
-
Active roles
Instant action menu
Each user row includes a more menu that provides immediate access to the following actions:
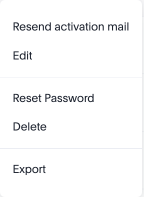
| Action | Description |
|---|---|
Resend Activation |
Resend the activation email to the user. |
Edit Details |
Modify the user’s profile information. |
Reset MFA |
Reset the user’s multi-factor authentication setup. |
Delete |
Remove the user from the system. |
Export |
Export the user’s data. |
Feature Management
Feature Management in the enhanced Admin settings portal introduces a granular, hierarchical system that transitions from cluster-level configurations to delegated authority at the org level.
Two-tiered hierarchy
The feature management system operates on a two-tiered model:
-
Cluster admin allocates a feature: The cluster admin must first allocate a feature to an Org. Once allocated, the Org admin gains authority to toggle that feature on or off within their organization.
-
Org inherits cluster-level setting: If a feature is not allocated to an Org, the Org simply inherits the cluster-level setting. The Org admin cannot modify features that have not been allocated to them.
| Tier | Responsibility |
|---|---|
Tier 1: Cluster admin |
Allocates features to orgs. Controls which features are available for delegation. Sets cluster-level defaults. |
Tier 2: Org admin |
Toggles allocated features on or off within their organization. Cannot access unallocated features. |
Global setting overrides
When a cluster admin enables a feature globally, they are prompted to choose:
-
Override all orgs: Apply the new setting across all organizations, replacing any local overrides.
-
Preserve local overrides: Keep the choices made by individual Org admins where applicable.
|
Cluster admins should preserve local overrides when changing a global setting to maintain the choices made by individual Org admins, where appropriate. This respects the autonomy of org-level administrators and avoids unintended disruptions. |
Best practices
-
Use the secure deletion workflow (typing a confirmation word) to prevent accidental, destructive deletions of organizations.
-
Cluster admins should preserve local overrides when changing a global setting to maintain choices made by individual Org admins, where appropriate.
Related information
-
Admin settings portal (legacy) — Documentation for the previous admin interface.
-
Manage users — Detailed instructions for user management.
-
Manage groups — Detailed instructions for group management.