Connect to Amazon Redshift in Analyst Studio
Additionally supports: mParticle Redshift, Tenjin Redshift
Supported JDBC drivers and known issues
| Driver | Driver Release Date | Analyst Studio Removal Date |
|---|---|---|
(Recommended) Amazon Redshift v 2.1.0.29 |
6/6/2024 |
|
Amazon Redshift v 2.1.0.13 |
3/30/2023 |
|
Amazon Redshift v 2.1.0.3 |
12/3/2021 |
|
Amazon Redshift v 2.0.0.7 |
7/23/2021 |
|
Amazon Redshift v 2.0.0.3 |
2/25/2021 |
The following are known issues with the current supported drivers. Analyst Studio continues to advocate on our customers' behalf for vendors and open-source communities to resolve these issues.
| Driver | Known Issue | Further Details |
|---|---|---|
All |
Date functions not displaying correctly |
Date functions like DATE_TRUNC do not work as expected due to Analyst Studio’s results formatter. A workaround is to use a function to convert the date to string. |
All |
Schema access privileges |
Redshift shows all schemas to users even if they don’t have permissions to them. The Redshift team confirmed there is a feature request to restrict access, but currently no ETA. |
Database configuration instructions
Amazon Redshift
Depending on your Amazon settings, you may need to grant Analyst Studio access to your Redshift security group:
-
Navigate to the Redshift Management Console.
-
Select Clusters from the left navigation bar.
-
Click on the cluster you want to connect.

-
Find Cluster Security Groups under Cluster Properties and click on the cluster’s security group.
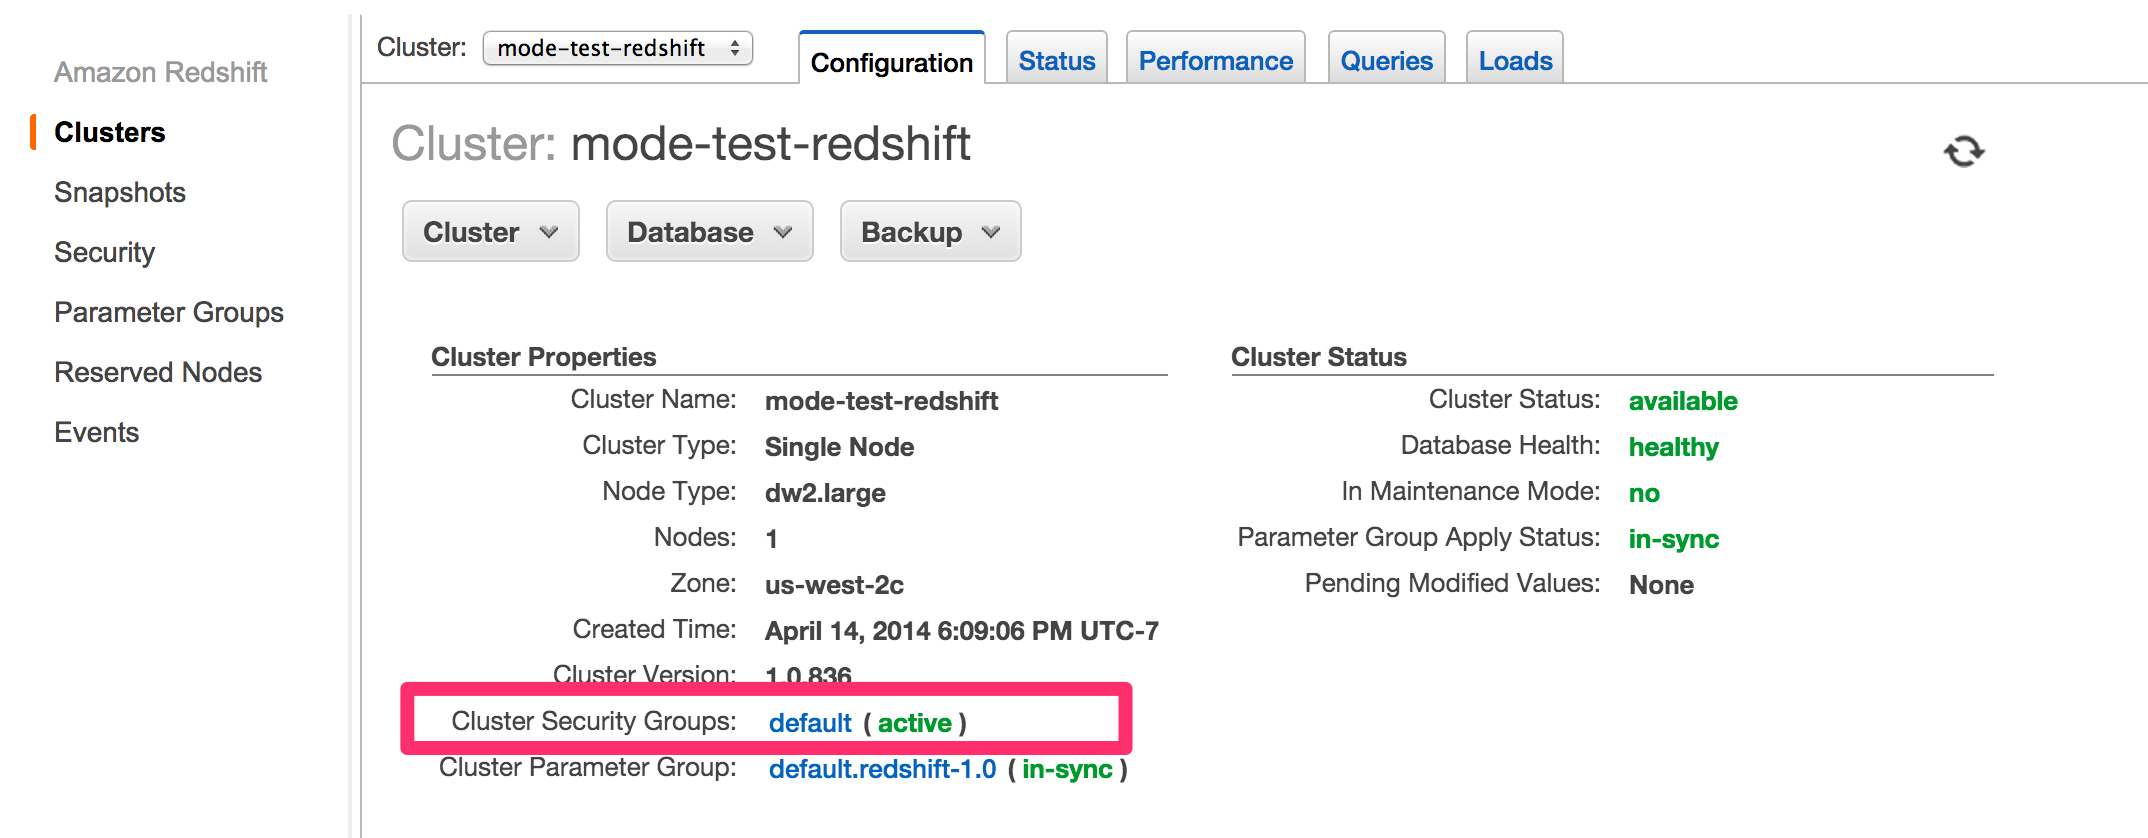
If you are using VPC Security Groups, you must also grant Analyst Studio access to that security group. Please click on your VPC Security Group name and follow this section of our Amazon RDS guide, starting with step 2. -
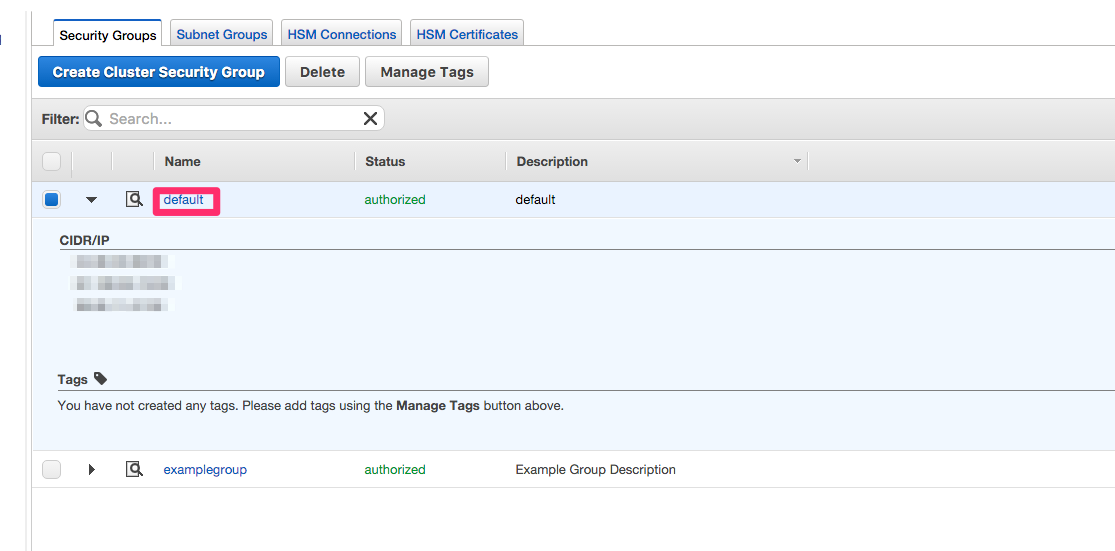
Click on the name of the security group.
-
You’ll see a list of authorized connections. Click the blue Add Connection Type button in the upper left.
-
Select CIDR/IP from the Connection Type dropdown, and paste the address
54.68.30.98/32in the CIDR/IP to Authorize field.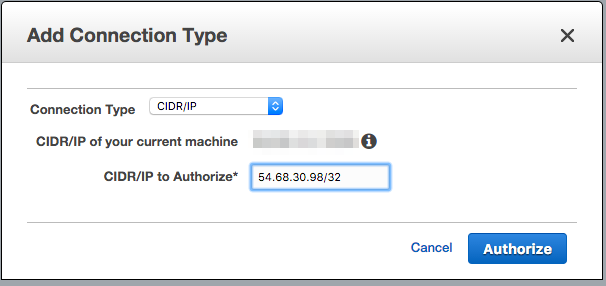
-
Click the blue Authorize button.
-
Repeat steps 5 through 7 for each of the addresses listed below:
-
54.68.45.3/32 -
34.209.23.118/32 -
54.188.241.100/32 -
52.43.195.103/32 -
3.224.146.111/32 -
54.221.238.89/32 -
52.20.173.236/32 -
18.219.18.49 -
3.20.219.67 -
3.130.46.196 -
18.190.82.112 -
18.219.27.193 -
18.224.75.176 -
3.143.83.15 -
3.22.39.190 -
52.15.221.243
-
Connecting to Analyst Studio via IAM role
-
Follow the steps to connect a database with Direct Connect.
-
Select Amazon Redshift from the list of databases.
-
Select Authentication method: IAM role in the Analyst Studio connection form.
-
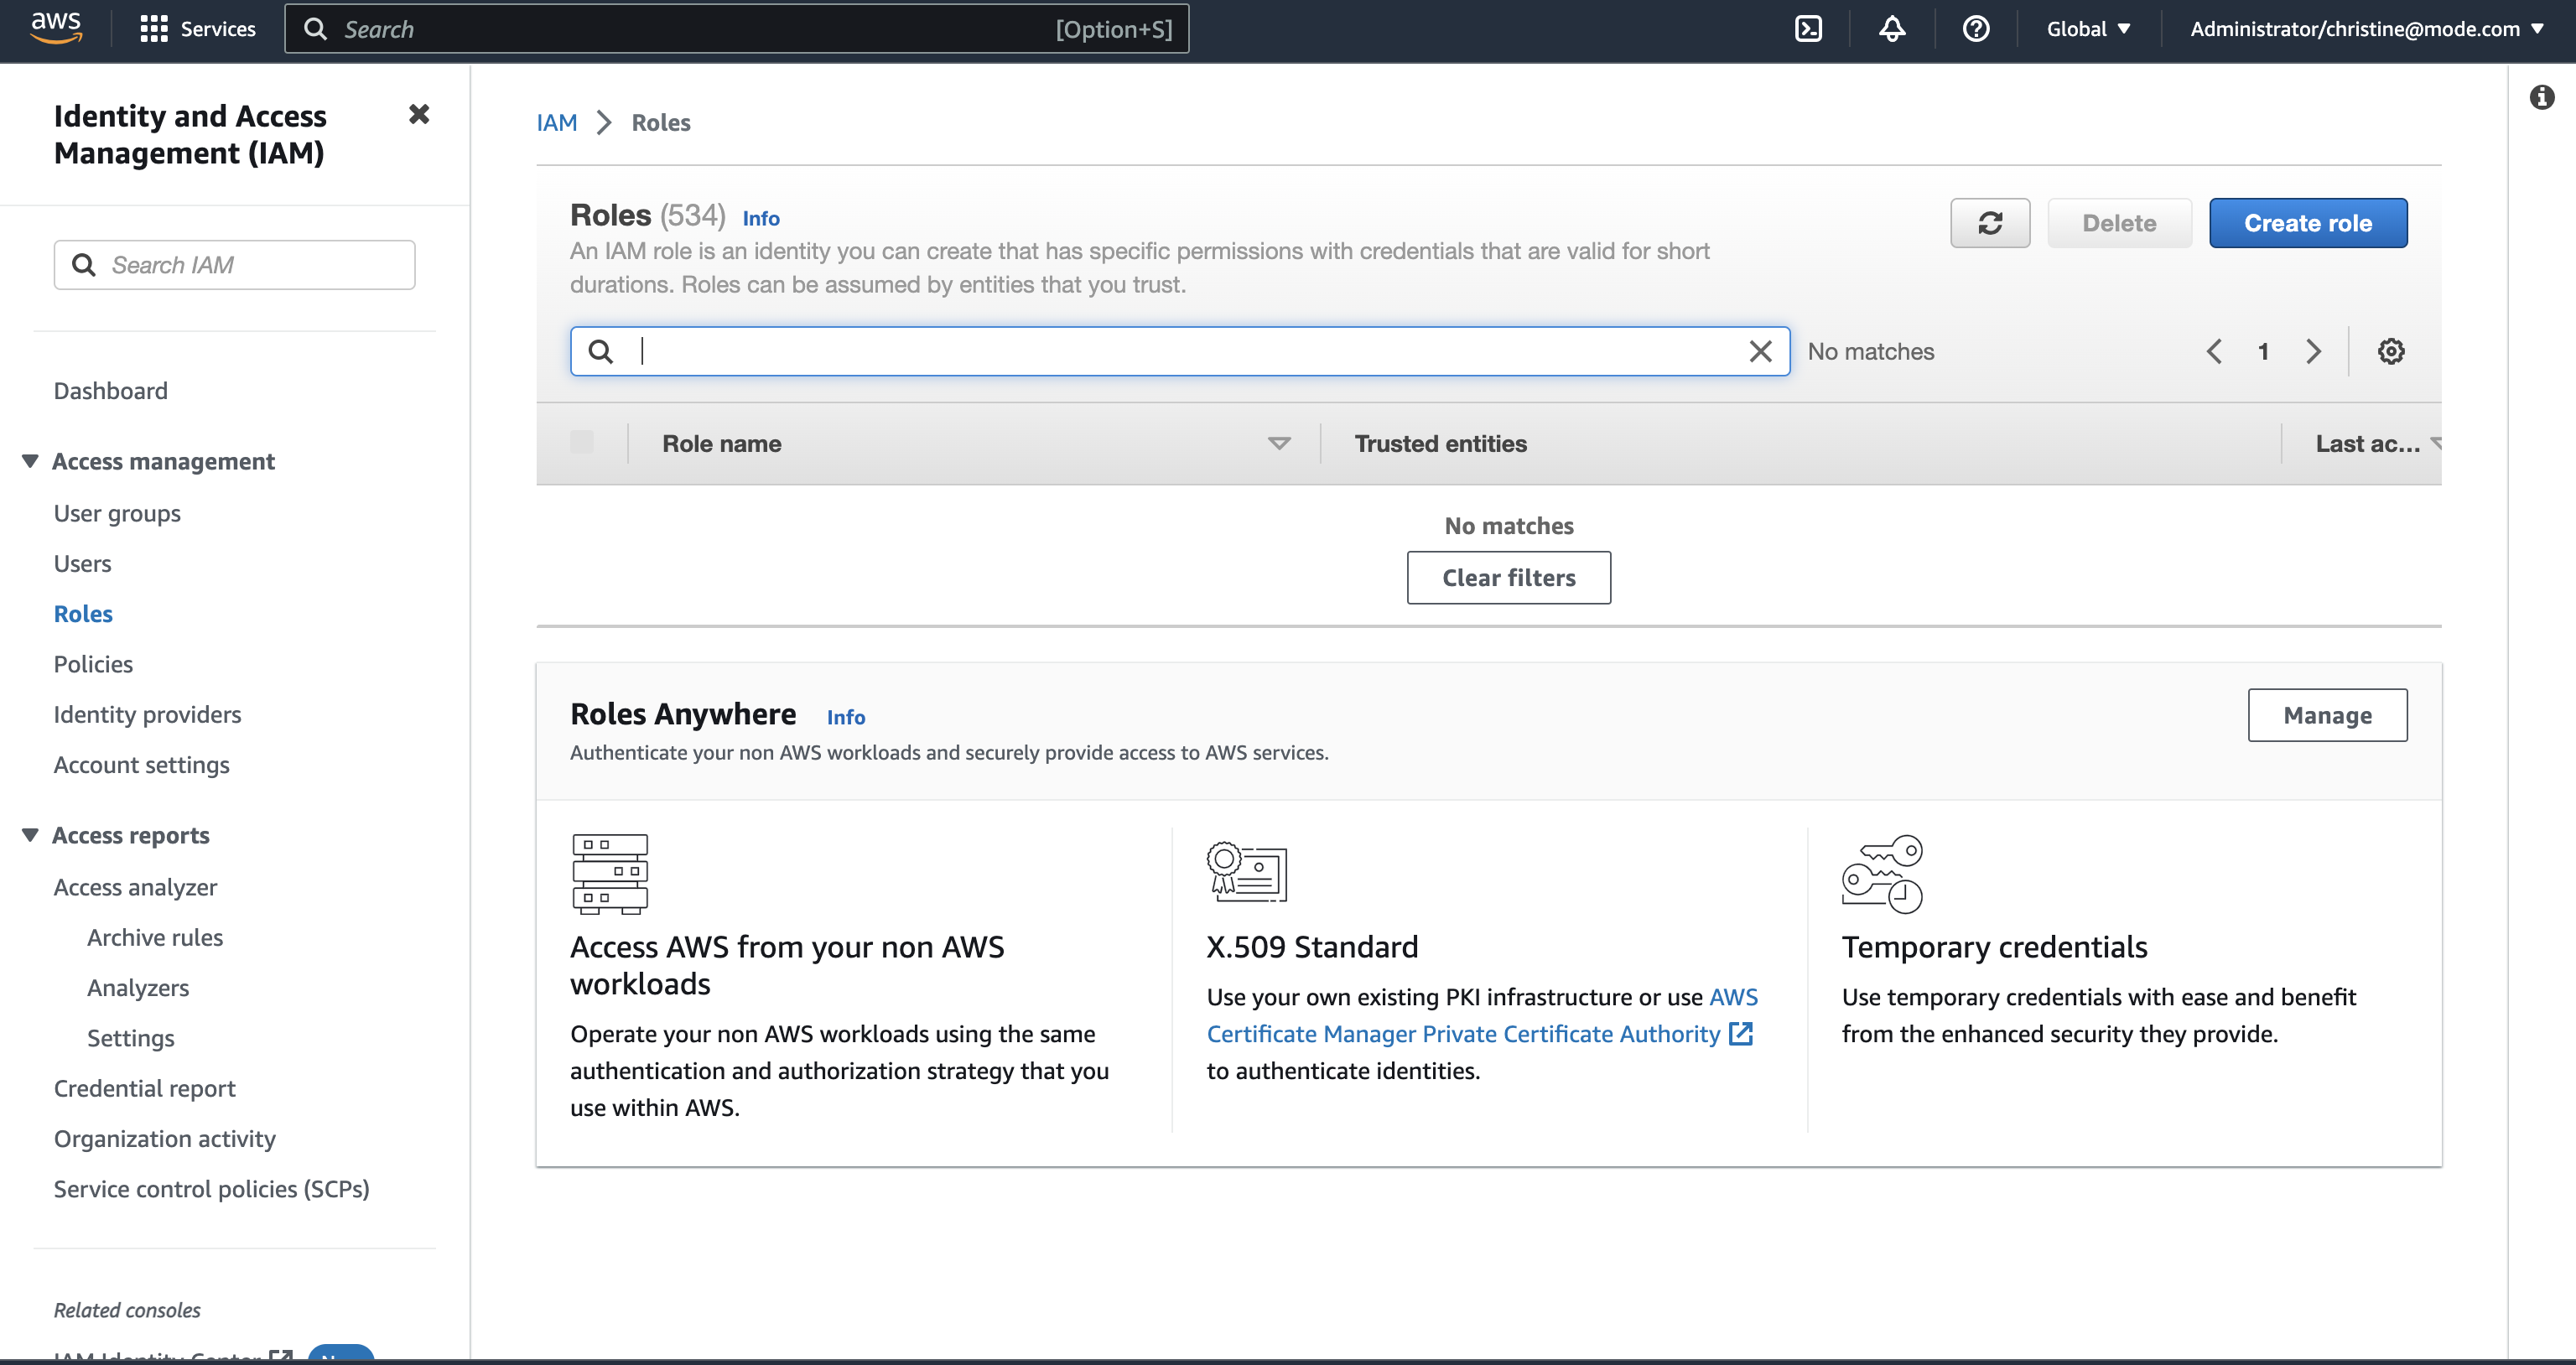
Navigate to IAM Roles in your AWS Console.
-
Create a new role or choose an existing role and select Custom trust policy under Trusted entity type.
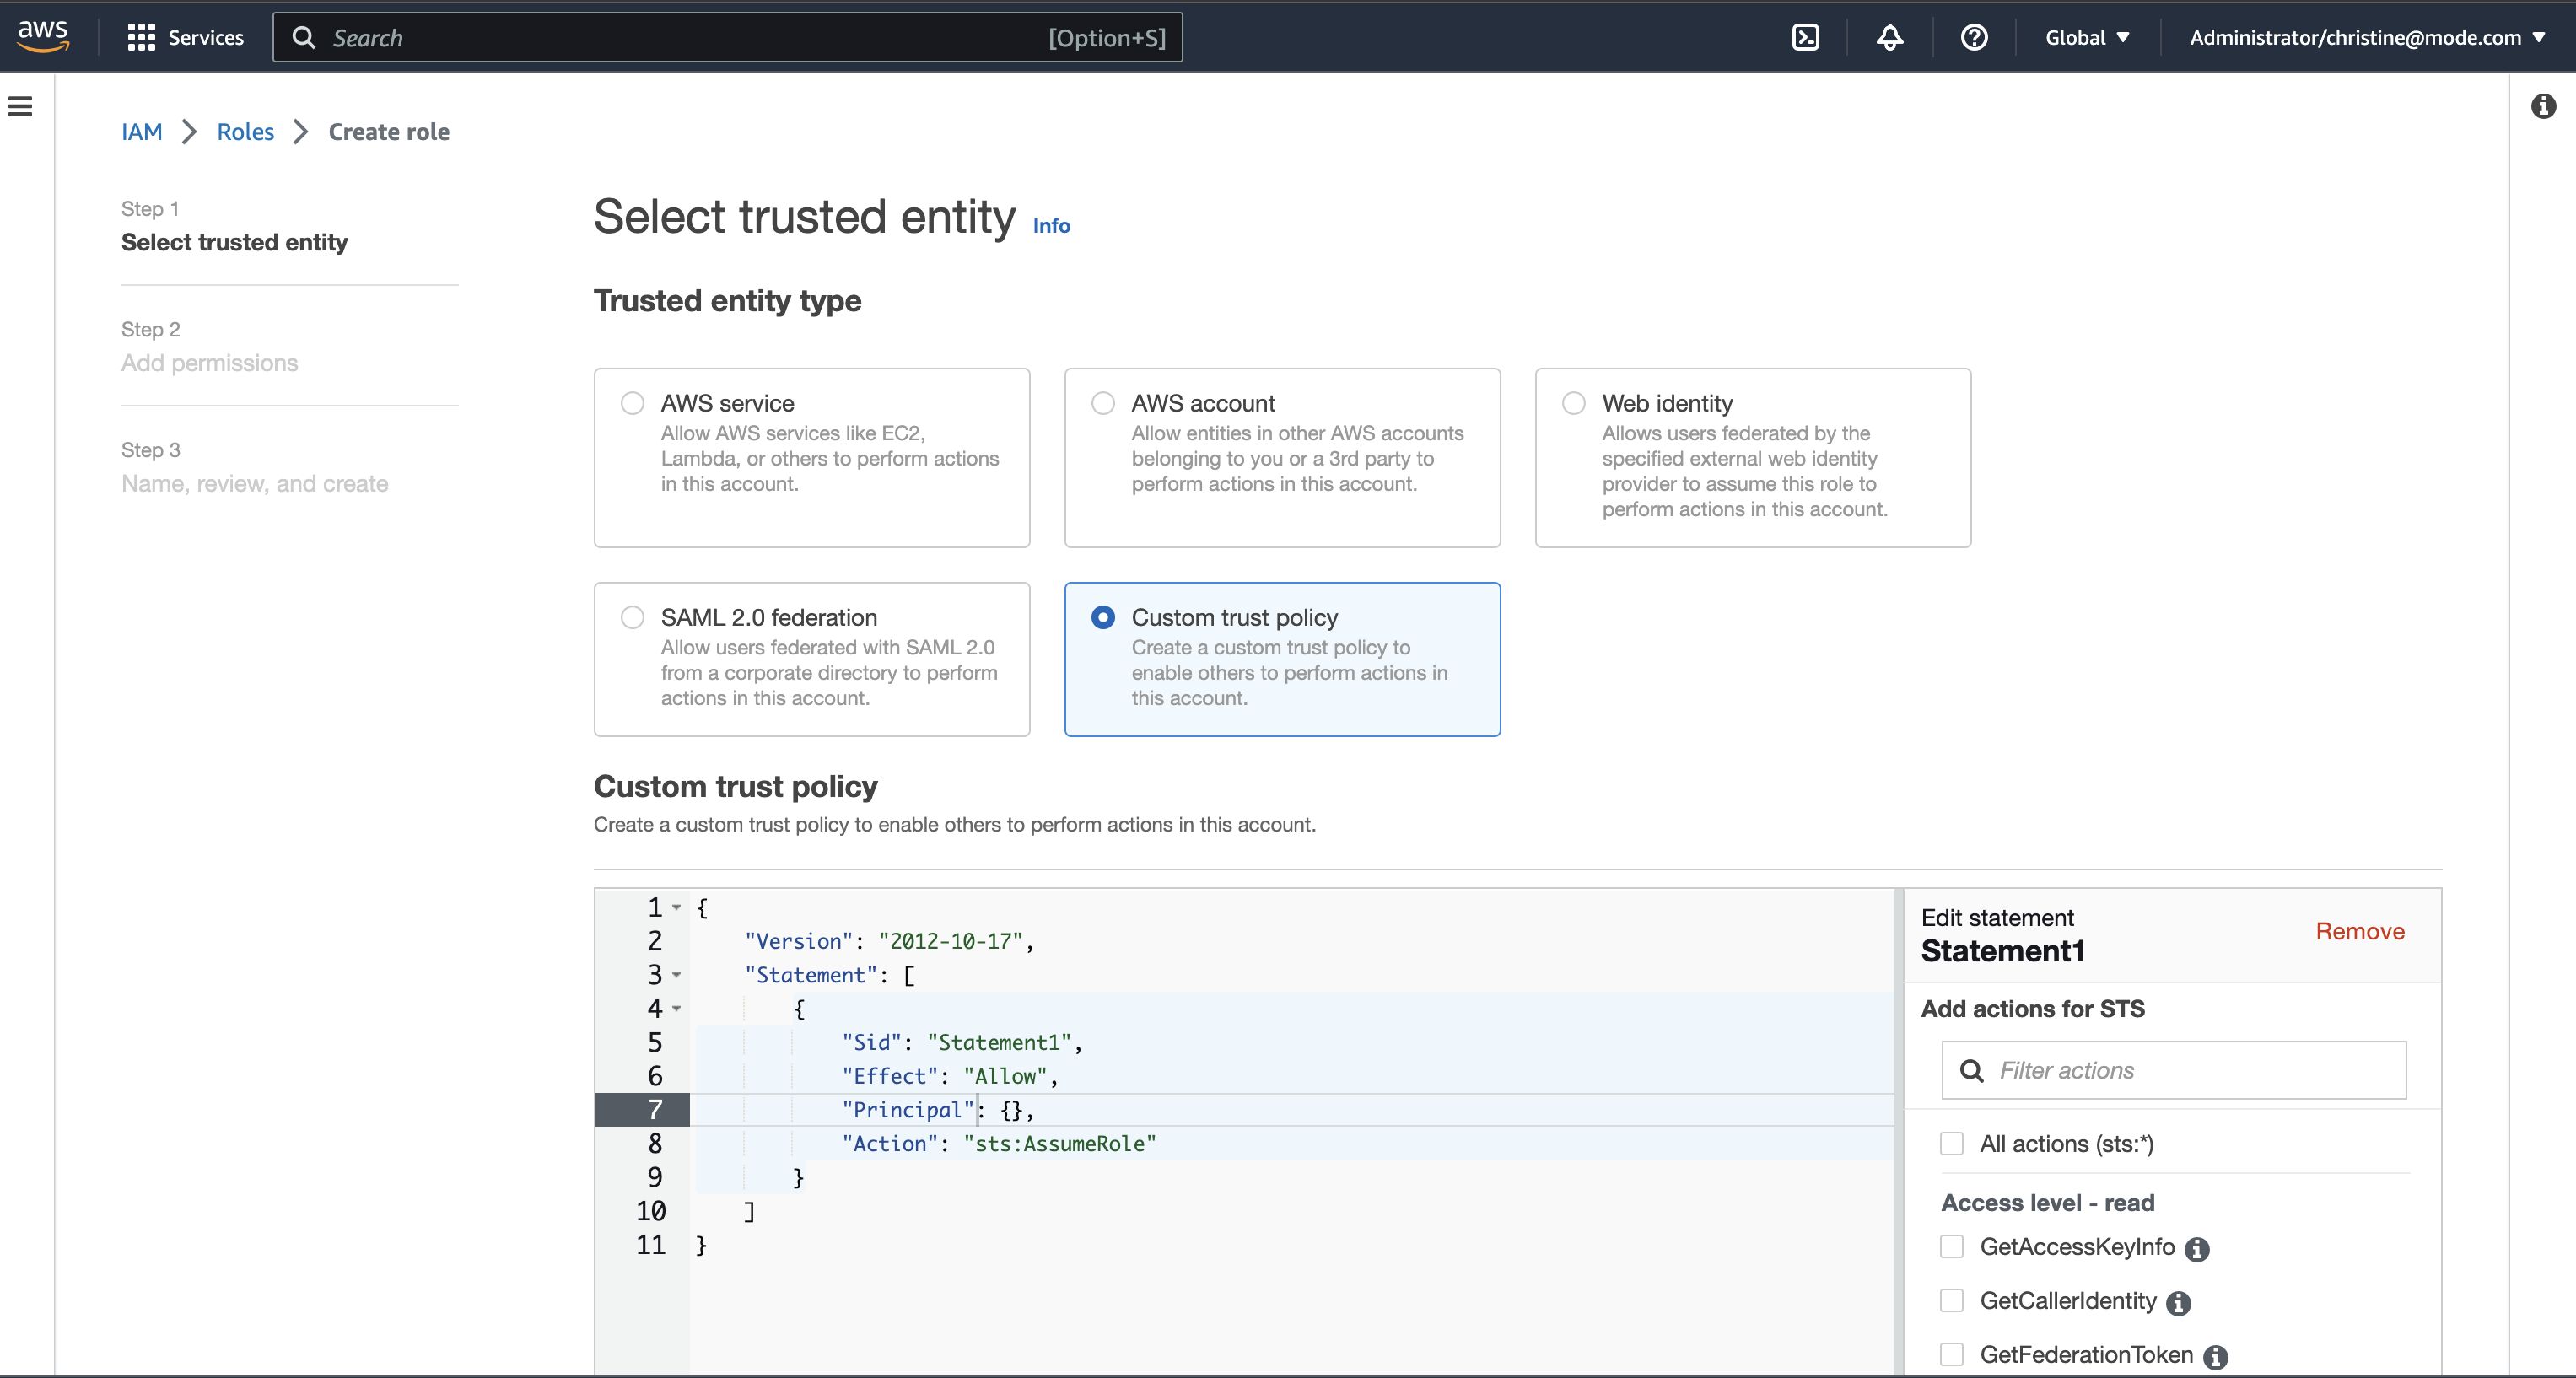
-
Alternatively, you can choose an existing role and select the Trust relationships tab.
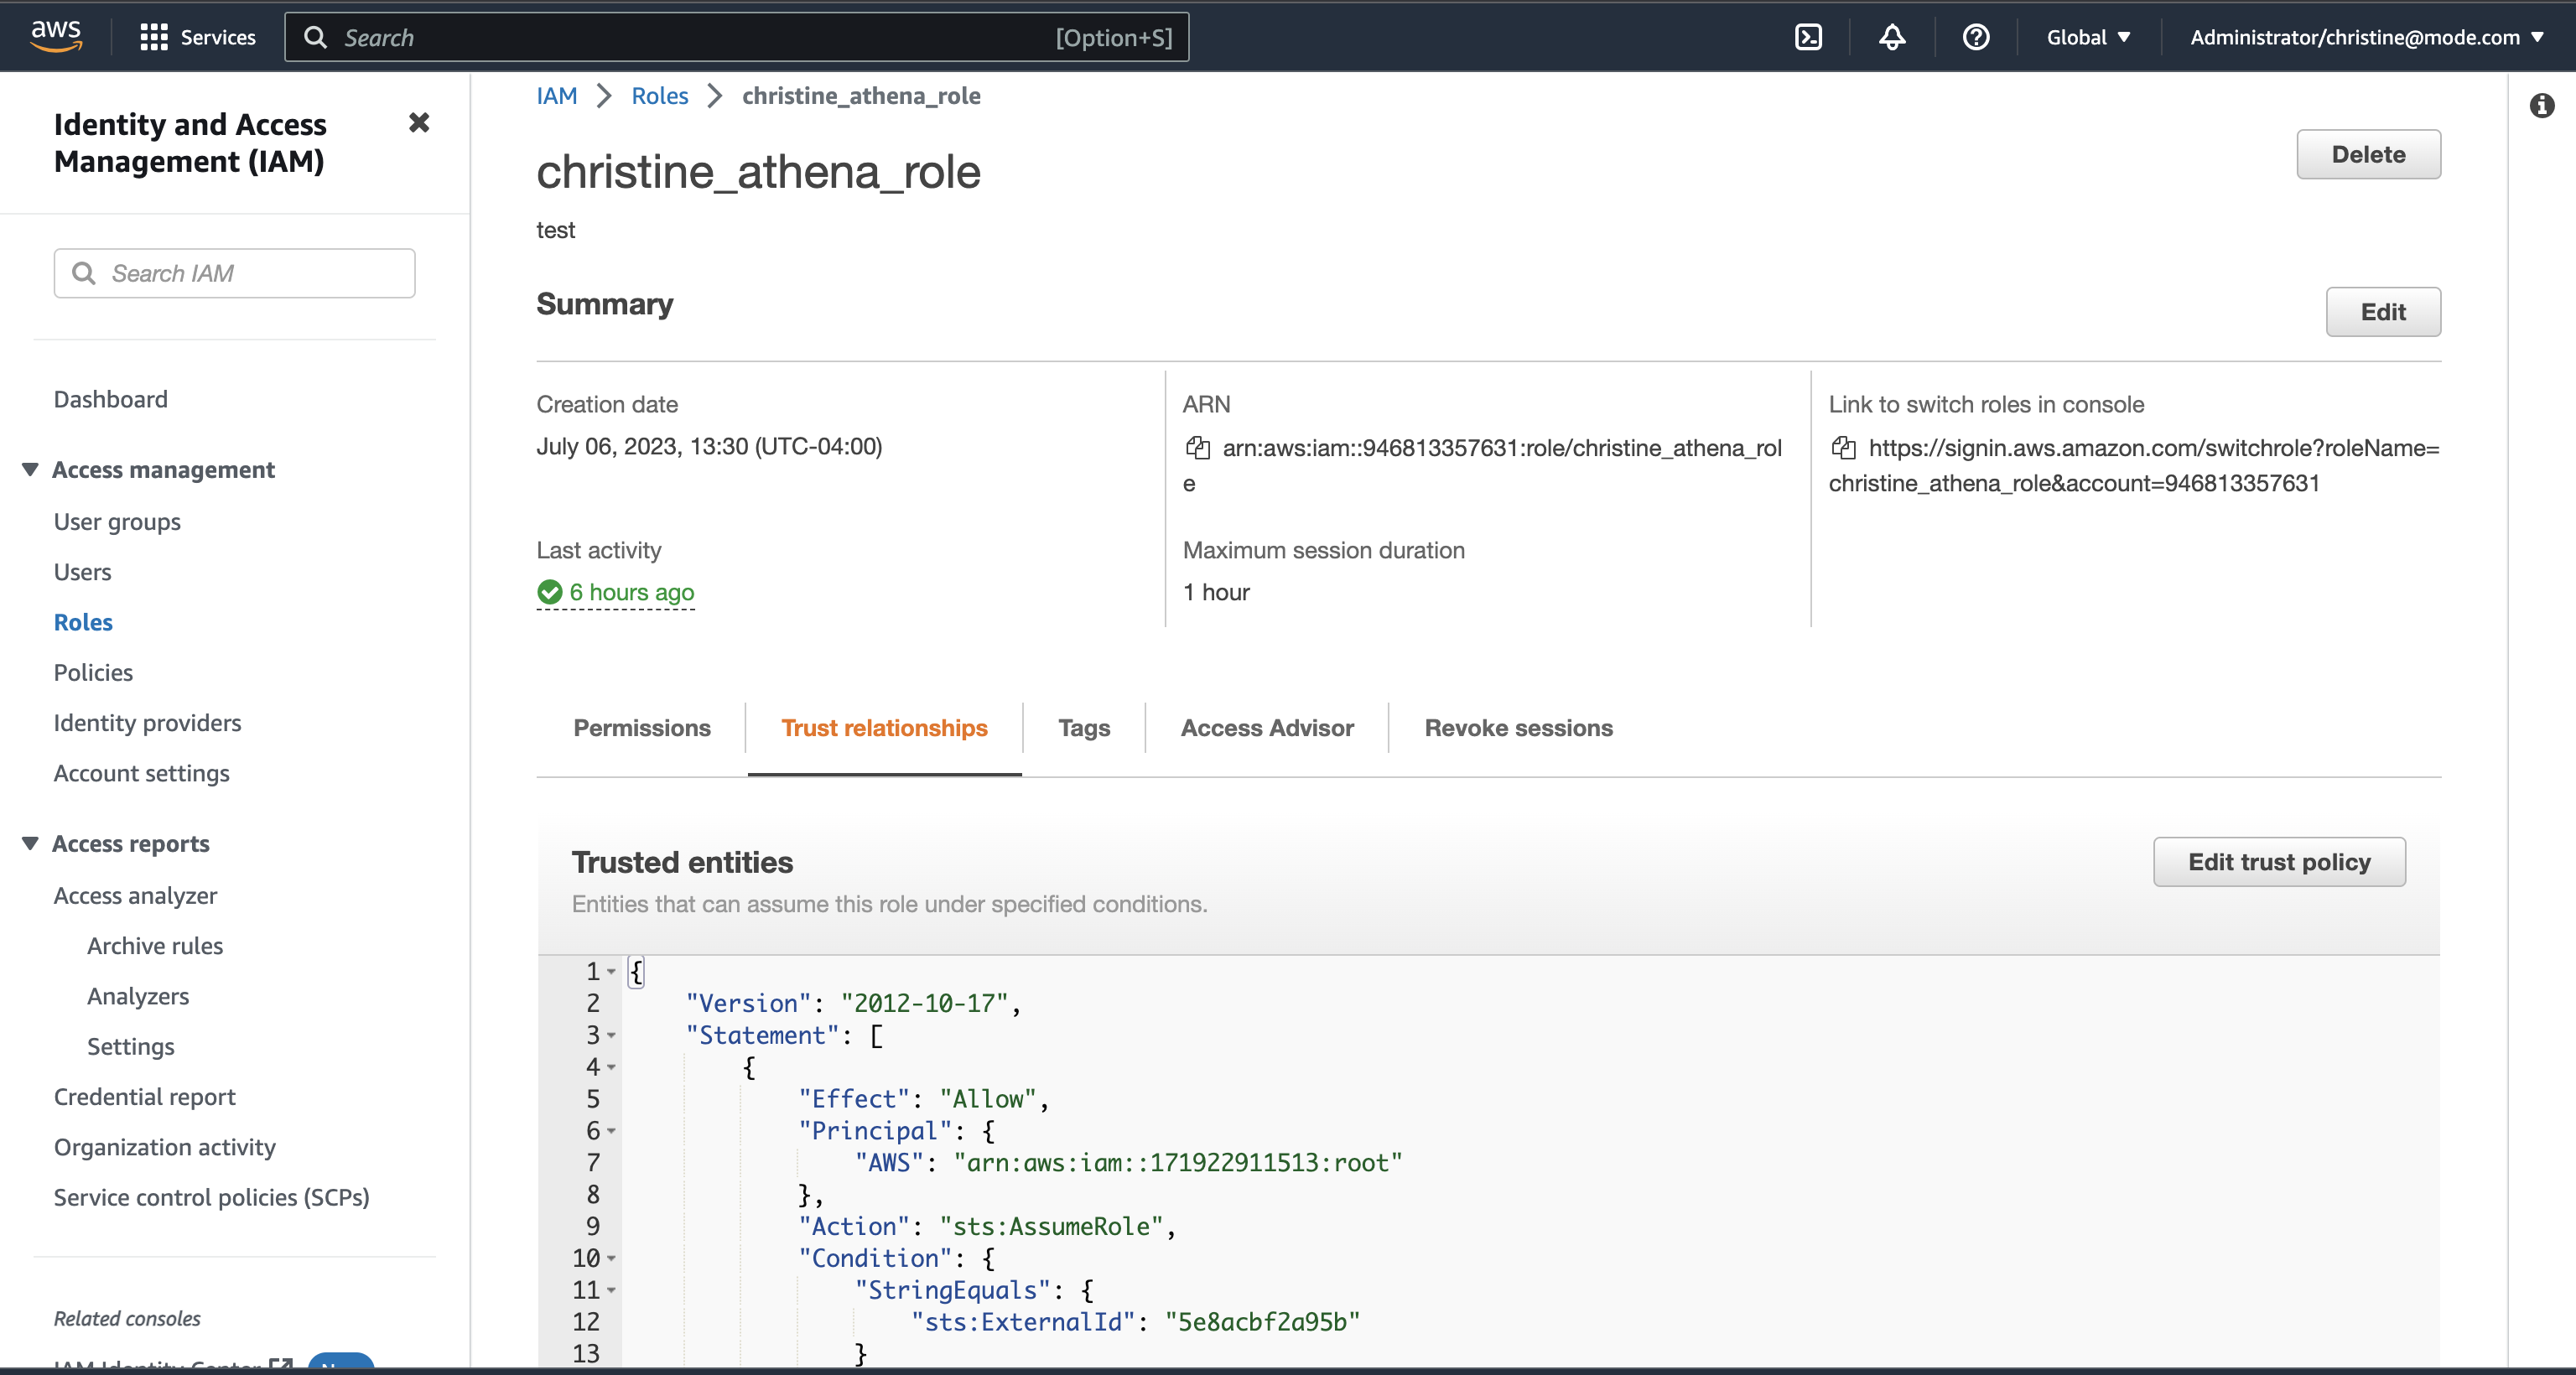
-
Copy and paste the trust relationship from the Analyst Studio connection form into your AWS IAM Role.
-
Add in the necessary IAM permissions to access your Redshift resource.
-
Click Create Role in AWS and paste in the IAM Role ARN into the Analyst Studio connection form.
-
Click Connect. You will land on a page that displays your database schema.
mParticle Redshift
mParticle supports both mParticle-hosted and client-hosted Redshift clusters. If you’re using an mParticle-hosted Redshift cluster, log in to the mParticle platform and navigate to the Redshift Configuration tab. There, you’ll find your connection string and user credentials.
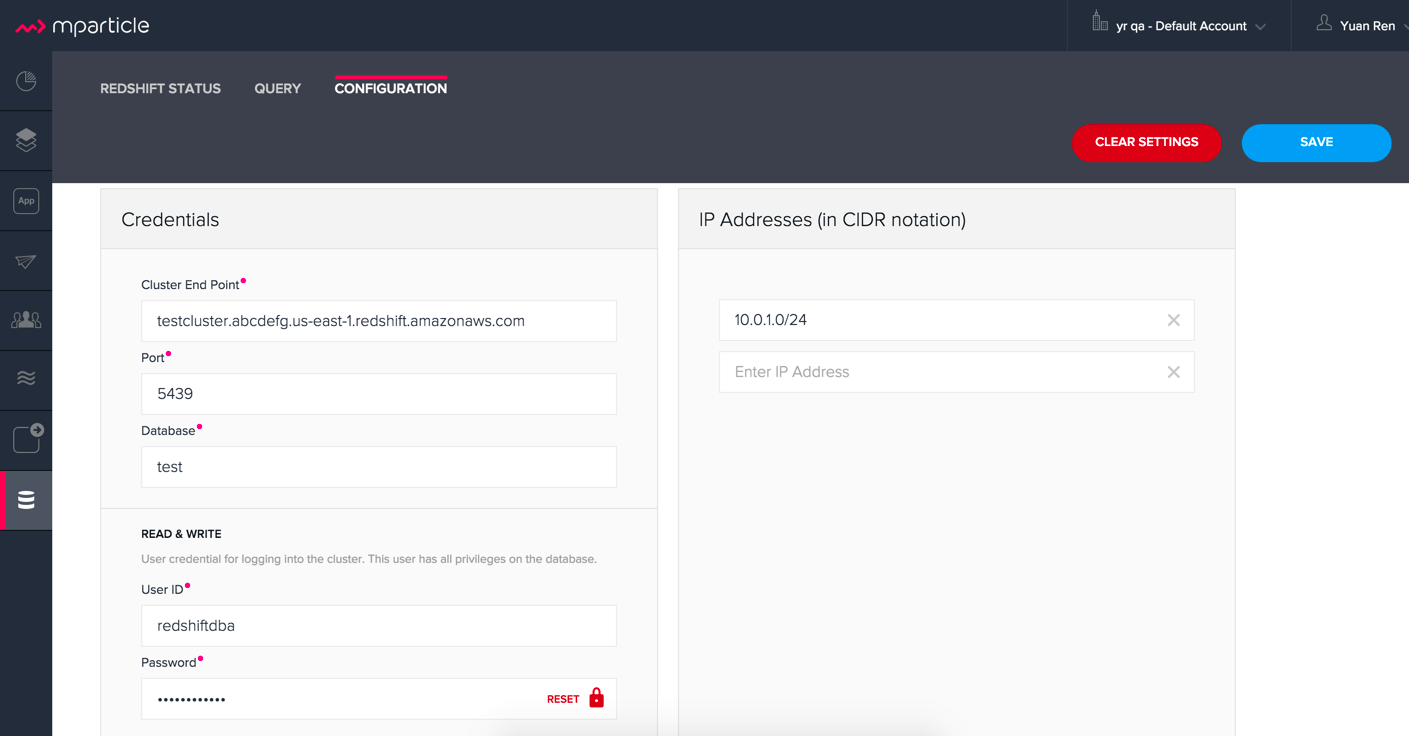
You can also allowlist Analyst Studio’s servers by editing the list of allowed IP addresses on mParticle UI, which will update the AWS security group settings associated with your Redshift cluster. Once you have your credentials, follow the steps below to connect Analyst Studio:
-
Log in to Analyst Studio and follow to steps to connect a database to Analyst Studio.
-
Select mParticle Redshift from the list of databases.
-
Enter your mParticle credentials and click Connect. You’ll land on a page that displays your database schema.
-
Click New Query in the top navigation to start writing queries.
Tenjin Redshift
Once you’ve activated the DataVault feature on your Tenjin account, you can access your DataVault credentials by logging in to the dashboard and navigating to Menu -> DataVault Credentials.
For additional questions about getting your DataVault credentials, please free to contact [email protected].